



Share information:
Interior (internal elements) body Toyota Corolla 5 (E80)

Removal and installation door trim
Note: This describes the removal of the front door trim. The process for removing the rear door trim is similar. Removal Remove the triangular cover of the rear view mirror by unscrewing 3 screws and remove the mirror....
Note: This describes the removal of the front door trim. The process for removing the rear door trim is similar. Removal Remove the triangular cover of the rear view mirror by unscrewing 3 screws and remove the mirror....

Removal, installation and adjustment of window glass and window lifter
Removal Remove the door trim. Remove the glass seals by unscrewing them from the brackets. Lower the glass with the handle and remove the rubber elements of the glass guides in the window opening. Disconnect the locking...
Removal Remove the door trim. Remove the glass seals by unscrewing them from the brackets. Lower the glass with the handle and remove the rubber elements of the glass guides in the window opening. Disconnect the locking...

Removal and installation the door lock and door handle
Removal Remove the door glass. Disconnect the lock connecting rods from the outer handle and the lock cylinder. Central locking device: Disconnect the plug connection at the installation motor and unscrew the lower...
Removal Remove the door glass. Disconnect the lock connecting rods from the outer handle and the lock cylinder. Central locking device: Disconnect the plug connection at the installation motor and unscrew the lower...

Checking and adjusting the sliding sunroof
Checking the position of the hatch Open and close the sliding sunroof. Check for unusual sounds and jamming. Pour water on top of the closed hatch. Water should not penetrate into the passenger compartment. Check the...
Checking the position of the hatch Open and close the sliding sunroof. Check for unusual sounds and jamming. Pour water on top of the closed hatch. Water should not penetrate into the passenger compartment. Check the...
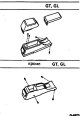
Removal and installation the console (since 5/87)
Removal Disconnect the ground (-) cable from the battery. Note: This will erase the entries in the on-board computer memory. In particular, the entries of faults and the radio receiver code. Before disconnecting the...
Removal Disconnect the ground (-) cable from the battery. Note: This will erase the entries in the on-board computer memory. In particular, the entries of faults and the radio receiver code. Before disconnecting the...

Removal and installation the front panel and its trim (since 5/87)
Removal Disconnect the ground (-) cable from the battery. Note: This will erase the entries in the on-board computer memory. In particular, the entries of faults and the radio receiver code. Before disconnecting the...
Removal Disconnect the ground (-) cable from the battery. Note: This will erase the entries in the on-board computer memory. In particular, the entries of faults and the radio receiver code. Before disconnecting the...

Removal and installation the front panel and its trim (up to 4/87)
Removal Disconnect the ground (-) cable from the battery. Note: This will erase the entries in the on-board computer memory. In particular, the entries of faults and the radio receiver code. Before disconnecting the...
Removal Disconnect the ground (-) cable from the battery. Note: This will erase the entries in the on-board computer memory. In particular, the entries of faults and the radio receiver code. Before disconnecting the...

Removal and installation the front seat
The seat is mounted on two skids, allowing it to move. Removal Remove 2 bolts securing the runners in front, 2 bolts in the back and remove the seat. Installation Install the seat in place and tighten the bolts securing...
The seat is mounted on two skids, allowing it to move. Removal Remove 2 bolts securing the runners in front, 2 bolts in the back and remove the seat. Installation Install the seat in place and tighten the bolts securing...

Removal and installation the rear seat
Removal Pull the levers located at the front edge of the rear seat forward and simultaneously lift the seat up. Remove the seat. Loosen the two lower bolts at the back of the seat. For a multi-piece seat (folding seat)...
Removal Pull the levers located at the front edge of the rear seat forward and simultaneously lift the seat up. Remove the seat. Loosen the two lower bolts at the back of the seat. For a multi-piece seat (folding seat)...
This section is available on: russian, bulgarian, belarusian, ukrainian, serbian, croatian, romanian, polish, slovak, hungarian
Similar sections for other Toyota models
➥ Interior (internal elements) Toyota Carina T190 (1992-1996)
➥ Interior (internal elements) Toyota Camry XV20 (1996-2001)
➥ Interior (internal elements) Toyota Highlander 1 (2000-2007, petrol)
➥ Interior (internal elements) Toyota RAV 4 XA10 (1994-2000)
➥ Interior (internal elements) Toyota Cruiser 100 (1998-2007)
➥ Interior (internal elements) Toyota 4Runner N120 (1989-1995)
Link in different formats to this article
TEXTHTMLBB Code
- General information
- User manual
- Start of movement
- Faults en route
- Maintenance
- Power unit
- Engine repair
- Lubrication system
- Cooling system
- Ignition system
- Supply system
- Fuel supply (carburetor)
- Fuel supply (injector)
- Diesel engine
- Exhaust system
- Transmission
- Clutch
- Manual gearbox
- Automatic gearbox
- Chassis, running gear
- Front suspension
- Rear suspension
- Steering
- Brake system
- Wheels and tires
- Body and interior
- Exterior (external elements)
- Interior (internal elements)
- Interior heating
- Electrical equipment
- Equipment and devices
- Power devices
- Lighting system
- Glass cleaners and washers
- General information
- User manual
- Power unit
- Petrol engines 1ZZ, 3ZZ
- Diesel engines 1СD-FTV
- Cooling system
- Lubrication system
- Fuel system
- Control system
- Exhaust system
- Transmission
- Clutch and drive shafts
- Mechanical gearbox
- Chassis, running gear
- Car suspension
- Steering
- Brake system
- Body and interior
- Exterior (external elements)
- Electrical equipment
- Power devices
- Electrical circuits