



Front crankshaft oil seal
1. Remove the crankshaft pulley (see paragraph 11).
2. After marking the depth of the oil seal and its position in the mounting hole, carefully pry it up with a screwdriver and pull it out of the oil pump assembly (see Figure 12.2) or use an appropriate puller for this purpose.
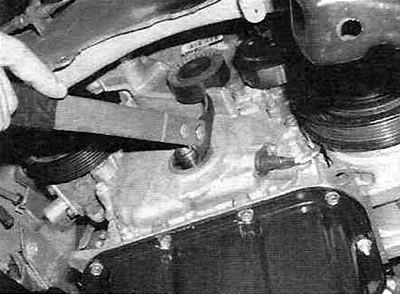
Figure 12.2. Carefully pry and remove the old oil seal from the timing chain cover, being careful not to scratch the crankshaft.
Try not to damage anything - neither the oil pump unit, nor the crankshaft, nor the mounting hole for the oil seal (a scratch on the crankshaft can cause a leak). To avoid damage, wrap the screwdriver tip with electrical tape.
3. Lubricate the new oil seal with multi-purpose grease or clean engine oil and press it into place with the working lips (spring) inward, using a suitable mandrel (the outer diameter of the mandrel should be slightly smaller than the outer diameter of the seal) and a hammer (see Figure 12.3).
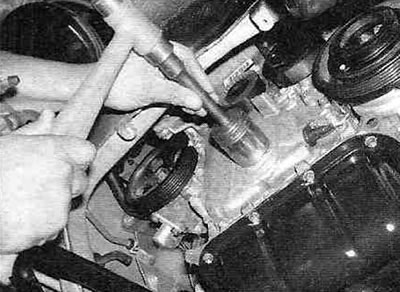
Figure 12.3. Press the new seal into the bore using a large socket and a hammer.
The pressing depth of the new and old oil seals must be the same.
4. Inspect the surface of the pulley hub in the area where the seal was pressed in. If there is a deep groove on it (the result of the hardened working edge of the seal and dirt), installing a new seal in the same place may not fix the problem. The working surface of the hub can be restored by pressing a special sleeve onto the neck using a wooden block and a hammer (see Figure 12.4).
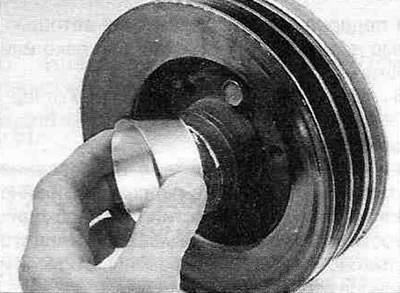
Figure 12.4. If there is a deep groove on the hub surface (the result of the hardened working edge of the seal), then it can be restored by pressing a special sleeve onto the neck.
5. Lubricate the pulley hub with clean engine oil and install the pulley on the crankshaft (see paragraph 11).
6. Install the crankshaft pulley mounting bolt and tighten it to the specified torque.
The text is taken from the specified website: toyotaman.ru
7. Installation of the remaining components is carried out in reverse order.