
Attention! Pads are changed only as a set for one axle. When cleaning the pads, remove dust and dirt by wiping with a rag soaked in alcohol or a special liquid; blowing is prohibited.
Checking and removing
1. Loosen wheel nuts, raise vehicle and place on stands. Remove the wheels and screw the wheel nuts back in place to secure the disc to the hub (washers can be put on to ensure the application of force to the disk).
2. Remove the caliper and set aside.
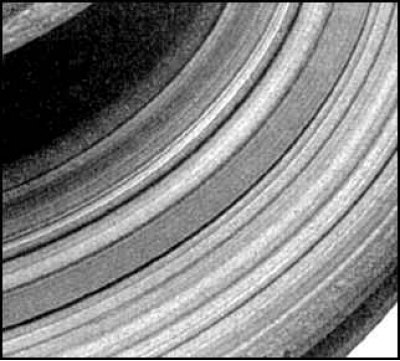
3. Check the condition of the disk on both sides. When traces of deep mining are found (depth over 0.38 mm) remove the disc and grind. If there are traces of lining rivets on the disc surface, as shown in the figure, replace the disc.
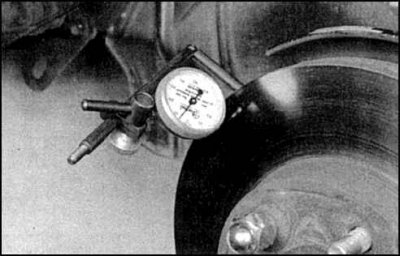 |  |
4. Check runout with a dial gauge. If the beat on the indicator exceeds the norm, then remove the disc and grind.
Attention! The disk is generally recommended to be periodically removed and polished, depending on the indicator readings. At least this can be done by hand with fine sandpaper to reduce roughness.

5. After grinding, the thickness of the disc should not be less than the maximum allowable, which is cast on the disc.
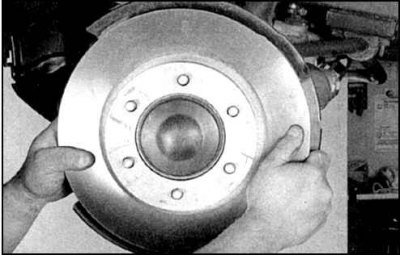
6. After checking, unscrew the wheel nuts and remove the disc.
Installation
Install the disc and assemble the brake in reverse order. Lower the car.