
Attention! Pads are changed only as a set for one axle.
Car rear brake "Toyota 4 Runner/ Hilux/ Surf"

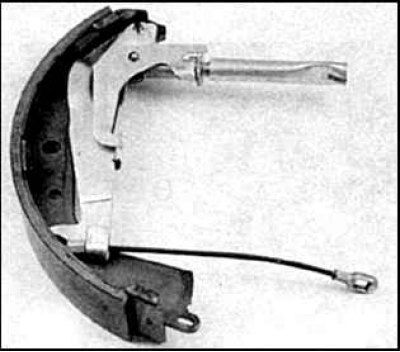
1. Split spring washer; 2. Hand brake crank; 3. Case; 4. Fitting for pumping; 5. Case; 6. Piston; 7. Spring; 8.11. Regulator; 9. Piston collar; 10. Cylinder; 12. Spring; 13. Rear pad; 14, 16, 26. Split washer; 15. Cup retainer pads; 17. Gasket; 18. Drum; 19. Lever for automatic pad adjustment; 20. Driven hand brake lever; 21. Spring retainer pads; 22. Front block; 23. Rope; 24, 28. Pin; 25. Plug; 27. Spring
Regulator Lever Parts

1. Block; 2. Driven hand brake lever; 3. Split washer; 4. Regulator lever; 5. Split lock washer
Replacement
1. Loosen the wheel nuts, raise the rear of the car. Remove rear wheels.
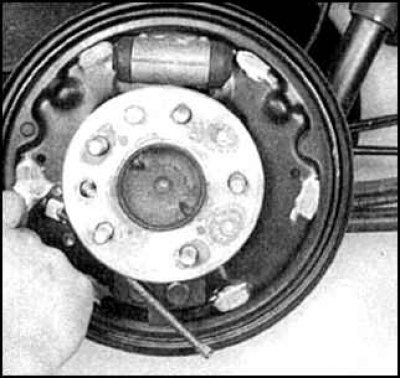
2. Remove the drum. If the drum cannot be removed, then pour penetrating liquid between the axle shaft flange studs and the drum holes and tap the drum from the inside along the contour. In extreme cases, move the drum by evenly screwing the bolts into the special threaded holes.
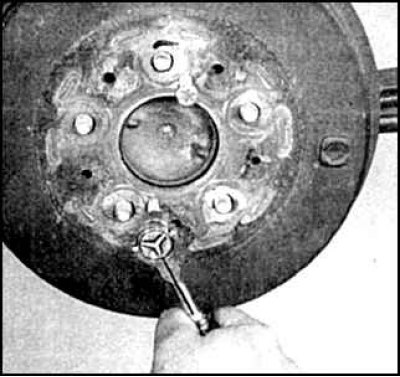
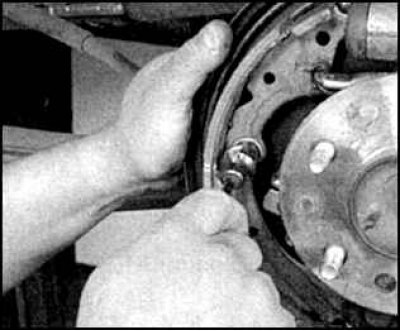
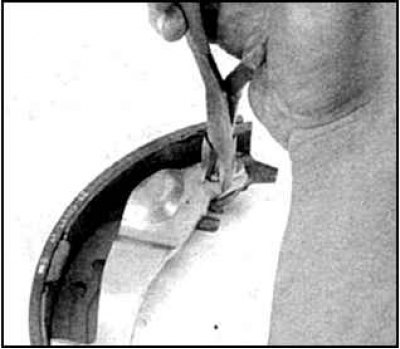
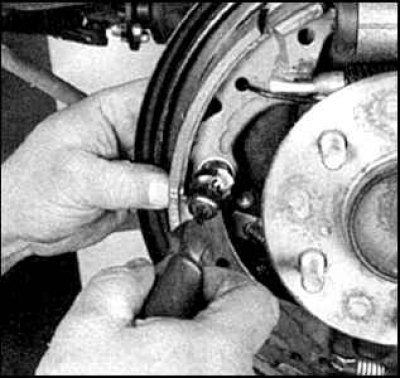
3. If the pads interfere with removal, then remove the plug from the brake shield and bring the pads together. To do this, move the regulator lever away from the gear wheel and turn the regulator gear wheel counterclockwise with a screwdriver.
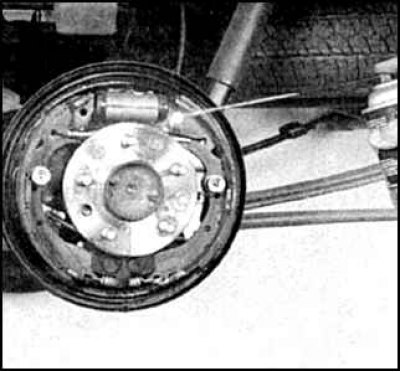
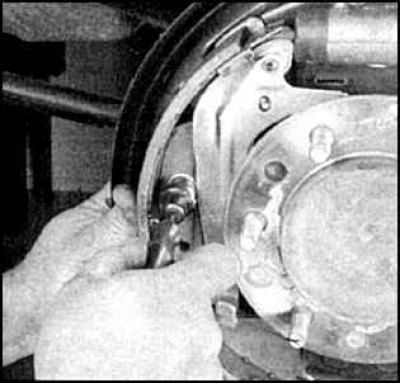
4. Clean the brake from dust and dirt. Check and replace the pads in accordance with the attached pictures.
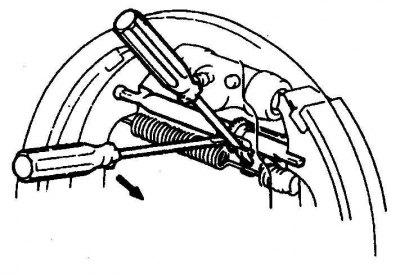
5. Disconnect the spring from the front shoe.
6. Remove the front pad retainer spring by pressing on the cup and turning 90°.
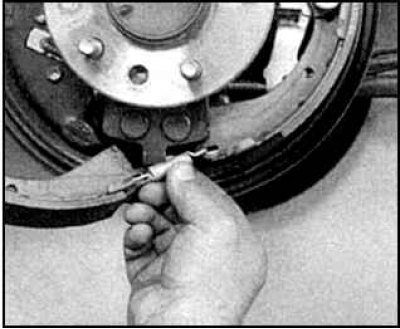
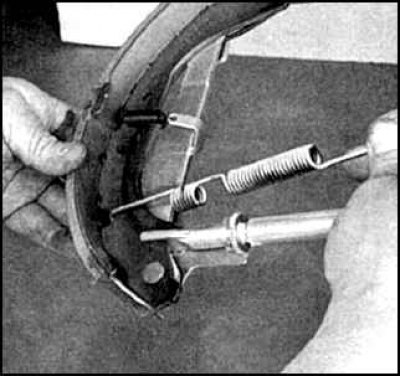
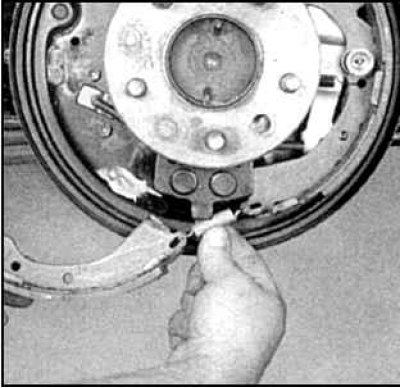
7. Remove the bottom spring.

8. Remove the rear pad retainer spring.
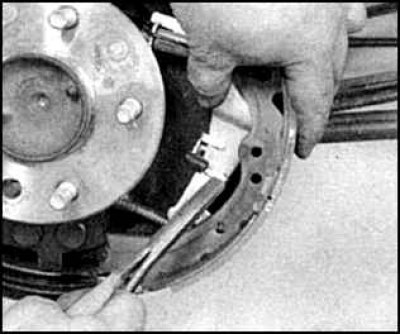
9. Disconnect the governor lever spring.
10. Disconnect the small crank cable.
11. Remove the regulator.
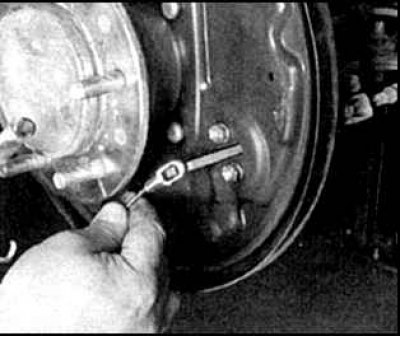
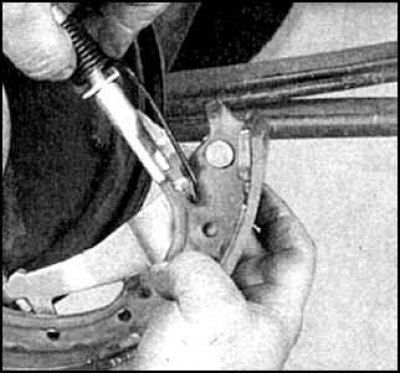
12. Remove the split lock washer of the governor lever axle from the rear block.
13. Remove the split washer from the handbrake lever shaft.
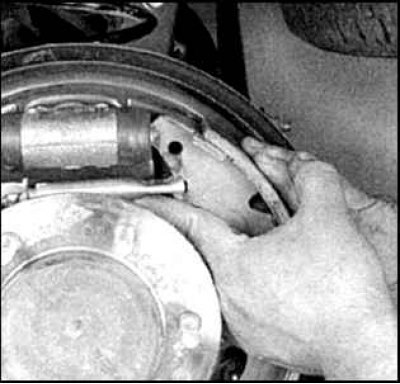
14. Knock the axle out of the old block and press it into the new one (if the axle is missing).
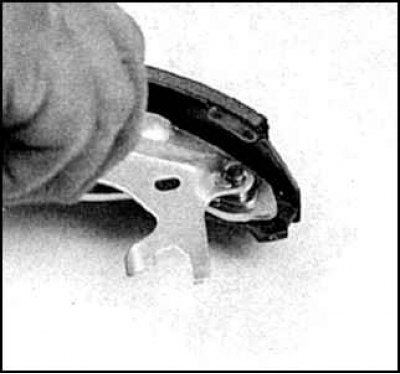
15. After installing the lever on the axis of the new pad, compress the split washer.
16. Install the adjuster lever and secure with a new split washer. Install the spring.
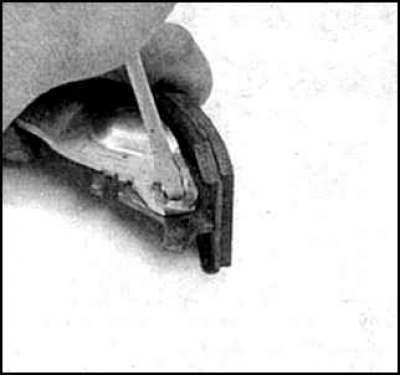
17. Lubricate the friction surface of the pad with refractory grease. Clean and lubricate the moving part of the adjusting pin.
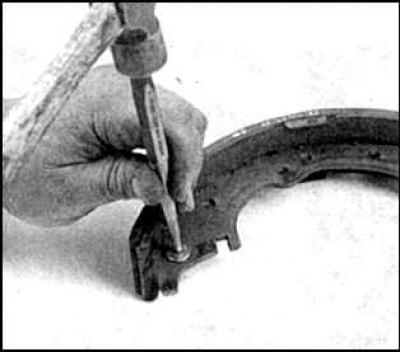
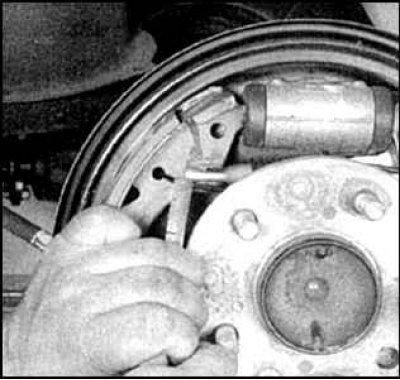
18. Disconnect the regulator and spring.
19. Install the assembled lever on the brake shield and secure by installing the pin, spring, support washer and cup.
20. Attach the bottom spring.
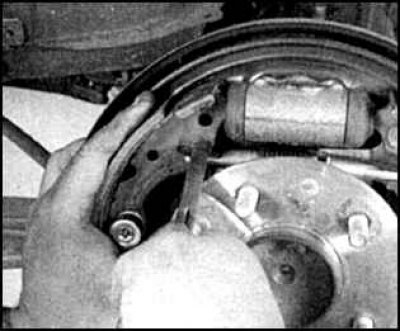
21. Install the block by engaging it with the regulator.
22. Put the return spring on the other block.
23. Secure the block with a clamping spring.
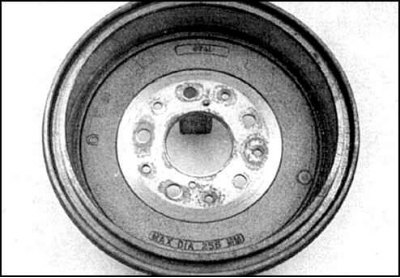
24. Clean the drum and check the condition of the surface. Check the ovality of the drum; in case of severe damage, grind the drum. If, after turning, the diameter is greater than the limit, replace the drum.
25. Follow these steps to brake the other wheel.
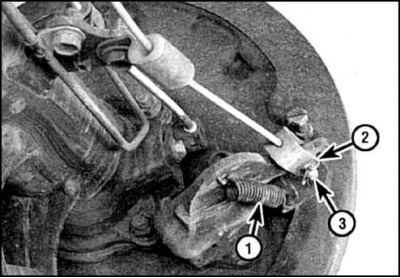
26. Adjust handbrake crank (1 - spring, 2 - cotter pin, 3 - axle). To do this, disconnect the cable. Move the crank in direction A until it stops in the block (gap B = 0).
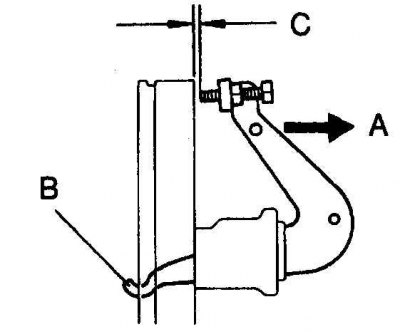
27. Loosen the lock nut and turn the bolt to set clearance C. Tighten the lock nut. Attach spring and cable. Perform the adjustment for the other wheel.
28. Make sure. that the governor pin rotates, moving the handbrake lever in the cabin.
29. Install drums. Press the brake pedal several times. Then spread the pads until they come into contact with the drum by turning the adjuster gear wheel through the hole in the brake shield with a screwdriver. Slightly retract the blocks so that the drum can rotate freely. Install the plug.
30. Further assembly is carried out in the reverse order. Check pedal position. If the pedal is too close to the floor, while reversing, press the brake pedal several times to adjust the gap between the shoes and drums using the automatic adjuster (works only when reversing).