
Company Honda Company Ford Company Skoda Company Kia Company Mazda Company Mercedes Company Renault
English Русский
Български
Беларускі
Український
Српски
Hrvatski
Română
Polski
Slovenský
Magyar
Bookmark Articles Sitemap Contacts
ToyotaMan.ru


Camry Corolla Corona Carina Land Cruiser Highlander 4Runner RAV4 Others
4Runner N120 (1989-1995)

Checking brake wear [Toyota 4Runner N120]

  • Main
  • 4Runner
  • N120 (1989-1995)
  • General information
  • Maintenance
  • Checking brake wear
0
Contents: Disc brakes ↓ Drum brakes ↓ Checking the vacuum booster ↓ Checking and adjusting the handbrake ↓
Raise the car and remove the wheels.

Disc brakes
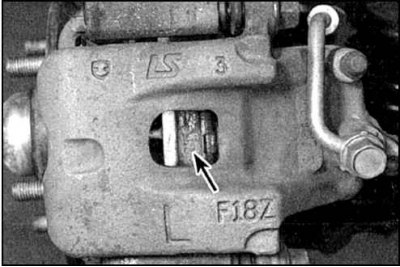


1. The pads can be checked through the window in the caliper (indicated by the arrow).
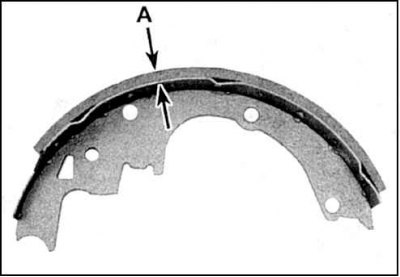


2. Measure the thickness (A) of the friction linings, and if the thickness is less than that specified in subsection 2.1, then replace the pads.

4. If there is any doubt about the normal condition of the linings, the pads should be removed.

5. At the same time, check the condition of the disk. Measure the thickness of the disk and check the surface condition. If the thickness is less than the norm, replace the disk. Minor surface defects are removed by grinding, replace a heavily worn disk.
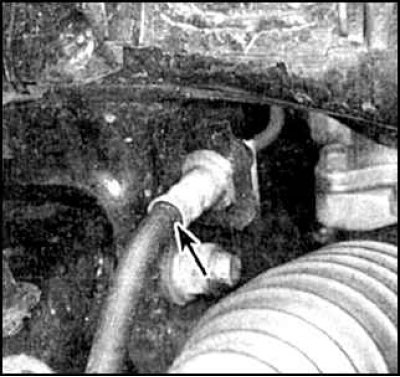


6. Check for fluid leakage from the hose in the indicated place (arrow) and the brake hydraulic tubes. Check the tightness of the connections. Eliminate any defects found immediately.

Drum brakes


1. Remove the drums (see subsection 8.6).

2. Check the thickness of the friction linings. If their thickness (or distance to rivet heads) less than 1.6 mm, or there are traces of oiling or serious damage, then replace the pads.

3. Check the condition of the springs and the clearance adjuster between the pads and drums.


The original source is located on the website: toyotaman.ru

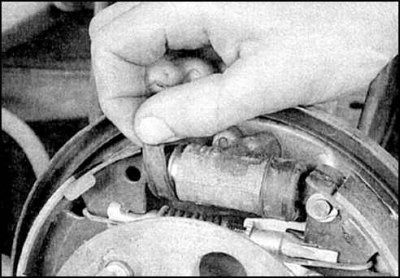
4. Check for fluid leakage from the wheel cylinder by bending back the dust cover. If a leak is detected, replace the cylinder.

5. Check the condition of the drums. Sand down minor defects with sandpaper, sharpen the drums if necessary.


6. Install all removed parts and lower the vehicle. Tighten the wheel nuts to the specified torque.

Checking the vacuum booster


1. With the engine not running, press the brake pedal several times; the brake pedal travel should not change.

2. Press the pedal and start the engine, all the time. After the engine starts, the pedal should move forward a little.

3. Press the brake pedal and stop the engine. The pedal should remain in its position for about 30 seconds.

4. Start the engine again, stop it after 1 minute and press the pedal several times. The pedal travel should decrease with each press.

5. If the operation of the vacuum booster differs from that described above, then the vacuum booster in this case must be replaced (see subsection 8.13).

Checking and adjusting the handbrake


1. Move the transmission lever to neutral. Apply moderate force to the handbrake lever and count the number of clicks of the lever's full travel. If the number of clicks is not correct, the handbrake needs to be adjusted.

2. Check the operation of the handbrake by parking the car on a steep slope. The adjustment procedure is described in subsection 8.11.
This article is available at: russian, bulgarian, belarusian, ukrainian, serbian, croatian, romanian, polish, slovak, hungarian
The article material has been checked: Gribkov Vladimir
Share information:
◀ Previous
4Runner N120: Maintenance
Next ▶

Checking the fuel system
Attachment drive belts
Air Filter Element — Checking and Replacing
Crankcase ventilation valve — inspection and replacement
Checking axle shaft covers
Checking and adjusting the clutch (brake) pedals
Replacing spark plugs
Checking and adjusting valve clearances
Replacing the fuel filter
High voltage wires, rotor and distributor cap
Similar articles on other Toyota models

➥ Brake pad wear indicator Toyota Camry XV20 (1996-2001)
➥ Checking the parking brake Toyota Corolla E80 (1983-1990)
➥ Brake lining wear indicators Toyota Corona T190 (1992-1997)
➥ Brake lining wear indicators Toyota Carina T190 (1992-1996)
➥ Checking and adjusting the clutch (brake) pedals Toyota Cruiser 60/80 (1980-1997, petrol)
➥ Checking the brake fluid level Toyota Highlander 1 (2000-2007, petrol)
Link in different formats to this article
Comments and feedback from visitors
No comments yet


Add two numbers 40 + 49


4Runner N120 (1989-1995) 
  • General information
  • User manual
  • Maintenance
  • Power unit
  • 4-cylinder engines
  • 6-cylinder engines
  • Engine overhaul
  • Cooling and heating
  • Fuel system
  • Transmission
  • Mechanical gearbox
  • Automatic gearbox
  • Transfer case
  • Clutch
  • Transmission line
  • Chassis, running gear
  • Brake system
  • Car suspension
  • Steering
  • Body and interior
  • Exterior (external elements)
  • Interior (internal elements)
  • Doors, locks and windows
  • Electrical equipment
  • Equipment and devices
  • Ignition system
  • Power devices
  • Electrical circuits
ToyotaMan.ru © 2018–2026 • Mobile version • Interesting about Toyota • Administration • Sitemap: EN BG BY UA RS HR RO PL SK HU • Search system • Bookmark
Camry Vista-V40 • Camry XV10 • Camry XV20 • Camry XV30 • Corolla Verso-AR10 • Corolla E80 • Corona T190 • Carina T170 • Carina T190 • Land Cruiser J70 (diesel) • Land Cruiser J60 (petrol) • Land Cruiser J100 • Highlander XU20 (petrol) • 4Runner N120 • RAV4 XA10 • RAV4 XA20 • Duet M100 • Dyna Y50 •
We require cookies to enable some interactive features. Is that ok with you?