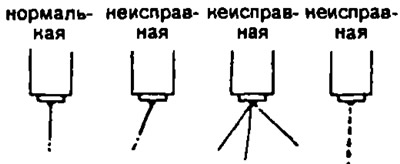
- A) Install the nozzle on the stand for testing.
- b) Move the fuel injection lever rapidly several times to build up pressure to clear the nozzle opening.
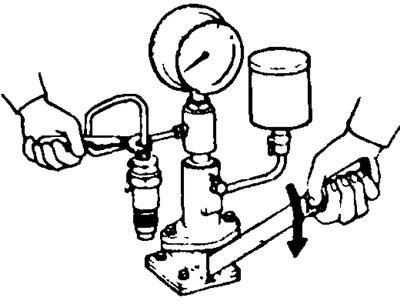
- V) Slowly swing the lever and read the pressure on the pressure gauge to start lifting the needle.
Needle lift start pressure: used nozzle 135-155 bar; new nozzle 145-155 bar.
Note: When the injector is operating correctly, a distinctive crisp cut-off sound should be heard.
If the pressure to start lifting the needle does not match the specified values. adjust it by selecting an adjusting washer of the required thickness.
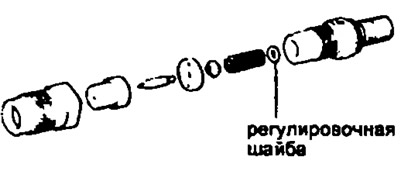
Note:
- Adjusting washers have 43 sizes (thickness values) from 0.900 mm to 1.950 mm in 0.025 mm increments.
- A change in the thickness of the shim by 0.025 mm results in a change in injection pressure of approximately 3.5 bar (343 kPa).
- Only one shim needs to be used.
- When adjusting the injection pressure, use the data for new injectors.
- d) After the end of the injection, no fuel leakage should be observed.
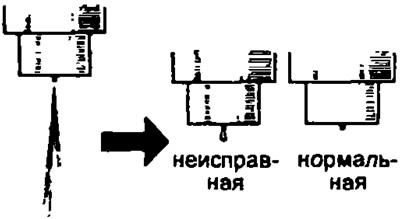
2. Check the nozzle needle for leaks. Pressurize the injector test stand to 10-20 bar (0.981-1.961 kPa) until the nozzle needle opens. In this case, there should be no leakage of fuel from the nozzle opening or around the nozzle coupling nut for 10 seconds.
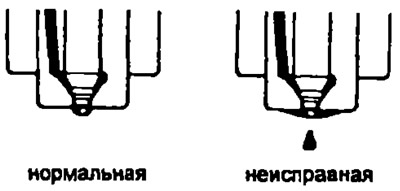
If fuel leakage is observed, replace or repair the injector.
3. Checking the sawing shape.
- A) Set the speed of the injection pump drive shaft (at the fuel stand) 15-60 rpm (nozzles used) and 30-60 rpm (new nozzles).
- b) Check the correct shape of the sawing jet.