
Attention! Before checking, find the location of the corresponding wires, using the diagram (see subsection 12.22). Please note that the power wires (connected to battery) have a brighter color and a larger diameter than the ground wires.
Examination
1. If the brush stroke is too slow, check the condition of the battery. If the battery is fully charged, remove the wiper motor (see below) and check by hand the freedom of movement of the brushes. Lubricate all pivot joints or repair as necessary. If this measure fails, then check the condition of the contacts, especially the ground connections. If all connections are good, replace the motor.
2. If the wiper does not work, check the fuse. If the fuse is good, then connect the electric motor to ground with a separate jumper. If the electric motor turns on, repair the ground connection. Otherwise, turn on the wiper and disconnect the motor connector. Check the presence of voltage on the electric motor. If there is voltage, then check the electric motor by connecting it to the battery through a thin wire. If the electric motor turns on, then check the freedom of movement of the thrust. Otherwise, replace the motor. If there is no voltage at the motor, check the voltage at the switch. If there is no voltage at the switch, then check the wiring from the fuse to the switch. If the wiring is good, then the switch is bad.
3. If the brushes only work at one speed, then check the wiring. If the wiring is good, replace the switch.
4. If the brush speed is not adjustable, check the wiring between the motor and the switch. If the wiring is good, replace the regulator module.
5. If the brushes do not return to the parked position when turned off, check the voltage at the motor with the ignition on and the wiper off. If there is voltage, then the limit switch inside the motor is faulty. Replace electric motor. If there is no voltage, then check and repair the wiring between the fuse and the motor.
6. If the brushes continue to work until the ignition is turned off, then disconnect the connector from the switch. If the brushes stop, replace the switch. Otherwise, the limit switch inside the motor is defective. Replace electric motor.
7. If the brushes go into the area below the edge of the hood, then check the condition of the rods and the entire mechanism of the cleaner. If the mechanism is OK, then check the wiring between the motor and the switch. If the wiring is good, replace the motor.
8. If the results of these checks are negative, then replace the electric motor.
Replacing the front wiper motor
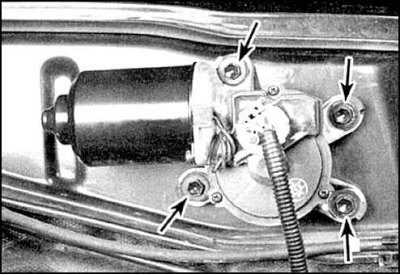
1. Loosen the mounting bolts (indicated by arrows) and raise the wiper motor.
2. Loosen the shaft nut on the back of the motor.
3. Disconnect the connector and remove the motor.
4. Installation is carried out in the reverse order.
Replacing the rear wiper motor
1. Remove the hatch cover and unscrew the nut securing the brush arm. Remove the lever from the shaft.
2. Loosen the shaft nut.
3. Open the rear cover and remove the inner handle, bottom door trim and hatch cover.
4. Disconnect the motor connector.
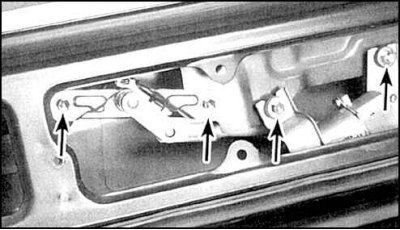
5. Loosen the mounting bolts (indicated by arrows) rear wiper motor and remove the motor assembly with rods.
6. Installation is carried out in the reverse order.