
Air conditioning system
Attention! The air conditioning system is constantly under high pressure. Never disconnect the refrigerant lines or remove system components without first unloading the refrigerant from the system. The unloading of refrigerant from the air conditioning system must be performed by the dealer's service department or an automotive air conditioner specialist using an appropriate service station designed for unloading/recycling the refrigerant and complying with the requirements of environmental protection legislation. Always wear protective goggles when disconnecting the refrigerant lines!
1. To maintain the maximum efficiency of the air conditioning system, the following checks should be performed regularly.
- A) Check the condition of the compressor drive belt. If it shows signs of wear or deterioration, replace it (see chapter 1).
- b) Check drive belt tension and adjust if necessary (see chapter 1).
- V) Check the system hoses for cracks, bulges, signs of hardening and aging of the rubber. Inspect hoses and fittings for oil bubbles and leaks. If there are signs of wear, damage or leakage, replace the hose (And).
- G) Check the fins/fins of the condenser for leaves, insects and other debris stuck between them. If necessary, clean with a fine brush or blow with compressed air.
- d) Check if the amount of refrigerant in the system is correct.
2. It is recommended to turn on the air conditioner for at least 10 minutes at least once a month. This is especially important in winter, as prolonged inactivity of the air conditioner leads to hardening and failure of the seals.
3. Due to the complexity of the system design and the need to use special equipment for its maintenance, detailed diagnostics and repairs are not considered in this Guide. However, this chapter provides simple procedures for replacing elements.
4. The most common reason for poor system efficiency is insufficient refrigerant in the system. If there is a noticeable drop in air conditioner efficiency, one of the simple checks below will quickly reveal signs of low refrigerant.
Examination
5. Warm up the engine to normal operating temperature.
6. Turn the temperature control of the air conditioner to the position for maximum cooling efficiency, select the maximum fan speed. Open the doors to prevent the air conditioner from turning off after it has sufficiently cooled the interior of the vehicle.
7. After the system has reached operating temperature, feel the two pipes connected to the evaporator on the baffle.
8. Pipeline (thiner), from the condenser outlet port to the evaporator must be cold and the evaporator outlet (thicker piping going back to the compressor) should be a little colder (at 1.5-5.5°C). If the evaporator outlet line is significantly hotter than the inlet line, the system needs to be charged. Insert a thermometer into the center vent (pic. 12.8) with the air conditioning system running. The outlet air temperature must be 19 5-22.5°C lower than the outdoor air temperature (up to approximately 4.5°С). If the outside temperature is very high (e.g. 43°C), the air temperature at the outlet of the deflector can reach 16°C, but, as a rule, the temperature issued by the air conditioner is 19.5-22.5°C lower than the outdoor temperature. If the air is not as cold as it should be, the system may need to be charged. Further inspection or testing of the system is beyond the purview of an amateur mechanic and should be left to a professional.
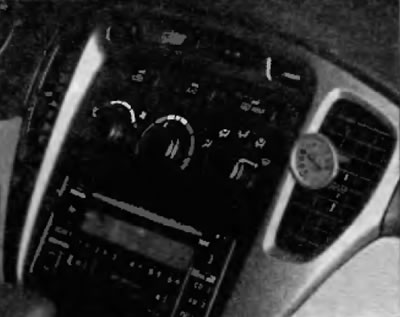
Pic. 12.8. Insert an accurate thermometer into the central vent on the front panel, turn on the air conditioner and check the outlet temperature
Adding refrigerant
Note. All models described in this manual use R-134a refrigerant. When charging refrigerant or replacing parts of an air conditioning system, use only refrigerant, compressor oil, and seals that are compatible with the system. Seals and compressor oil used with the old P-12 refrigerant are not compatible with the components of this system.
10. Obtain a standard R-134e refrigerant charge kit from an auto parts store. Kit includes 340g refrigerant bottle, valve cap and short hose to be connected between valve and service valve on low pressure side of refrigerant line (pic. 12.10)
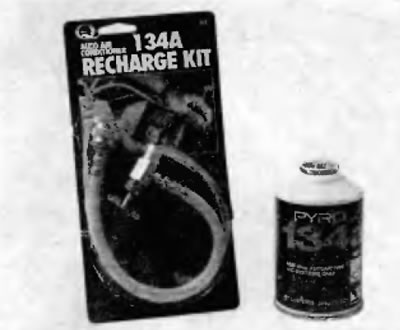
Pic. 12.10. Standard air conditioner refill kit (it must be designed only for R134a refrigerant, and in no case for R12) and a bottle of appropriate refrigerant
11. Connect the charging kit to the system following the manufacturer's instructions.
12. Close the valve on the charging kit and screw the charging kit fitting onto the canister head, making sure there is an O-ring/rubber seal inside the threaded fitting of the kit.
Attention! Always wear protective goggles when handling bottles filled with pressurized refrigerant!
13. Remove the dust cap from the charge port on the low pressure side of the refrigerant line and connect the charge kit hose quick fitting to it (pic. 12.13).
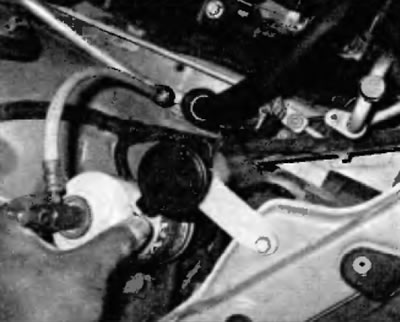
Pic. 12.13. The R134a refrigerant must only be added through the bead on the low pressure side. The procedure will be easier if you wrap the can with a towel moistened with hot water; this helps to prevent icing of the canister
Attention! Do not connect the filling kit hose to the high pressure side of the system! The fittings on the charge kit are designed to connect only to the port on the low pressure side of the system.
14. Warm up the engine to normal operating temperature and turn on the air conditioner. Make sure that the charging kit hose does not come into contact with fan blades or other moving parts.
Note. The system must be charged with the compressor running. If the compressor clutch disengages to keep the compressor constantly on, the system should be switched to maximum cooling efficiency and all passenger compartment doors should be left open.
15. Turn the valve handle on the kit so that the stem penetrates the canister head, then turn the handle back to release the refrigerant. You should hear the characteristic sound of escaping gas. Add refrigerant through the port on the low pressure side of the system until the evaporator outlet and inlet lines feel approximately the same temperature to the touch. Between charging series, pause to allow the system to stabilize.
Attention! Never fill more than two bottles of refrigerant into the system!
The spray can freeze over, slowing down the procedure. Moisten a towel with hot water and wrap it around the bottom of the can to keep it from freezing.
16. Re-insert the thermometer through the deflector into the central air duct of the air conditioner and make sure that the temperature of the air supplied to the passenger compartment becomes lower.
17. When the cartridge is empty, close the valve and disconnect the hose from the port on the low pressure side of the system. Replace the dust cap immediately.
18. Disconnect the refill kit from the cartridge and save the kit for future use. Move the piercing rod to the up position to prevent inadvertent piercing the next time you use it.
Heating system
19. If the heater does not provide heating of the air supplied to the passenger compartment, one of the following may be the reason for this:
- A) The thermostat is stuck open, preventing the engine coolant from warming up enough to transfer heat to the heater core. Replace thermostat (see paragraph 3).
- b) The heater hose is clogged preventing coolant from flowing through the heater core. Feel the hoses connected to the nozzles on the partition. They must be hot. If one of them is cold, then there is a blockage in one of the hoses or in the heater radiator, or the heater control valve is closed. Disconnect hoses and backflush (countercurrent) heater core with a garden hose. If the heater core is clean but there is no circulation, remove both of these hoses and flush them out with a garden hose.
- V) If the blockage in the heater core cannot be cleared by flushing, the heater core must be replaced.
20. If the fan speed does not match the setting selected by the fan switch, the problem may be a blown fuse, electrical circuit, fan relay, fan speed switch, or fan resistor.
21. If there is no air supply from the ventilation deflectors:
- A) Turn on the ignition and turn on the blower fan. Put your ear to the vent and listen. The operation of electric motors, as a rule, is accompanied by a characteristic sound. Listen to the sound of the electric motor.
- b) If there is no sound (and you have already verified that the fan regulator and fan resistor are good), It looks like the fan itself is defective (see paragraph 9).
22. If the floor covering under the heater core is wet or antifreeze vapor comes out through the vents, the heater core is leaking. Take it off (see paragraph 11) and install a new block (most service stations do not repair a leaking heater core).
23. Inspect the heater/evaporator drain hose that runs under the body floor (fig 12.23). If wet mist exits the system ducts, this hose may become clogged with leaves or road debris.
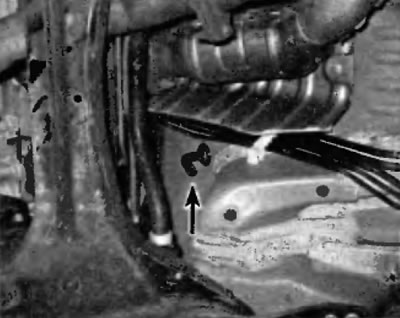
Pic. 12.23. This drain hose from the heater/air conditioner must be kept clean to drain any condensate (shown from under the car)
Eliminate odors from the air conditioning system
24. Unpleasant odors that often occur in air conditioning systems are caused by the formation of mold, usually on the surface of the evaporator radiator. The ideal environment for mold to grow is a warm, humid environment.
25. On most vehicles, access to the evaporator radiator is difficult, and dealerships offer a lengthy and expensive mold removal process that requires opening the evaporator housing, using a strong disinfectant, and rinsing the evaporator radiator until the mold is completely removed. You can service your own car's air conditioner yourself, but you'll need something a little more effective than basic household mold removers or deodorizers.
26. Automotive air conditioning spray disinfectants are available at most auto parts stores, but remember that the most effective products are also the most expensive when you visit the store. The basic procedure for using these aerosols is to start by running the system in recirculation mode for 10 minutes with the fan set to maximum speed. Turn the heater on for maximum efficiency to dry out the system and turn off the compressor by disconnecting the electrical connector on it (see paragraph 14).
27. The disinfection kit is usually equipped with a long aerosol injection hose. Remove the cabin air filter, point the tip into the hole and inject the aerosol according to the manufacturer's recommendations (fig 12.27). Follow the manufacturer's recommendations for injection duration and pause between injections.
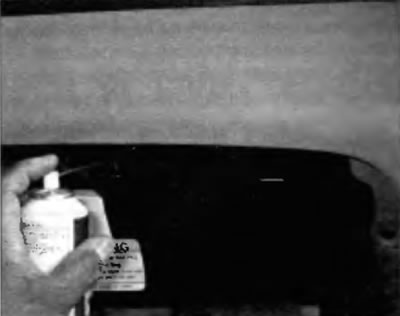
Pic. 12.27. Remove the cabin air filter and insert the tip of a disinfectant can. The jet must not fall on the fan blades!
28. The best way to prevent mold from growing back after cleaning the evaporator is to keep the evaporator body drain line clean (pic. 12.23) and running short deicing cycles to dry out the evaporator after a long drive with the A/C on.