
Front heater radiator
Attention! Models covered in this manual are equipped with an assisted restraint system (SRS), better known as «airbag system». To prevent accidental deployment of airbags, which could result in injury, be sure to deactivate the airbag system before working near components of the airbag system (see chapter 12).
Attention! Do not allow antifreeze to come into contact with skin or body paintwork. Wash off splashes immediately with plenty of water. Do not leave coolant in open containers or in puddles where children and pets can access it. The pleasant smell of this substance may attract their attention, but its ingestion can be fatal! Wipe up spilled antifreeze from the garage floor immediately. Keep antifreeze bottles covered and repair leaks in the cooling system as soon as they are discovered. Dispose of used antifreeze in accordance with local codes and regulations. Never pour used antifreeze onto the ground or down a drain.
Attention! Wait until the engine has completely cooled down before starting this procedure.
Application. Non-toxic coolant is available from some auto parts stores. Although fresh coolant of this type is non-toxic, the appropriate regulations for the disposal of coolant must be followed.
Application. Removing the heater core is a rather difficult procedure for an amateur mechanic. It is required to remove numerous fastening elements, access to some of which can be significantly difficult, and therefore it is recommended to replace the heater core yourself only with considerable experience.
1. Contact the dealer's service department or an automotive air conditioner specialist to unload the refrigerant from the air conditioning system and dispose of it.
2. Disconnect the ground wire from the battery (see paragraph 1 of chapter 5).
3. Drain the coolant from the cooling system (see chapter 1).
4. The factory procedure for removing the heater core requires removal of the heater/evaporator housing, which requires complete removal of the instrument panel and support cross member.
5. Remove the floor console (in the presence of) and instrument panel (see chapter 11). On Lexus models, remove the hood panel/airbox deflector from the engine compartment (see chapter 11).
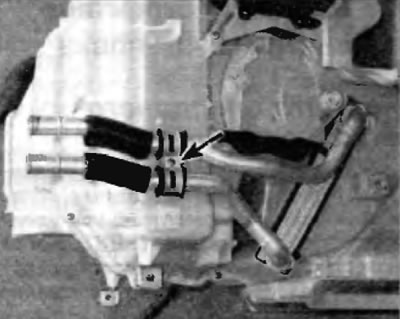
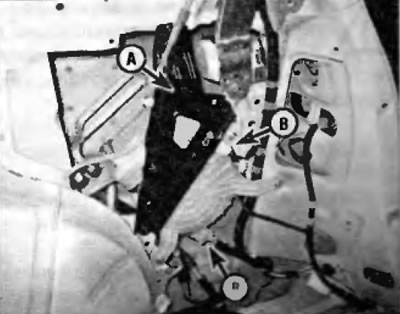
6. Disconnect the refrigerant lines to the evaporator at the bulkhead on the engine side, and then remove the coolant hoses from the heater radiator pipes (pic. 11.16, a, b).
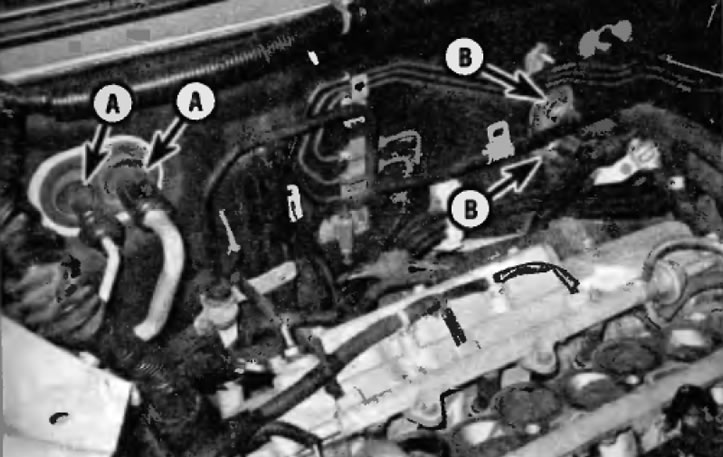
Pic. 11.6, a. Location of refrigerant lines (A) and heater hoses (IN)
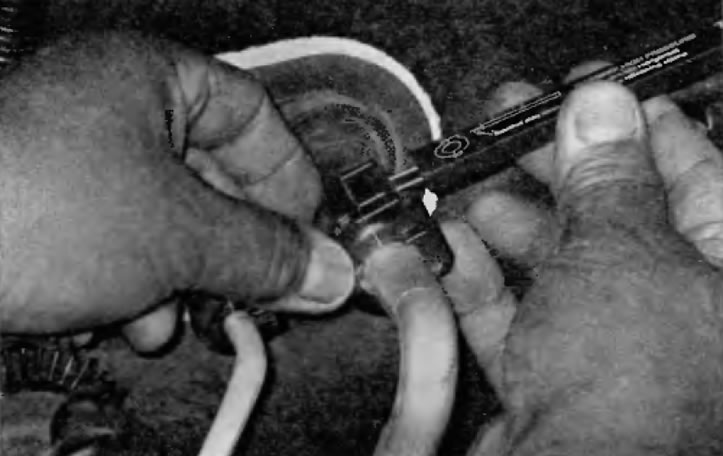
Pic. 11.6, b. Using the special tool to release the clamp on the refrigerant lines
7. If the hoses cannot be removed, cut them and then remove the remnants of the hoses from the metal fittings on the heater core.
Note. The use of a special tool to disconnect the refrigerant lines is not required on all models.
8. Disconnect the steering column from the support tube (see chapter 10).
9. Remove the shift lever (see chapter 7).
10. Pull the flooring back just enough to remove the floor air ducts from the heater/evaporator housing.
11. Disconnect a shift cable from a tubular cross member of salon. Unscrew the fasteners for each tie and remove them (pic. 11.11).
Pic. 11.11. Elements for fastening the tubular cross member of the passenger compartment and the gearshift cable
12. On Highlander models, disconnect the PCM and body control module from the right side of the passenger compartment tubular cross member (pic. 11.12).
Ryas. 11.12. PCM fasteners and body control modules on the passenger compartment tubular crossmember
13. On Highlander models, disconnect the fuse box and instrument panel relay and the stability control module («skid control») from the left side of the tubular cross member (pic. 11.13).
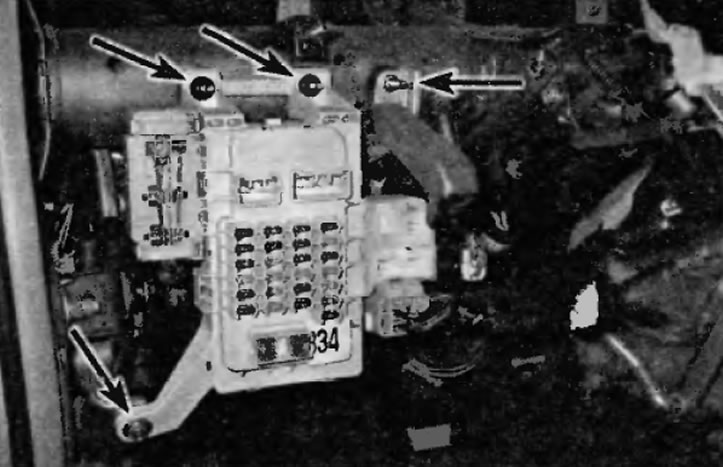
Pic. 11.13. Fastening elements of the fuse box and relay and the control module of the dynamic stabilization system on the tubular cross member of the passenger compartment
14. Turn out bolts of fastening of a tubular cross-beam of salon and accurately remove it (pic. 11.14).
Note. Be careful not to damage the wiring harness when removing the cross member.
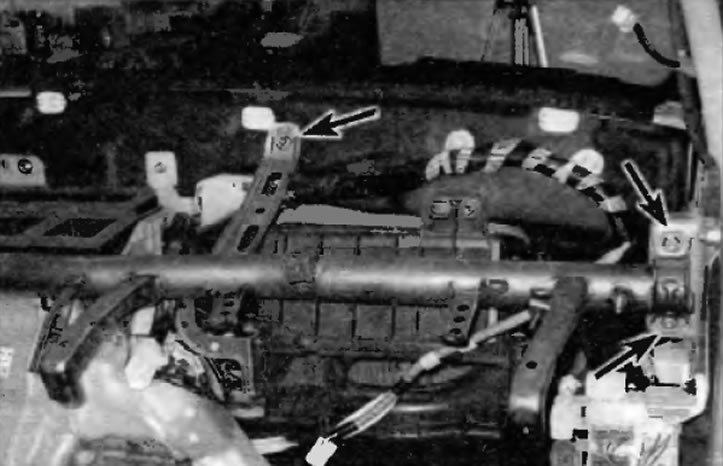
Pic. 11.14 a. Fastening elements of the salol cross member on the right side
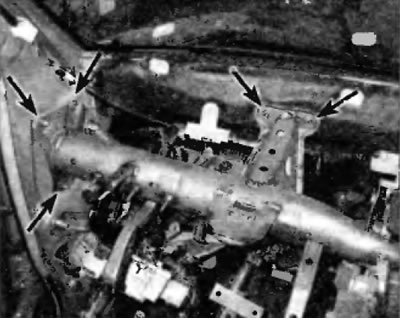
Pic. 11.14, b. Elements of fastening of a crossbar of salon on the left side
15. Remove all small air lines from the heater/evaporator housing.
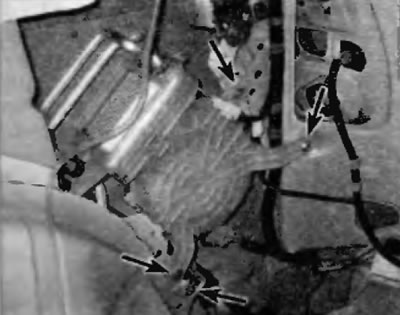
16. Disconnect all wiring harnesses connected to the heater / evaporator housing, then remove the housing fasteners and carefully pull it away from the bulkhead so that the pipelines for the heater radiator and evaporator do not block the openings (pic. 11.16).
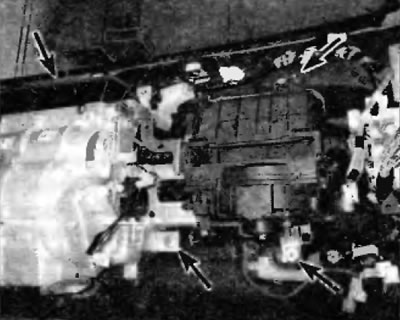
Pic. 11.16. Elements of fastening of the case of a heater/evaporator (one is hidden so the overlay is approximate)
17. On Highlander models, remove the clip securing the heater radiator pipes to the housing wall and then slide the heater radiator out of the housing (pic. 11.17). On Lexus models, several other items may need to be removed to remove the heater core.
Pic. 11.17. Heater radiator pipe holder in the corresponding screw
18. Installation is carried out in the reverse order of removal. Use new O-rings to seal the refrigerant lines. Before installing the front panel facing, securely tighten all the fastening elements of the passenger compartment tubular cross member. Recharge the cooling system (see chapter 1).
Rear heater radiator
Application. This feature is installed as an option (at the request of the client) only on Highlander 2004 and later.
19. Remove the right rear floor panel.
20. Remove the seal from the bottom and right side of the rear door area.
21. Remove trim from the rear edge of the floor covering.
22. Remove the small box that was covered by the right rear floor panel.
23. Remove the bottom panel of furnish and a sealant of the right back door.
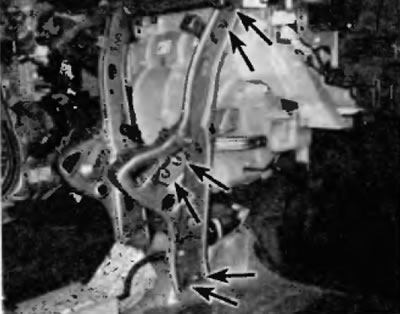
24. Remove the covers of the various fasteners and the fasteners themselves, and then remove the right rear trim panel (pic. 11.24, a, b).
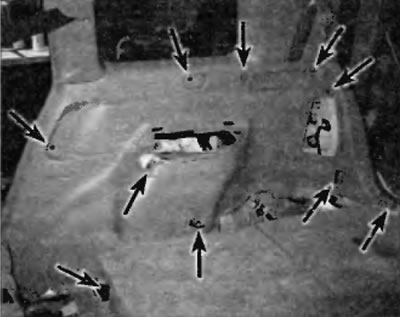
Pic. 11.24 a. Arrangement of elements of fastening of the right back panel
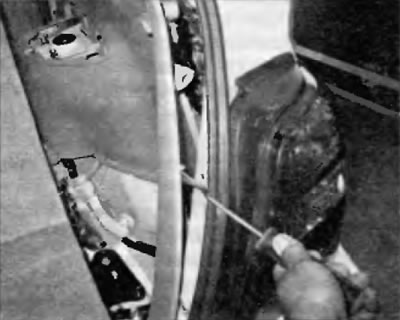
Pic. 11.24 b. Separate the panel from the body by carefully prying it with a trim remover
25. Disconnect the heater hoses under the car (fig 11.25).
Note. Pinch the hoses before disconnecting them to prevent fluid from escaping.
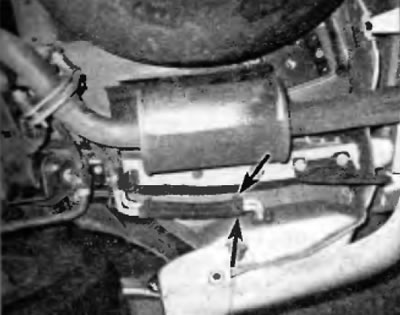
Pic. 11.25. Disconnect the hoses from the heater radiator pipes
26. Remove the air lines.
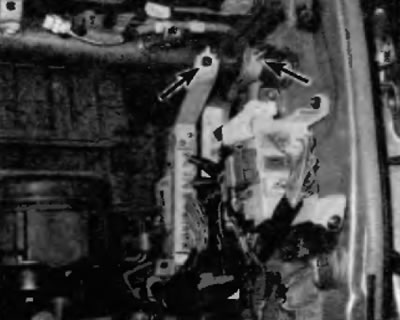
27. Remove the heater panel assembly and disconnect the electrical connectors (fig 11.27).
Pic. 11.27. Remove the plate (A), that closes the heater and disconnect the electrical connectors (IN)
28. Turn out screws of fastening of a heater in gathering and then accurately remove it (pic. 11.28)
Pic. 11.28. Elements of fastening of a heater assy
29. Disassemble the heater and remove the heater core.
30. Installation is carried out in the reverse order of removal. Check coolant level. Check hose connections for leaks.