



Oil pump
Removal
1. Remove the engine oil pan (see paragraph 12).
2. Loosen the bolts/nuts of the oil receiver assembly (see Figure 13.2).
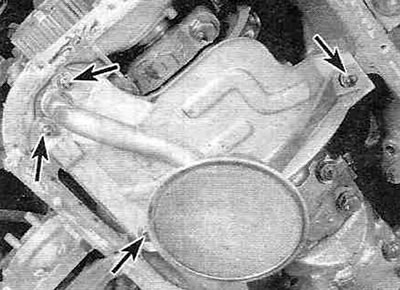
Figure 13.2. The oil receiver and reflector plate assembly is secured with two bolts and two nuts (shown by arrows).
3. Securely support the engine and remove the lower tension roller, crankshaft pulley, timing belt and crankshaft sprocket (see paragraph 7).
4. Loosen the 12 mounting bolts and remove the oil pump assembly from the engine (see Figure 13.4).
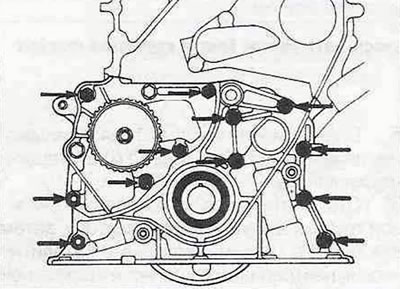
Figure 13.4. Loosen the bolts securing the oil pump cover to the cylinder block (shown by arrow).
(The material was taken from a resource www.TOYOTAMAN.ru)
If the pump cannot be removed by hand, tap it with a rubber hammer or pry it off with a screwdriver, resting it against the lug on the pump body.
5. Unscrew the two remaining bolts (see Figure 13.5,a) and separate the oil pump housing from the cover.
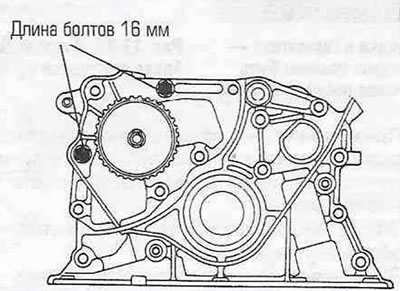
Figure 13.5,a. Unscrew the bolts securing the oil pump housing to the cover.
Remove the outer rotor and remove the sealing ring (see Fig. 13.5,b).
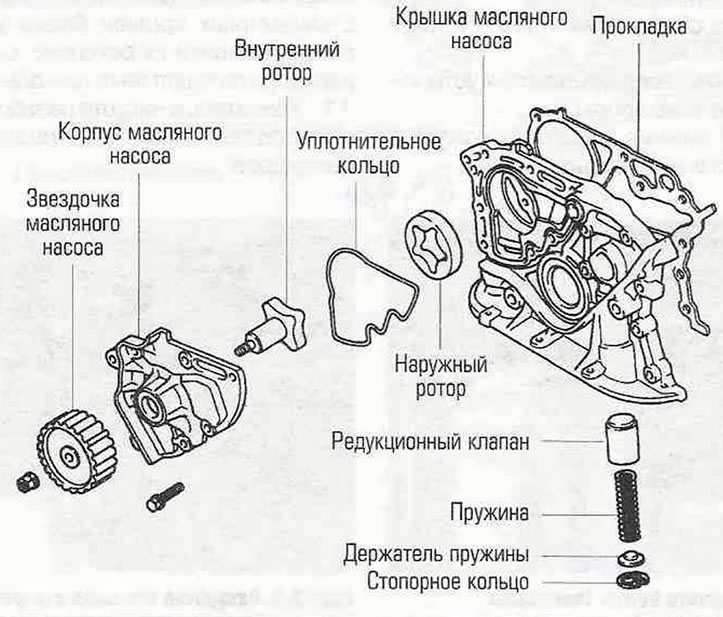
Figure 13.5,b. Oil pump components.
6. Clamp the oil pump sprocket in a vice with soft jaws (see Figure 13.6).
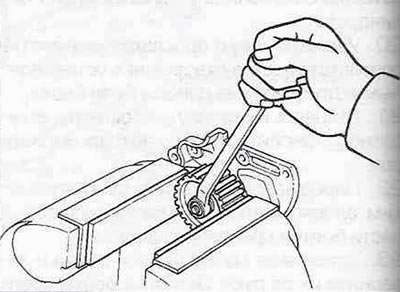
Figure 13.6. To loosen the mounting bolt, clamp the oil pump sprocket in a vice with soft jaws.
Loosen the sprocket mounting nut and remove the sprocket. Remove the inner rotor.
7. Using a special scraper, remove all traces of the old gasket and sealant from the mating surfaces of the oil pump cover and block, then wipe them with a rag soaked in varnish thinner or acetone.
8. Remove the pressure relief valve retaining ring (see Figure 13.8), then remove the spring retainer, spring and plunger.
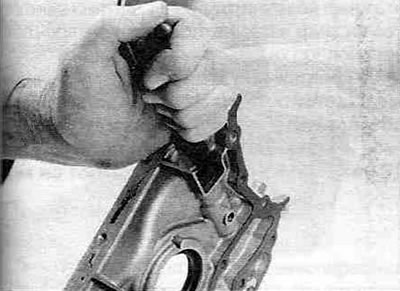
Figure 13.8. To disassemble the pressure reducing valve, you must first remove the retaining ring.
Caution! The pressure relief valve spring is heavily compressed. Wear a protective mask or goggles.
Examination
9. Wash all components with solvent and inspect them for wear or damage.
10. Check that the plunger is not worn or the pressure relief valve spring is damaged. If one of these parts is damaged, they are replaced as a set.
11. Check rotor sizes and clearances. To do this you will need a micrometer, a set of flat feeler gauges and a caliper (see figure 13.1, a, b).
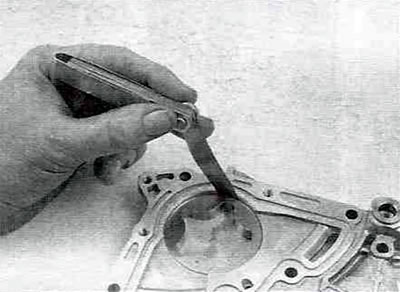
Figure 13.11,a. Using a set of flat feeler gauges, measure the outer rotor/housing gap...
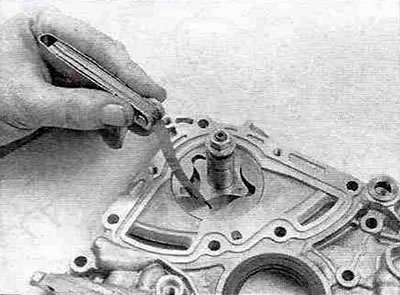
Figure 13.11, b...and the gap between the outer rotor and the inner rotor cam.
Compare the results with the data given in Specifications. If the dimensions are not within tolerances, replace both rotors. Replace the oil pump cover and/or housing if necessary.
Installation
12. Carefully pry the inner rotor shaft seal with a screwdriver and remove it from the oil pump housing. Using a high socket and a hammer, carefully press in the new seal. Lubricate the seal lips with multi-purpose grease.
13. Install the new front crankshaft oil seal into the pump cover following the procedure described in paragraph 8. Lubricate the working lips of the oil seal with multi-purpose grease.
14. Install a new sealing ring, then, after lubricating the outer rotor with clean engine oil, install it in place so that the mark is visible (see figure 13.14).
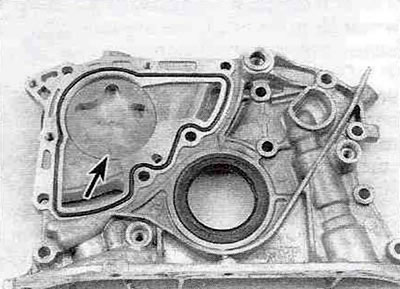
Figure 13.14. The oil pump cover is prepared for installation of the oil pump housing: the seal and O-ring have been replaced, the outer rotor mark is located on its outer side (indicated by the arrow).
15. Lubricate the inner rotor shaft with clean engine oil and install it into the oil pump housing, then install the sprocket onto it and tighten the mounting nut to the torque specified in Specifications.
16. Fill the voids in the oil pump housing with assembly gel and install the housing into the oil pump cover. Install two 16mm long bolts and tighten them to the specified torque Specifications moment (see Figure 13.5,a).
17. Lubricate the relief valve plunger with clean engine oil and install the valve components into the oil pump cover.
18. Place the new gasket on the engine block, aligning the corresponding holes with the mounting pins on the mating surface of the block.
19. Install the oil pump cover on the block and tighten the mounting bolts.
20. Tighten the mounting bolts to the torque specified in Specifications. Tighten the screws in a cross pattern to avoid distortion of the mating surface of the lid, making three to four passes.
21. After installing the new gasket, install the oil receiver assembly with the protective screen. Tighten the mounting bolts to the torque specified in Specifications.
22. Install the remaining components in the reverse order of removal.
23. Fill with oil, start the engine, check the oil pressure and make sure there are no leaks.