



Oil pump
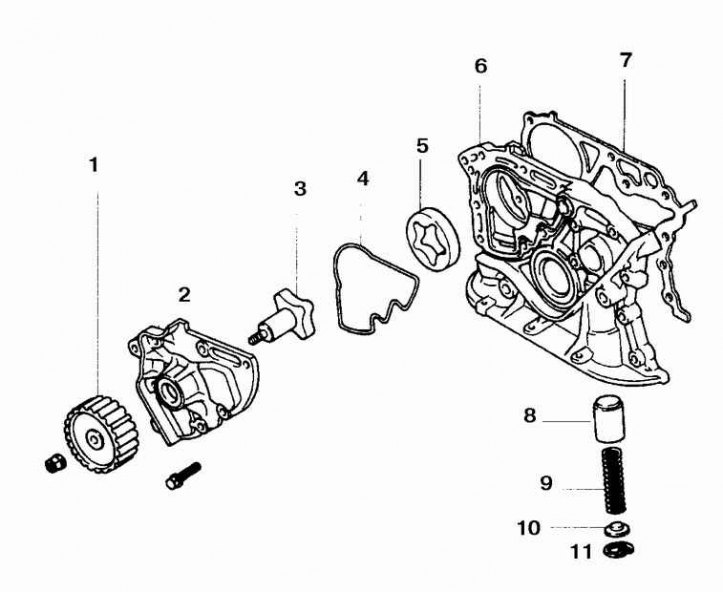
1. Pulley; 2. Working part of the pump; 3. Drive gear; 4. Sealing ring; 5. Driven gear; 6. Pump casing; 7. Gasket; 8. Piston; 9. Spring; 10. Spring retainer; 11. Retaining ring
Removal
1. Remove the oil pan.
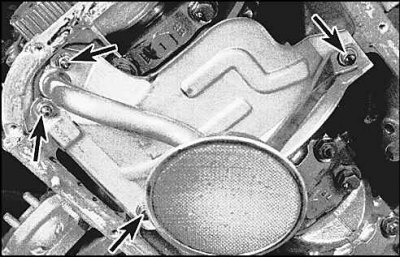
2. Unscrew the screws (arrows) and remove the oil intake pipe.
3. Remove the lower timing belt idler pulley, crankshaft pulley, timing belt and crankshaft sprocket.
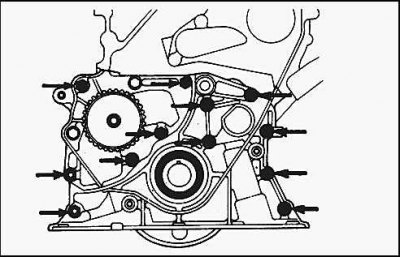
4. Remove 12 bolts and disconnect the oil pump housing from the engine.
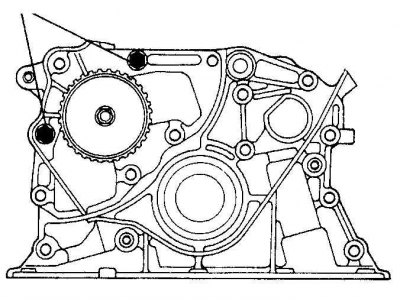
5. Unscrew the two bolts (bolt length 16mm) and disconnect the working part of the pump. Remove the driven gear and remove the sealing ring.
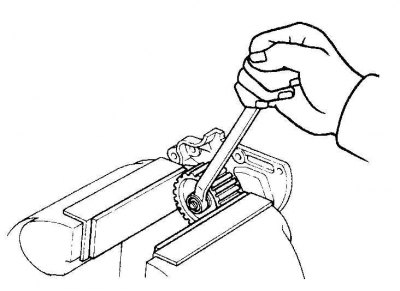
6. Clamp the pump sprocket in a vice, loosen the sprocket nut and remove the sprocket.
7. Thoroughly clean and wipe with acetone the mating surfaces of the pump housing and cylinder block.
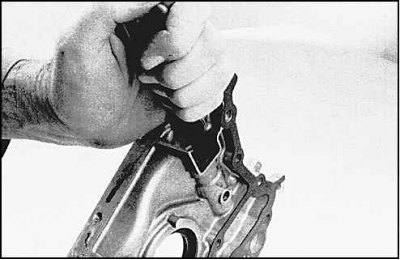
8. Remove the pressure relief valve retaining ring, spring retainer, spring and piston.
The material is republished from an online website (TOYOTAMAN)
Examination
1. Clean all parts with solvent and inspect them for wear and damage.
2. If the spring or piston of the pressure reducing valve is damaged, all valve components must be replaced.
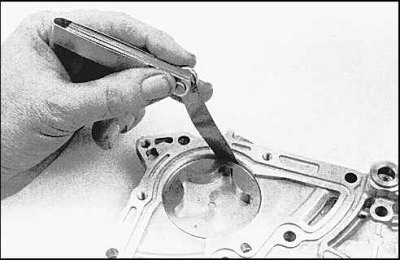
3. Measure the clearance between the driven rotor and the pump casing.
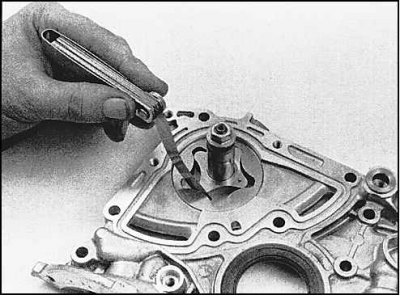
4. Measure the clearance between the gear teeth. If the clearances exceed the maximum allowable limits, the gears must be replaced.
Installation
1. Replace the pump shaft and crankshaft seals. Lubricate the seals with multi-purpose grease.
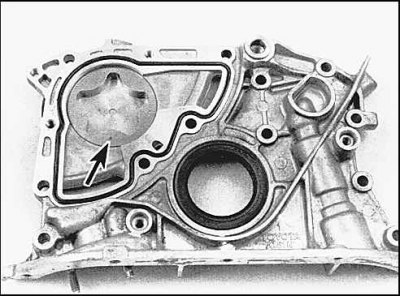
2. Install a new sealing ring, lubricate the driven gear with engine oil and install the gear into the housing. The mark on the gear should be facing outward (arrow).
3. Lubricate the pump shaft and insert the drive gear, install the pump sprocket and tighten the nut to the required torque.
4. Fill the pump cavity with Vaseline and install the working part of the pump on the casing. Tighten the bolts.
5. Lubricate the relief valve piston with oil and install the valve parts into the pump housing.
6. Install a new pump gasket.
7. Install the pump and insert the bolts. Tighten the bolts to the specified torque.
8. Install the remaining parts.