
Self-diagnosis
1. Turn on the ignition.
2. Lower the door glass for 2 seconds or more (in manual mode).
3. In the event of a malfunction, the indicator "AUTO" will display its code. Note: The indication lasts 30 seconds or until the ignition is turned off.
 |  |
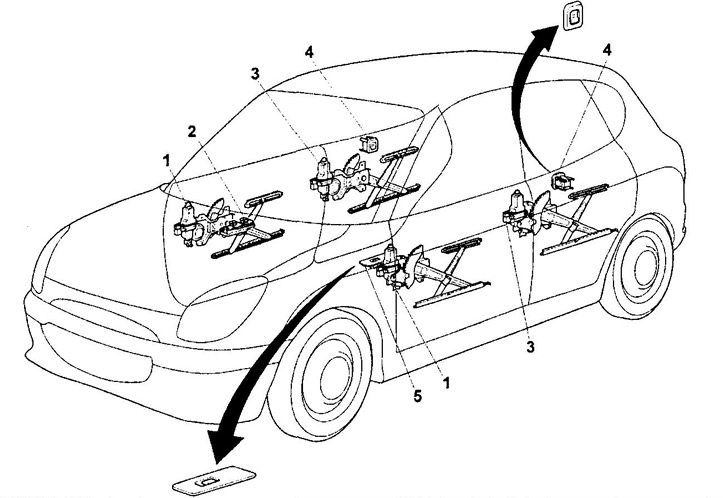
Location of components (power windows).
1 - front door power window mechanism,
2 - the main power window control switch on the driver's door,
3 - rear side door power window mechanism,
4 - power window control switch on the front passenger door,
5 - power window control switch on the rear passenger door.
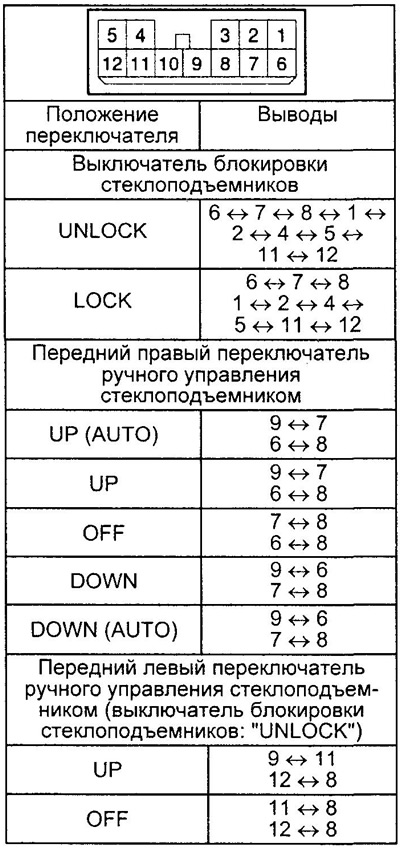
Checking the main power window switch on the driver's door
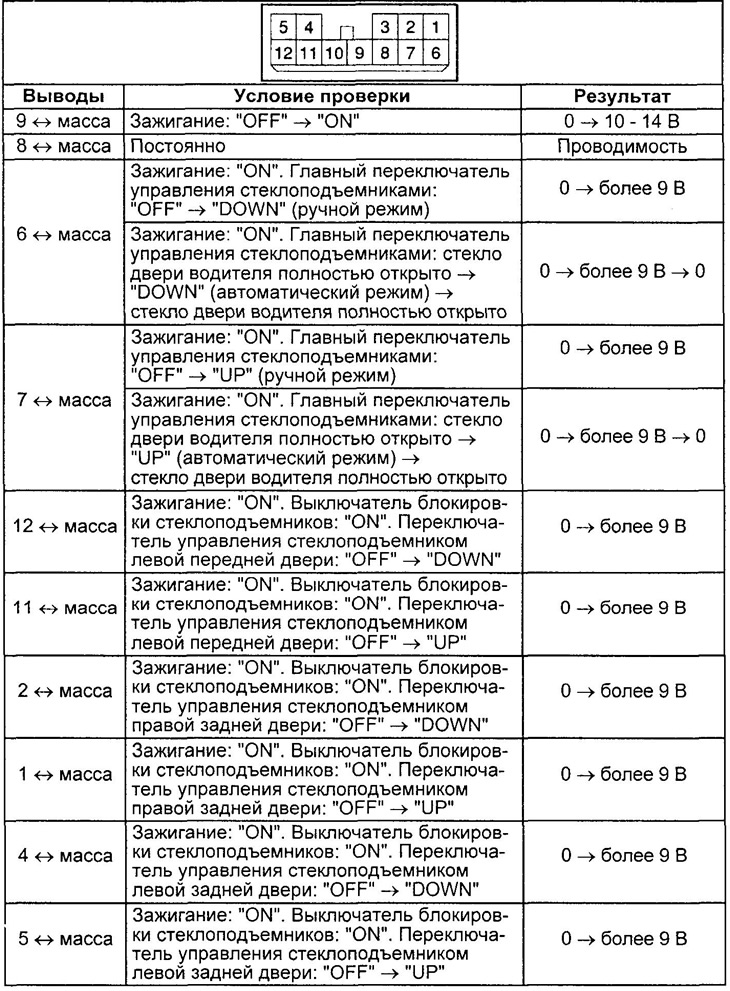
Check the voltage and continuity between the connector pins at different switch positions.
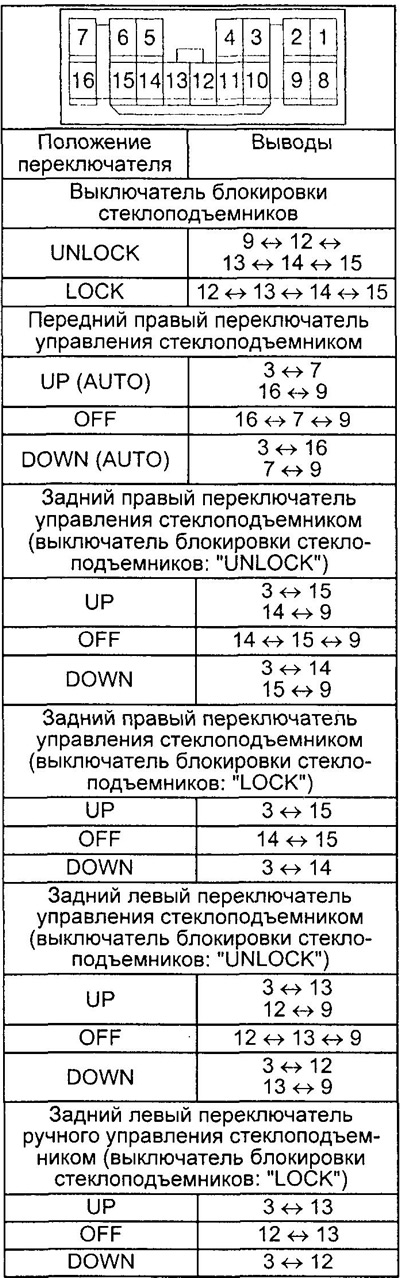
Type 1.
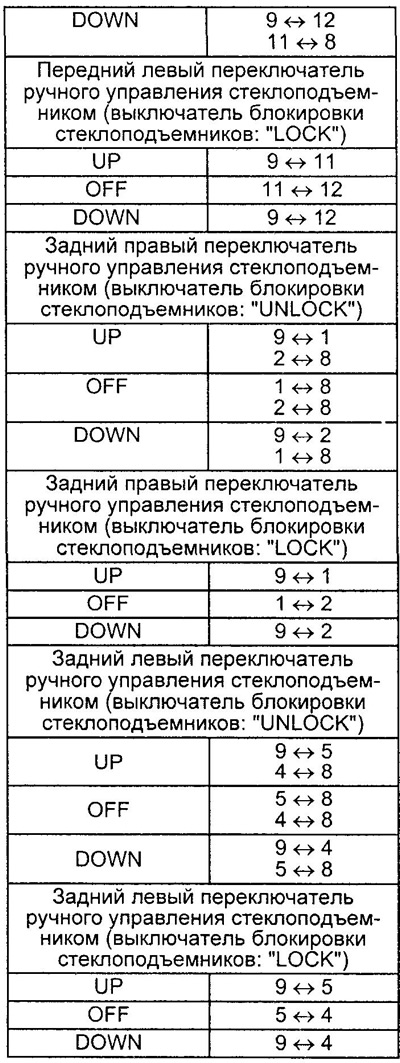
Type 2 (except front left power window switch).
Type 2 (front left power window control switch).
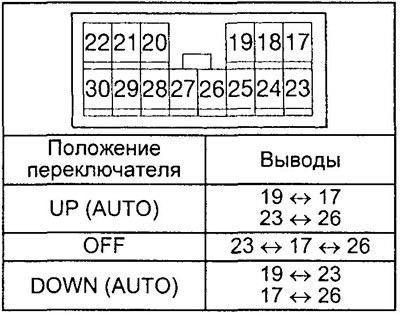
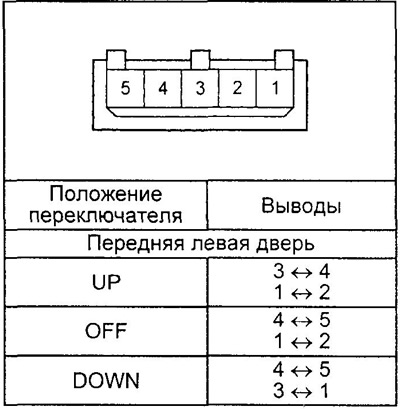
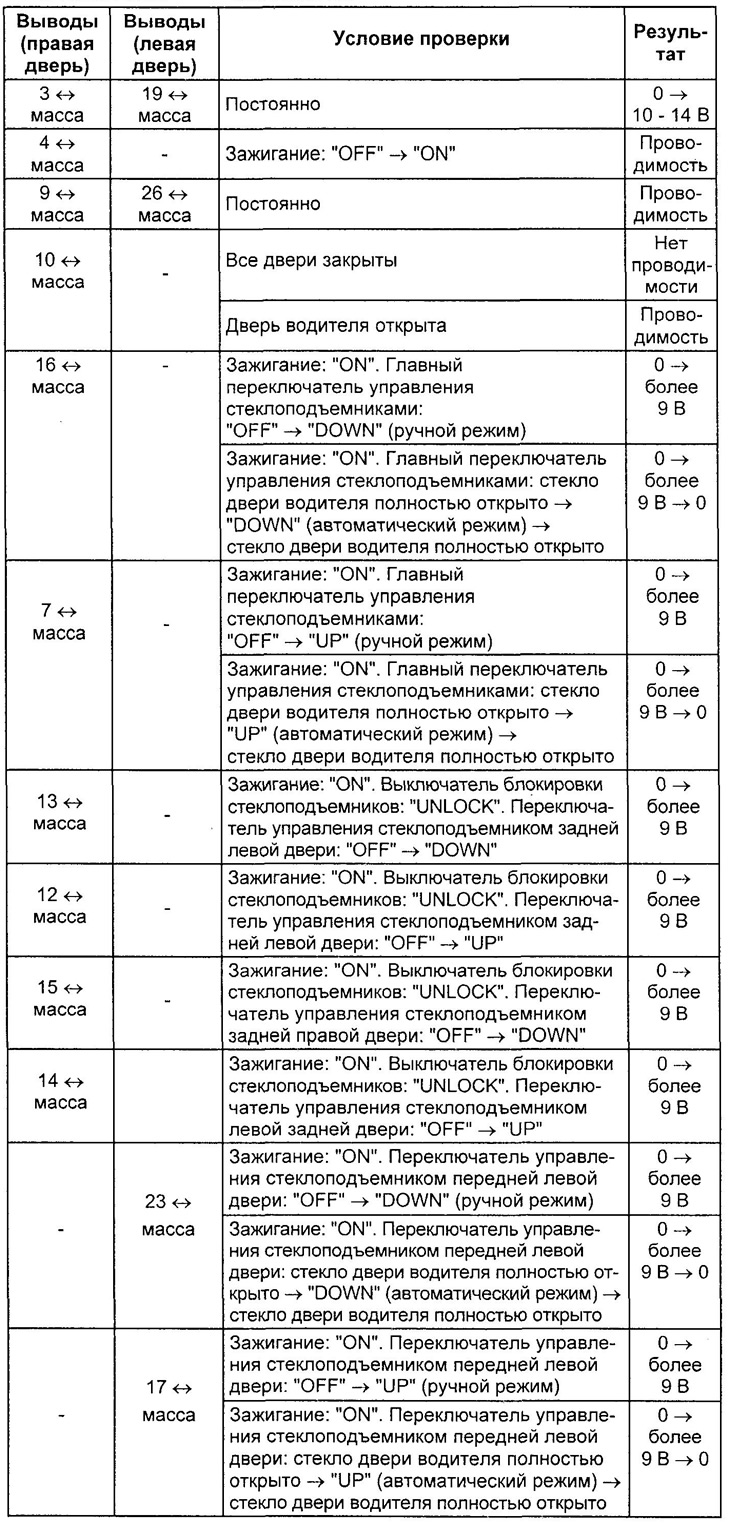
Table. Checking the voltage at the terminals of the connector of the main power window control switch on the driver's door (type 1).
Checking the power window switches on the passenger doors
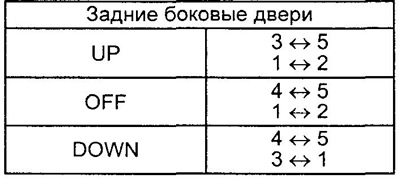
Check continuity between connector pins at different switch positions.
Checking the power window motor
Front doors.
Rear side doors.
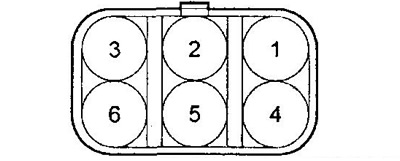
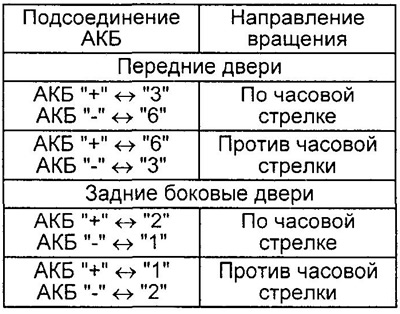
Apply battery voltage to the motor connector terminals and check that the motor armature turns smoothly and the direction of rotation matches that shown in the table below.
Checking the operation of the power windows
1. Function test (mode "MANUAL").
A) Turn on the ignition "ON".
b) Test the main power window switch by opening and closing each window with it.
V) Check the power window switches on the doors by opening and closing each window.
G) Set the power window lock switch to position "LOCK" and make sure the windows can only be opened and closed using the master switch on the driver's door.
2. Function test (mode "AUTO").
A) Turn on the ignition "ON".
b) Move the driver's door power window control switch to the "DOWN (AUTO) " and make sure the glass opens fully.
V) Move the driver's door power window control switch to the "UP (AUTO) " and make sure the glass closes completely.
G) During operation "DOWN (AUTO) " move the driver's window control switch to the position "UP" and make sure the glass stops (by holding the button for a long time in the position "UP" the window regulator will start to operate in the mode "MANUAL").
d) During operation "UP (AUTO) " move the power window button on the driver's door to the position "DOWN" and make sure the glass stops (by holding the button for a long time in the position "DOWN" the window regulator will start to operate in the mode "MANUAL").
e) Check the switches on the other doors in the same way.
3. Function test when the ignition is switched off.
A) Move the ignition key out of position "ON" into position "OFF" and check that the power windows can only be operated using the main switch on the driver's door. Open and close the driver's door and check that the power windows can be operated.
b) Move the ignition key out of position "ON" into position "OFF" and check that after approximately 45 seconds the power windows can be operated.
V) Move the key out of position "ON" into position "OFF", open the driver's door, turn the power window button on the main switch to "AUTOUP" or "AUTODOWN", close the driver's door and check that the glass closes completely or opens automatically. Make sure that the driver's door window regulator is not operated after the operation is completed.
Table. Check of tension on conclusions of a socket of switches of management of window regulators of forward doors (type 2).
4. Check the anti-pinch function.
Note:
- When checking, do not pinch your hands or other parts of the body, do not use unsuitable objects for testing.
- After the initialization procedure, move the glass several times to the upper and lower positions in the mode "MANUAL".
- The anti-pinch function is active when the window is raised in "AUTOUP" And "MANUAL UP".
A) Fully open the glass.
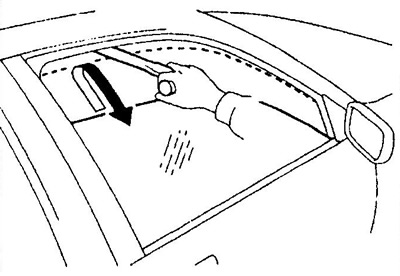
b) Install the hammer handle at the top of the window opening.
V) Fully close the glass in "AUTOUP". Glass after touching the handle should, without pinching it, begin to move down (about 200 mm).
G) When moving the glass down, move the button to the position "UP" and make sure the glass does not close.
5. Checking the illumination of the main power window control switch.
Turn the ignition on and check that the main power window control switch illuminates.
6. Checking the illumination of the power window switches on the passenger doors.
A) Move the power window lock switch to position "UNLOCK".
b) With the connector connected, turn on the ignition and make sure that the switch lights come on.

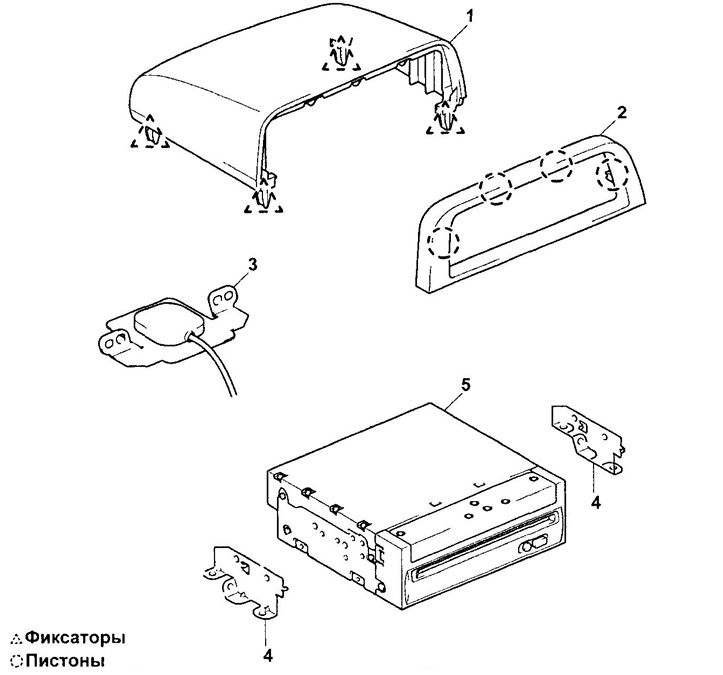
Location of components (navigation system).
1 - navigation system antenna,
2 - GPS receiver,
3 - fuse block (ACC 15A),
4 - relay block (BACKUP 10A).
GPS receiver.
1 - receiver cover,
2 - receiver trim,
3 - navigation system antenna,
4 - receiver mounting bracket,
5 - GPS receiver.