
Checking the internal and external antenna
Check the range of the internal and external antennas of the system according to the figure ''Checking the internal and external antennas'".
Diagnostics
Initial conditions:
- The master key is not inserted in the lock.
- All doors are closed.
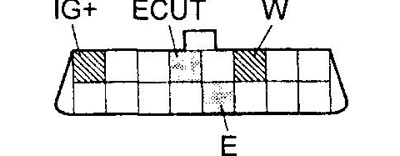
1. Connect the tester to the terminals "IG+" And "W" diagnostic connector as shown in the figure below.
2. Insert the master key into the lock.
3. Within 10 seconds, bridge the leads "ECUT" And "E" diagnostic socket.
 |  |
4. Within 10 seconds, move the ignition switch to the "LOCK".
5. The ignition switch should automatically move to the following positions: "LOCK" -> "UNLOCK".
6. Within 5 seconds, move the ignition switch to the "ON".
3. Read fault codes (see table "System Diagnostic Trouble Codes "KEY FREE"").
Note:
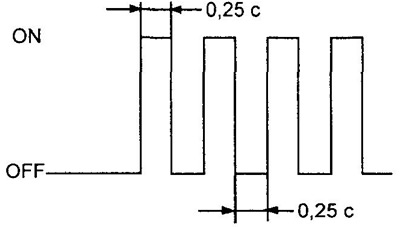
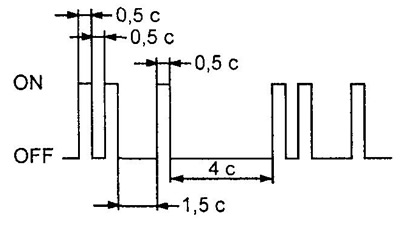
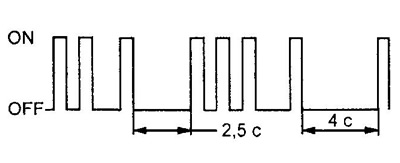
- In the absence of malfunctions, the indicator flashes continuously at a frequency of two flashes per second.
- If there is a fault, after a pause of 4 seconds, the output of codes begins.
- When the codes are displayed, the indicator flashes once per second. The first sequence of flashes corresponds to the first number of the diagnostic code, which consists of two numbers. After a pause of 1.5 seconds, a second sequence of flashes is displayed corresponding to the second number of the code (the figure shows an example of a code indication "21").
- If there are two or more fault codes, an interval of 2.5 seconds is set between them when outputting. The indication will start from the lowest number and continue upward (the figure shows an example of the indication of codes "21" And "31").
 |  |
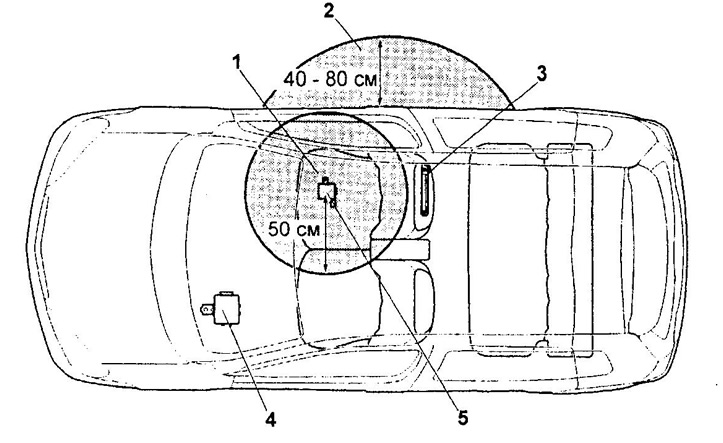
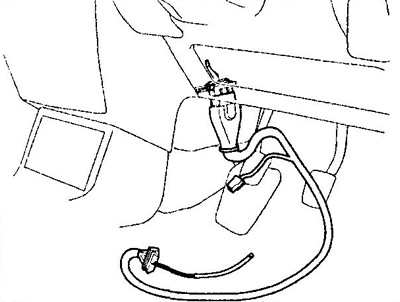
Checking the internal and external antenna.
1 - range of the internal antenna,
2 - range of the external antenna,
3 - external antenna,
4 - system tuner "KEY FREE",
5 - internal antenna.
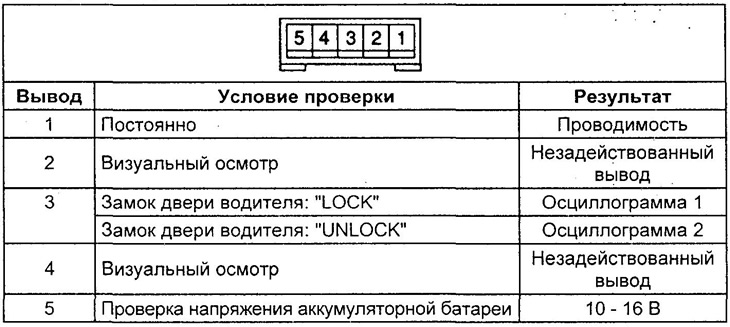
Table. Receiver check.
4. Erasing fault codes is done by removing the fuse "TAIL 40A" from the relay box.
Note: Do not disconnect the wire from the negative battery terminal. This may erase the diagnostic codes of other systems.