



Share information:
Brake system of the car Toyota Duet

Bleeding the brake system
Note: After any work involving air entering the brake system, bleed it. Caution: Do not allow brake fluid to come into contact with painted surfaces. If brake fluid does come into contact with a painted surface, wash it...
Note: After any work involving air entering the brake system, bleed it. Caution: Do not allow brake fluid to come into contact with painted surfaces. If brake fluid does come into contact with a painted surface, wash it...

Brake pedal
Checking and adjusting the brake pedal 1. Remove the floor mat. 2. Make sure the pedal height is adjusted as shown in the figure. Pedal height from floor covering: with manual transmission - 140-150 mm with automatic...
Checking and adjusting the brake pedal 1. Remove the floor mat. 2. Make sure the pedal height is adjusted as shown in the figure. Pedal height from floor covering: with manual transmission - 140-150 mm with automatic...

Checking and adjusting the parking brake
1. Check the travel of the parking brake lever. Pull the parking brake lever all the way and count the number of clicks. Nominal travel of the parking brake lever at a force of 196 N - 4-7 clicks 2. Make sure that the...
1. Check the travel of the parking brake lever. Pull the parking brake lever all the way and count the number of clicks. Nominal travel of the parking brake lever at a force of 196 N - 4-7 clicks 2. Make sure that the...

Checking the thickness of the brake pads
1. Measure the thickness of the front brake shoe linings. Minimum brake shoe lining thickness: 13 inch disk - 1.0 mm 14 inch disk - 1.5 mm Nominal thickness of brake shoe linings: 13 inch disc - 10.0 mm 14 inch disk -...
1. Measure the thickness of the front brake shoe linings. Minimum brake shoe lining thickness: 13 inch disk - 1.0 mm 14 inch disk - 1.5 mm Nominal thickness of brake shoe linings: 13 inch disc - 10.0 mm 14 inch disk -...

Master brake cylinder
Removal and installation Note: Carry out removal in accordance with the corresponding figure "Removing the master brake cylinder". Installation is carried out in the reverse order of removal. Tightening torques are...
Removal and installation Note: Carry out removal in accordance with the corresponding figure "Removing the master brake cylinder". Installation is carried out in the reverse order of removal. Tightening torques are...

Vacuum brake booster
Removal and installation Note: Carry out removal in accordance with the corresponding figure "Removing the brake booster". Installation is carried out in the reverse order of removal. Tightening torques are given in the...
Removal and installation Note: Carry out removal in accordance with the corresponding figure "Removing the brake booster". Installation is carried out in the reverse order of removal. Tightening torques are given in the...

Pressure regulator
Removal and installation Note: Carry out removal in accordance with the figure "Removing the pressure regulator". Installation is carried out in the reverse order of removal. Pressure regulator. Examination 1. Install...
Removal and installation Note: Carry out removal in accordance with the figure "Removing the pressure regulator". Installation is carried out in the reverse order of removal. Pressure regulator. Examination 1. Install...

Front brakes
Removal and installation Note: Carry out removal in accordance with the drawing "Front brakes". Installation is carried out in the reverse order of removal. Tightening torques are shown in the figure. Disassembly and...
Removal and installation Note: Carry out removal in accordance with the drawing "Front brakes". Installation is carried out in the reverse order of removal. Tightening torques are shown in the figure. Disassembly and...

Rear brakes
Removal and installation 1. When removing and installing, refer to the assembly drawings "Rear brakes". 2. Installation is carried out in the reverse order of removal. 3. After installation, fill the reservoir with...
Removal and installation 1. When removing and installing, refer to the assembly drawings "Rear brakes". 2. Installation is carried out in the reverse order of removal. 3. After installation, fill the reservoir with...

Parking brake
Removal and installation Note: When removing, refer to the drawings "Parking brake lever". Installation is carried out in the reverse order of removal. Parking brake lever. 1 - center console, 2 - parking brake lever...
Removal and installation Note: When removing, refer to the drawings "Parking brake lever". Installation is carried out in the reverse order of removal. Parking brake lever. 1 - center console, 2 - parking brake lever...

Description of the ABS diagnostic system
The electronic control unit has a failure protection system that can detect a malfunction. When a malfunction is detected, the electronic control unit switches off the ABS system and the ABS indicator lights up on the...
The electronic control unit has a failure protection system that can detect a malfunction. When a malfunction is detected, the electronic control unit switches off the ABS system and the ABS indicator lights up on the...

Checking the ABS system
1. Make sure the battery voltage is (with ignition off) corresponds to the nominal value. Nominal voltage - 10-14 V 2. Check the ABS indicator. a) Turn on the ignition. b) Make sure the indicator lights up for three...
1. Make sure the battery voltage is (with ignition off) corresponds to the nominal value. Nominal voltage - 10-14 V 2. Check the ABS indicator. a) Turn on the ignition. b) Make sure the indicator lights up for three...

Resetting ABS system fault codes
1. (Using the brake pedal) a) Short-circuit the "ECUT" and "E" terminals of the diagnostic connector. b) Turn on the ignition. c) Press the brake pedal eight or more times within five seconds to clear the fault codes...
1. (Using the brake pedal) a) Short-circuit the "ECUT" and "E" terminals of the diagnostic connector. b) Turn on the ignition. c) Press the brake pedal eight or more times within five seconds to clear the fault codes...

Diagnostics of speed sensors and deceleration sensor
Note: When diagnosing speed sensors, the brake system operates as normal (ABS does not work). 1. Make sure the battery voltage is (with ignition off) corresponds to the nominal value. Nominal voltage - 10-14 V 2. Check...
Note: When diagnosing speed sensors, the brake system operates as normal (ABS does not work). 1. Make sure the battery voltage is (with ignition off) corresponds to the nominal value. Nominal voltage - 10-14 V 2. Check...

Removal and installation the pressure modulator
Note: Carry out removal in accordance with the drawing "Pressure modulator". When disconnecting the pressure modulator connector, disconnect the retainer. Installation is carried out in the reverse order of removal....
Note: Carry out removal in accordance with the drawing "Pressure modulator". When disconnecting the pressure modulator connector, disconnect the retainer. Installation is carried out in the reverse order of removal....

Front wheel speed sensors
Examination 1. Measure the resistance between the connector terminals of each sensor. Nominal resistance - 1.25 - 1.55 kOhm If the value does not correspond to the nominal value, replace the sensor. Pressure modulator....
Examination 1. Measure the resistance between the connector terminals of each sensor. Nominal resistance - 1.25 - 1.55 kOhm If the value does not correspond to the nominal value, replace the sensor. Pressure modulator....

Removal and installation the deceleration sensor
Note: Remove and install the sensor in accordance with the figure "Deceleration sensor". When installing, orient the sensor as shown in the figure. Slowdown sensor.
Note: Remove and install the sensor in accordance with the figure "Deceleration sensor". When installing, orient the sensor as shown in the figure. Slowdown sensor.

Rear wheel speed sensors
Examination 1. Measure the resistance between the sensor connector terminals. Nominal resistance - 1.0 -1.8 kOhm If the value does not correspond to the nominal value, replace the sensor. Front wheel speed sensor. 1 -...
Examination 1. Measure the resistance between the sensor connector terminals. Nominal resistance - 1.0 -1.8 kOhm If the value does not correspond to the nominal value, replace the sensor. Front wheel speed sensor. 1 -...

Checking the ABS circuit
Disconnect the ABS electronic control unit connector (on the pressure modulator) and measure the resistance and voltage between the terminals of the wire harness connector (see the table "Circuit between the terminals...
Disconnect the ABS electronic control unit connector (on the pressure modulator) and measure the resistance and voltage between the terminals of the wire harness connector (see the table "Circuit between the terminals...

Checking vehicle handling improvement systems
1. Make sure the battery voltage is (with ignition off) corresponds to the nominal value. Nominal voltage - 10 - 14 V 2. Check the ABS and slip indicators. a) Turn on the ignition. b) Make sure the indicator lights up...
1. Make sure the battery voltage is (with ignition off) corresponds to the nominal value. Nominal voltage - 10 - 14 V 2. Check the ABS and slip indicators. a) Turn on the ignition. b) Make sure the indicator lights up...

Resetting fault codes
1. (Using the brake pedal) a) Short-circuit the "ECUT" and "E" terminals of the diagnostic connector. b) Turn on the ignition. c) Press the brake pedal eight or more times within five seconds to clear the fault codes...
1. (Using the brake pedal) a) Short-circuit the "ECUT" and "E" terminals of the diagnostic connector. b) Turn on the ignition. c) Press the brake pedal eight or more times within five seconds to clear the fault codes...

Diagnostics of sensors of systems for improving vehicle controllability
Note: When diagnosing speed sensors, the brake system operates as normal (vehicle handling enhancement systems not working). 1. Conduct diagnostics of the vehicle's control improvement systems. 2. If there is no...
Note: When diagnosing speed sensors, the brake system operates as normal (vehicle handling enhancement systems not working). 1. Conduct diagnostics of the vehicle's control improvement systems. 2. If there is no...

Pressure modulator — diagnostics
Removal and installation Note: Carry out removal in accordance with the drawing "Pressure modulator". Installation is carried out in the reverse order of removal. Tightening torques are shown in the figure. After...
Removal and installation Note: Carry out removal in accordance with the drawing "Pressure modulator". Installation is carried out in the reverse order of removal. Tightening torques are shown in the figure. After...

Control relays — diagnostics
1. Make sure there is conductivity between terminals "1" - "3" and no conductivity between terminals "2" and "4". 2. Apply battery voltage to terminals "1" and "2". 3. Make sure there is conductivity between terminals...
1. Make sure there is conductivity between terminals "1" - "3" and no conductivity between terminals "2" and "4". 2. Apply battery voltage to terminals "1" and "2". 3. Make sure there is conductivity between terminals...
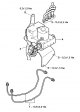
Diagnostics of front wheel speed sensors
Examination 1. Measure the resistance between the connector terminals of each sensor. Nominal resistance - 1.25 - 1.55 kOhm If the value does not correspond to the nominal value, replace the sensor. 2. Check for...
Examination 1. Measure the resistance between the connector terminals of each sensor. Nominal resistance - 1.25 - 1.55 kOhm If the value does not correspond to the nominal value, replace the sensor. 2. Check for...

Rear Wheel Speed Sensors — Diagnostics
Examination 1. Measure the resistance between the sensor connector terminals. Nominal resistance - 1.0 - 1.8 kOhm If the value does not correspond to the nominal value, replace the sensor. 2. Check for conductivity...
Examination 1. Measure the resistance between the sensor connector terminals. Nominal resistance - 1.0 - 1.8 kOhm If the value does not correspond to the nominal value, replace the sensor. 2. Check for conductivity...

Brake Master Cylinder Pressure Sensors
Removal and installation Note: Carry out removal in accordance with the figure "Pressure sensors in the master brake cylinder". Installation is carried out in the reverse order of removal. Pressure sensors in the master...
Removal and installation Note: Carry out removal in accordance with the figure "Pressure sensors in the master brake cylinder". Installation is carried out in the reverse order of removal. Pressure sensors in the master...

ABS Circuit Check — Diagnostics
1. Disconnect the ABS control unit connector and measure the resistance and voltage between the terminals of the wire harness connector (see the table "Circuit between the terminals of the control unit wire harness...
1. Disconnect the ABS control unit connector and measure the resistance and voltage between the terminals of the wire harness connector (see the table "Circuit between the terminals of the control unit wire harness...

This section is available on: russian, bulgarian, belarusian, ukrainian, serbian, croatian, romanian, polish, slovak, hungarian
Similar sections for other Toyota models
➥ Brake system Toyota 4Runner N120 (1989-1995)
➥ Brake system Toyota Cruiser 70 (1985-1996, diesel)
➥ Brake system Toyota Highlander 1 (2000-2007, petrol)
➥ Brake system Toyota RAV 4 XA20 (2000-2005)
➥ Brake system Toyota Corolla Verso 3 (2004-2009)
➥ Brake system Toyota Corona T190 (1992-1997)
Link in different formats to this article
TEXTHTMLBB Code
- General information
- User manual
- Maintenance
- Power unit
- Petrol engines 1.0 l
- Petrol engines 1.3 l
- Engine overhaul
- Cooling system
- Lubrication system
- Fuel injection system
- Starting and charging system
- Transmission
- Clutch
- Mechanical gearbox
- Automatic gearbox
- Drive shafts and cardan
- Chassis, running gear
- Car suspension
- Steering
- Brake system
- Body and interior
- Body elements
- Heating and air conditioning
- SRS security system
- Electrical equipment
- Equipment and devices
- Electrical circuits
- Petrol engines «Y»
- Checks and adjustments
- Overhaul engine
- Cooling and lubrication system
- Fuel system
- Starting and charging system
- Ignition system
- Diesel engines «L»
- Engine repair
- Cooling and lubrication system
- Fuel system
- Starting and charging system
- Transmission
- Clutch
- Manual gearbox
- Cardan shaft
- Chassis, running gear
- Car suspension
- Brake system
- Steering
- Electrical equipment and body
- Body elements
- Equipment and devices
- Electrical diagrams