



Contents: Removal the slave cylinder ↓ Disassembling the slave cylinder ↓ Checking the slave cylinder ↓ Assembly of the working cylinder ↓ Installing the slave cylinder ↓
Removal the slave cylinder
1. Disconnect the clutch hydraulic line.
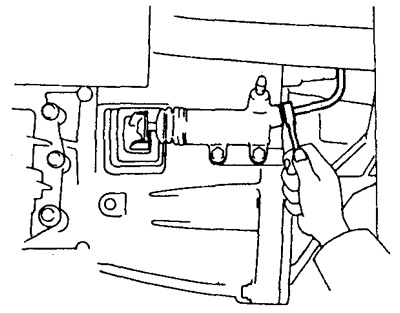
2. Unscrew the two bolts and remove the slave cylinder.
Disassembling the slave cylinder
1. Pull out the rod.
2. Remove the cover.
3. Remove the piston from the working cylinder body.
Note: Compressed air can be used to remove the piston.
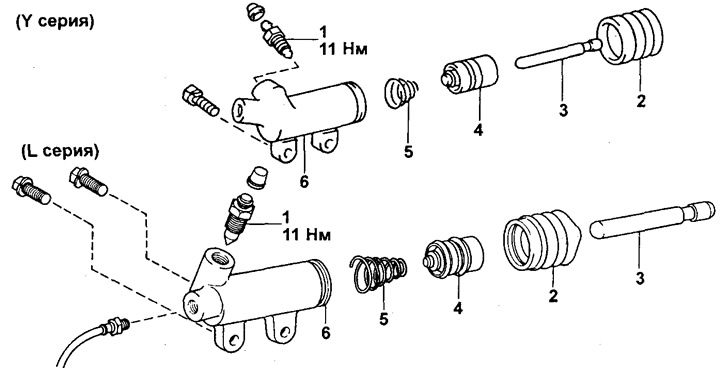
Clutch slave cylinder.
1 - Drain plug,
2 - Cover,
3 - Rod,
4 - Piston,
5 - Spring,
6 - Working cylinder.
Checking the slave cylinder
1. Inspect the working cylinder mirror for scoring or signs of corrosion.
2. Inspect the piston and seals for wear, scoring, cracks or swelling.
Note: Parts must be replaced as a set.
3. Inspect the stem for wear or damage.
Assembly of the working cylinder
1. Apply grease to the piston as shown in the figure.
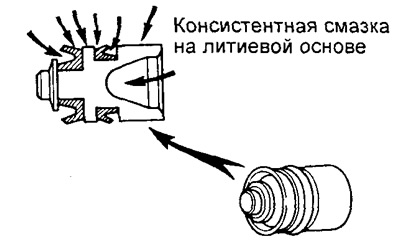
2. Insert the piston.
3. Put on the cover and insert the rod.
Installing the slave cylinder
1. Install the slave cylinder and tighten the two bolts that secure it.
2. Connect the clutch hydraulic line.
3. Tighten the slave cylinder mounting bolts.
- Tightening torque - 12 Nm
4. Bleed the clutch hydraulic drive.