
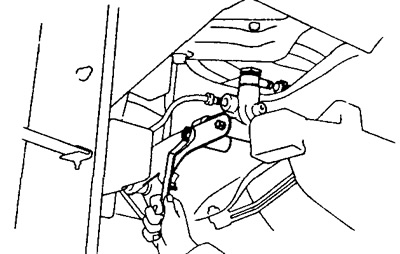
Removing the Master Cylinder
1. Pump out the liquid
2. Remove cotter pin and pull out fork pin.
3. Disconnect the hose.
4. Disconnect the clutch hydraulic pipe.
5. Turn away bolts of fastening and remove the main cylinder.
Master cylinder disassembly
1. Remove the pusher.
A) Pull off the cover and use the ring removal and installation pliers to remove the circlip.
b) Pull out the pusher together with the washer.
2. Use compressed air to push the piston out of the cylinder.
Warning: A pressurized piston may fly out of the master cylinder.
Checking the Master Cylinder
1. Inspect the master cylinder mirror for nicks or corrosion.
2. Inspect the piston and cups for wear, scoring, cracks, or swelling.
If only one of the parts requires replacement, the cylinder parts must be replaced as a set.
3. Inspect the tappet for wear or damage.
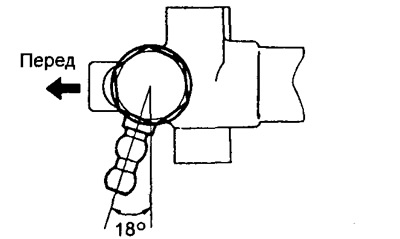
Master cylinder assembly
1. Apply grease as shown.
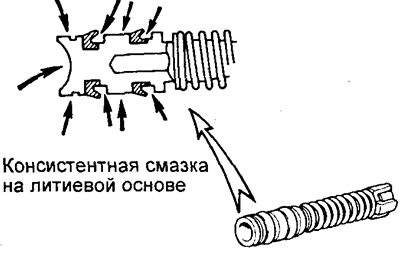
2. Insert the piston into the cylinder.
3. Establish a pusher in gathering with a lock ring.
4. Install the fitting as shown in the figure.
5. Tighten the bypass bolt.
- Tightening torque - 54 Nm
Master cylinder installation
1. Establish the main cylinder and tighten bolts of its fastening.
2. Connect the clutch hydraulic pipe.
3. Connect the hose.
4. Tighten the cylinder mounting bolts.
- Tightening torque - 13 Nm
5. Install the pin and insert the cotter pin.
6. Bleed the clutch hydraulics.
7. Check the system for leaks.
8. Check and adjust the position of the clutch pedal.
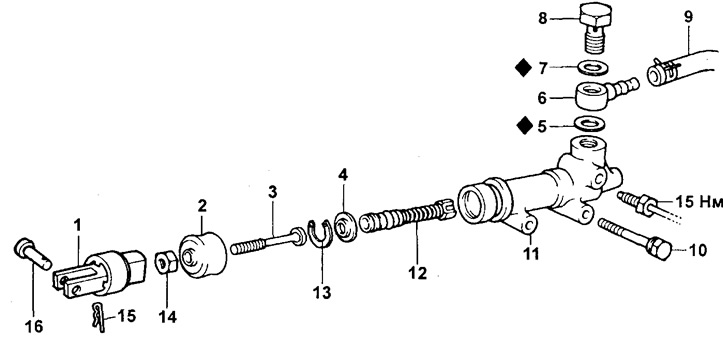
Clutch master cylinder.
1 - Fork,
2 - Cover,
3 - Pusher,
4 - Washer,
5 and 7 - Gasket,
6 - Fitting,
8 - Bypass bolt,
9 - Hose,
10 - Mounting bolt,
11 - Master cylinder housing,
12 - Piston,
13 - Retaining ring,
14 - Nut,
15 - Cotter pin,
16 - Pin.