
Removing
Remove door trim.
Remove the glass seals by unscrewing them from the brackets.
Lower the glass with the handle and remove the rubber elements of the guide glasses in the window opening.
Disconnect the lock levers from the door lock, see also fig. G-4842.
Disconnect the glass from the power window by removing the two screws.
Tilt the glass in front and take it out of the opening.
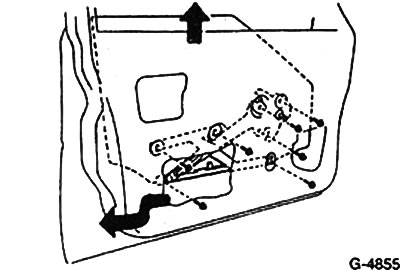
Unscrew the 5 screws securing the power window on the door panel. Remove the 6 screws securing the power window. Disconnect electrical wire. Remove the power window from the bottom cutout of the door, see illustration.
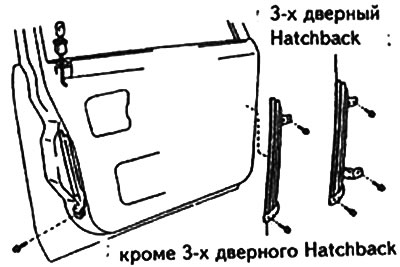
Loosen the screws securing the front and rear window guides and remove.
Installation
Install and secure the screw guides.
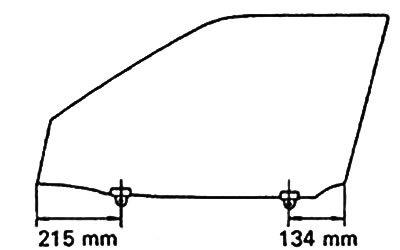
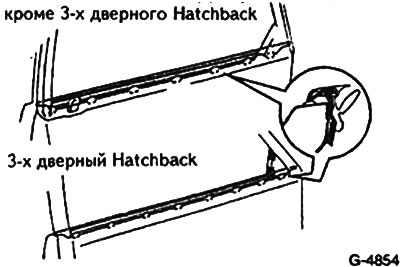
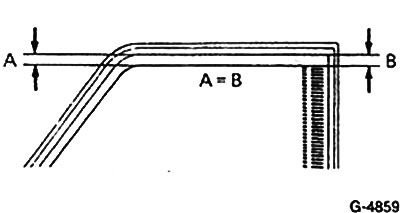
If a new glass is installed, remove the holder from the old one and install it with a rubber mallet on the new one. Shown in fig. G-4857 mounting dimensions of holders correspond to models from 5/87 of manufacture (except 3-door Compact) and other models must be transferred to the new glass old sizes.
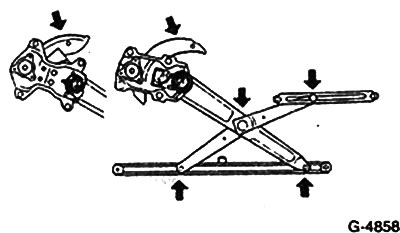
Lubricate the window regulator with grease at the points indicated by the arrows. Caution: Do not apply grease to the power window spring.
Insert window lifter into door and secure with bolts without tightening.
Insert the glass into the door and secure it to the power window with two screws.
Connect the plug connection of the power window drive.
Connect the lock to the door lock.
Install the glass guide rubber pieces into the door cutout.
Window glass adjustment
Raise the glass up and moving the power window to ensure that the distance between the glass and the frame of the door panel is uniform. In this position, fix the window regulator with screws.
Install the seal with brackets on the opening of the door panel and press it down.
Install the door trim.