



Contents: Removal the upper radiator bracket ↓ Removal the expansion tank of the…↓ Removal the relay block #2 in the…↓ Removal the radiator assembly ↓ Installing the radiator assembly ↓
Drain the coolant.
Disconnect the negative terminal from the battery post.
Remove the upper radiator shroud.
Removing the hood lock assembly
Disconnect the breather hose.
Disconnect the 2 horn connectors.
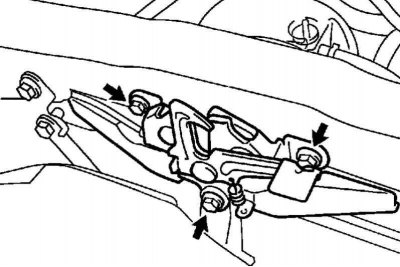
Fig. 2.421. Fastening the hood lock
Remove 3 bolts and hood lock assembly, then disconnect hood lock drive cable (fig. 2.421).
Removal the upper radiator bracket
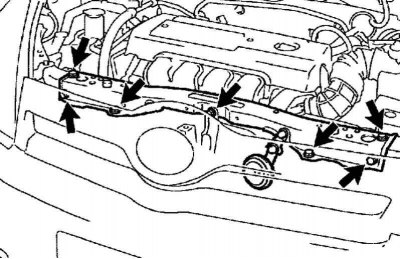
Fig. 2.416. Fastening the upper radiator bracket
Remove 7 bolts and upper radiator bracket (see fig. 2.416).
Removal the expansion tank of the cooling system as a whole
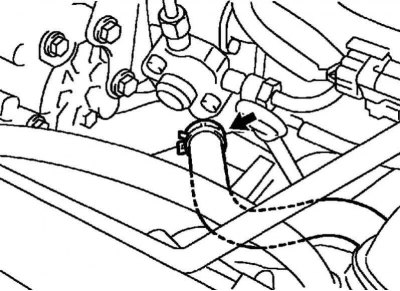
Fig. 2.422. Coolant bypass hose clamp No.2
Disconnect coolant bypass hose #2 (fig. 2.422).
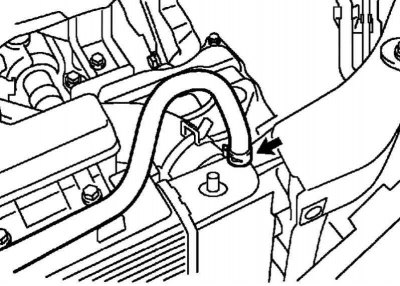
Fig. 2.423. Coolant bypass hose
Disconnect the coolant bypass hose (fig. 2.423).
Remove 2 bolts and remove the expansion tank assembly.
Removal the relay block #2 in the engine compartment
Disconnect the 2 cooling fan connectors and the wiring harness clamp.
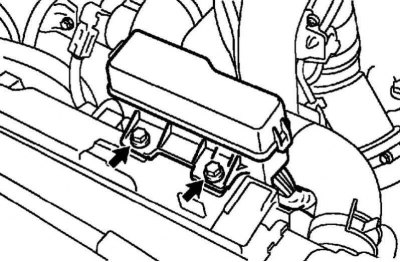
Fig. 2.424. Fastening of relay block No.2 of the engine compartment
Remove 2 bolts, then remove engine compartment relay box #2 (fig. 2.424).
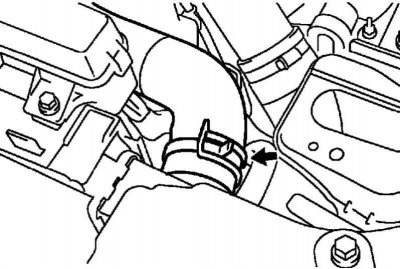
Fig. 2.425. Radiator inlet hose
Disconnect the radiator inlet hose (fig. 2.425).
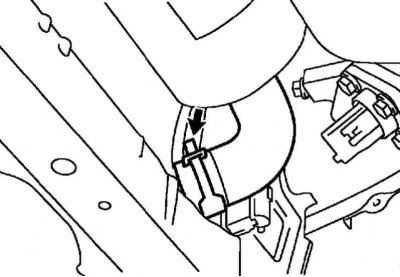
Fig. 2.426. Radiator outlet hose
Disconnect the radiator outlet hose (fig. 2.426).
Removal the radiator assembly
Disconnect the temperature sensor connector.
Remove 2 bolts.
Remove the 2 snap fasteners, then remove the cooling fan shroud with the electric motor.
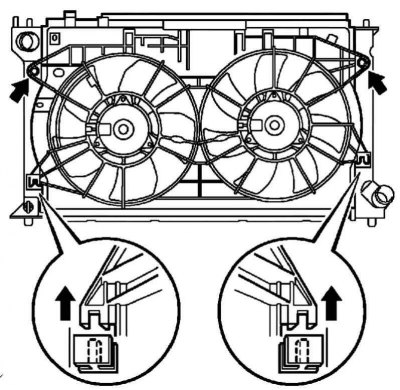
Fig. 2.427. Radiator fastening
Remove the radiator assembly from the vehicle (fig. 2.427).
Installing the radiator assembly
Install the radiator assembly onto the vehicle.
Install the fan shroud with the electric motor and secure with 2 bolts.
Tightening torque: 7.5 Nm.
Connect the temperature sensor connector.
Connect the radiator outlet hose.
Connect the radiator inlet hose.
Install relay box #2 in the engine compartment.
Tightening torque: 5.3 Nm.
Install the expansion tank of the cooling system as an assembly.
Tightening torque: 6.0 Nm.
Note: Install the remaining components in the reverse order of removal.
Fill with coolant.
Check for coolant leaks.