



Contents: Removal the rear exhaust pipe…↓ Removal the front exhaust pipe…↓ Removal the exhaust pipe hanger #4 ↓ Removal the exhaust pipe hanger #5 ↓ Installing Exhaust Pipe Hanger #5 ↓ Installing Exhaust Pipe Hanger #4 ↓ Installing the front exhaust pipe…↓ Installing the rear exhaust pipe…↓ Table 2.43. Technical…↓ Table 2.45. Nominal tightening…↓
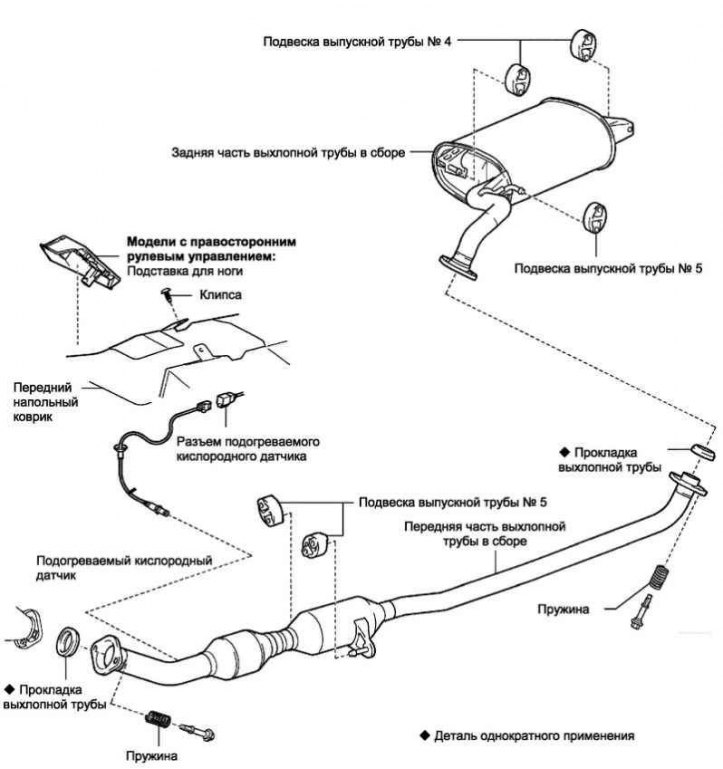
Fig. 2.612. Exhaust pipe assembly (1ZZ-FE/ 3ZZ-FE)
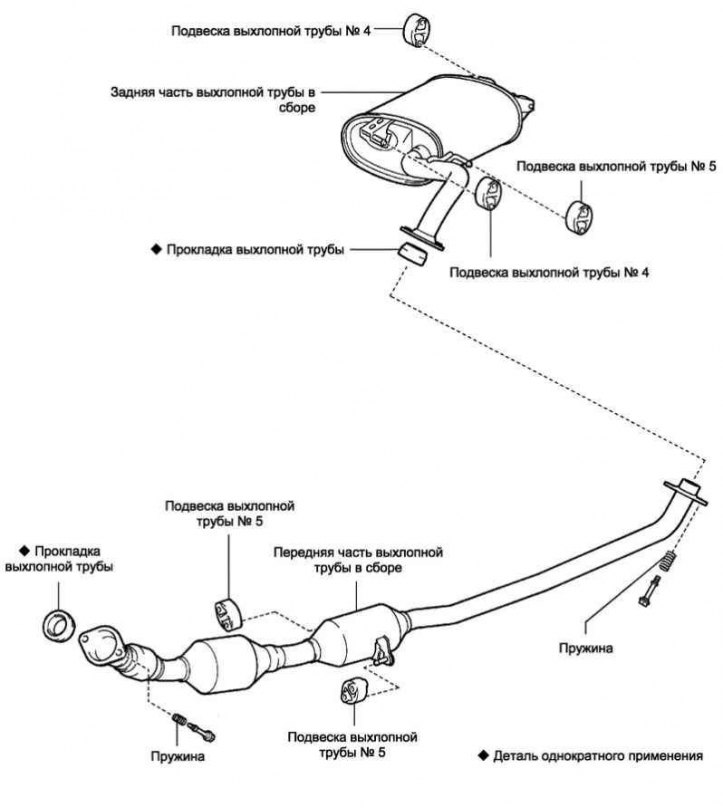
Fig. 2.613. Exhaust pipe assembly (1CD-FTV)
Disconnect the negative terminal from the battery post.
Remove the front footrest.
Remove the heated oxygen sensor.
Removal the rear exhaust pipe assembly
Remove 2 bolts and 2 springs.
Remove the rear part of the exhaust pipe from the 2 hangers #4 and from hanger #5.
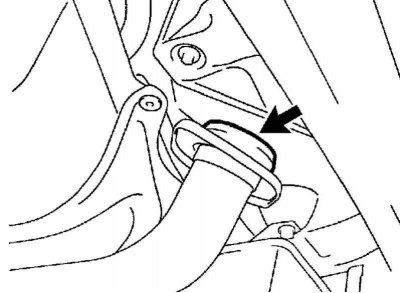
Fig. 2.614. Gasket of the front part of the exhaust pipe
Remove the gasket from the front of the exhaust pipe (fig. 2.614).
Removal the front exhaust pipe assembly
Remove 2 bolts and 2 springs.
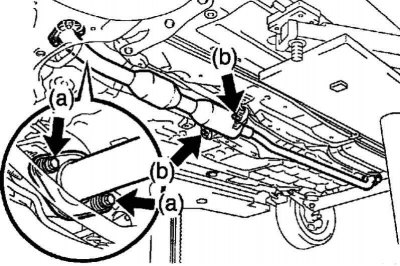
Fig. 2.615. Gasket of the front part of the exhaust pipe
Remove the front part of the exhaust pipe from the 2 hangers #5 (fig. 2.615).
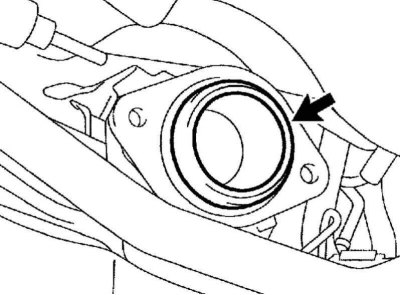
Fig. 2.616. Exhaust manifold gasket
Remove the gasket from the exhaust manifold (fig. 2.616).
Removal the exhaust pipe hanger #4
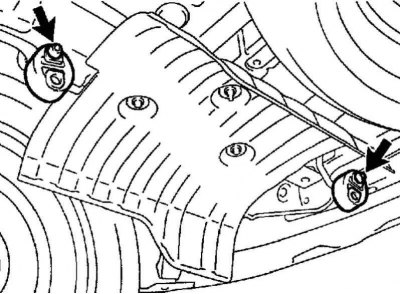
Fig. 2.617. Exhaust pipe hangers No.4
Remove 2 exhaust pipe hangers #4 from the body (fig. 2.617).
Removal the exhaust pipe hanger #5
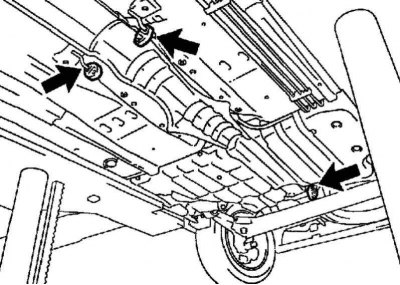
Fig. 2.618. Exhaust pipe hangers No.5
Remove 3 exhaust pipe hangers #5 from the body (fig. 2.618).
Installing Exhaust Pipe Hanger #5
Install 3 exhaust pipe hangers No.5 on the body.
Installing Exhaust Pipe Hanger #4
Install 2 exhaust pipe hangers No.4 on the body.
Installing the front exhaust pipe assembly
Check the length of the spring in its free state.
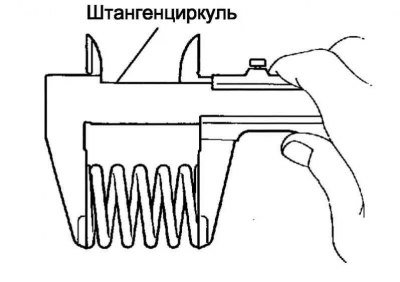
Fig. 2.619. Measuring the length of a spring
[The material is republished from an online website: Toyotaman.ru]
Use a caliper to measure the length of the spring in its free state (fig. 2.619).
Minimum length: 41.5 mm.
If the free length of the spring is less than the minimum permissible value, the spring should be replaced.
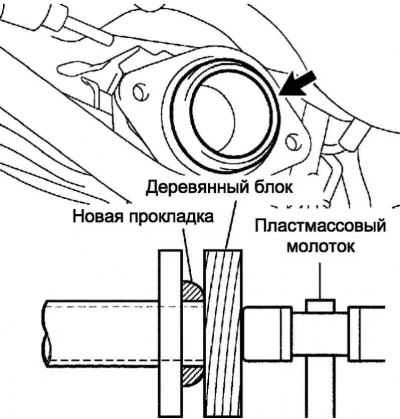
Fig. 2.620. Diagram of pressing in the exhaust manifold gasket
Using a wood block and a plastic hammer, press the new gasket in until it is flush with the exhaust manifold (fig. 2.620).
Note: It is necessary to ensure that the gasket is installed in the correct position.
Note: It is not permitted to use the removed gasket.
Note: Do not press the gasket into the exhaust manifold by installing the front part of the exhaust pipe onto the exhaust manifold.
Install the front part of the exhaust pipe on hangers No.5.
Tighten the 2 bolts with springs.
Tightening torque: 43 Nm.
Installing the rear exhaust pipe assembly
Check the length of the spring in its free state.
Use a caliper to measure the length of the spring in its free state.
Minimum length: 38.5 mm.
If the free length of the spring is less than the minimum permissible value, the spring should be replaced.
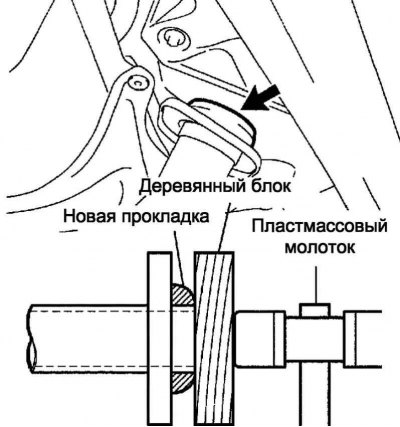
Fig. 2.621. Diagram of pressing in the gasket of the front part of the exhaust pipe
Using a wood block and a plastic hammer, press the new gasket into the front of the exhaust pipe (fig. 2.621).
Note: It is necessary to ensure that the gasket is installed in the correct position.
Note: It is not permitted to use the removed gasket.
Note: Do not press the gasket into the exhaust manifold by installing the front part of the exhaust pipe onto the exhaust manifold.
Install the rear part of the exhaust pipe on 2 hangers #4 and hanger #5.
Tighten the 2 bolts with springs.
Tightening torque: 43 Nm.
Install a heated oxygen sensor.
Connect the negative terminal to the battery terminal.
Tightening torque: 5.4 Nm.
Check for exhaust leaks from the exhaust system.
Install the footrest.
Table 2.43. Technical characteristics for testing and adjustment work (engines 1ZZ-FE / 3ZZ-FE)

Table 2.45. Nominal tightening torques (1ZZ-FE / 3ZZ-FE)
