
Remove the lower left engine shield.
Remove the top radiator shroud.
Remove the grille.
Remove the front bumper cover.
Removing the intercooler duct
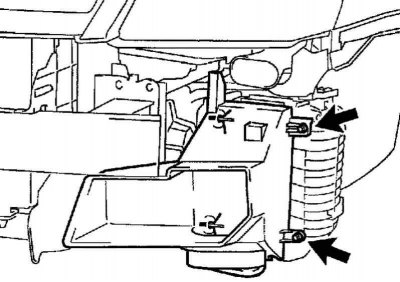
Pic. 2.431. cooler duct mount
Turn out 2 bolts and remove a cooler air duct (pic. 2.431).
Removing the intercooler assembly
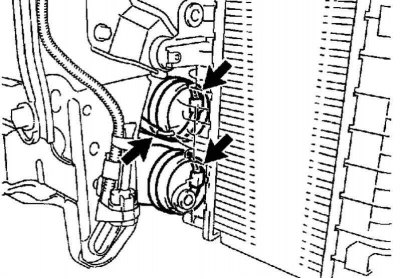
Pic. 2.432. Air hose clamps #1 and #2
Disconnect the vacuum hose and air hoses #1 and #2 from the intercooler (pic. 2.432).
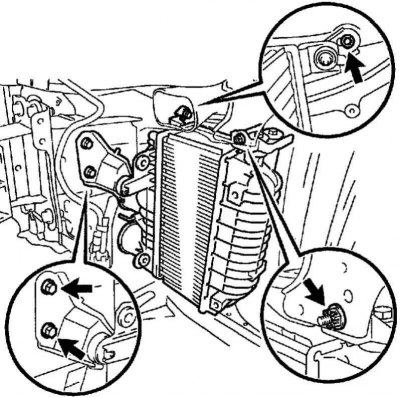
Pic. 2.433. Fastening of an intercooler assy
Remove the 3 bolts and nut, then remove the intercooler assembly (pic. 2.433).
Installing the intercooler assembly
Install the intercooler assembly and secure with 3 bolts and a new nut.
Tightening torque: 7.0 Nm.
Connect the #1 and #2 vacuum hoses to the intercooler.
Pic. 2.434. Clamp installation diagram
Establish an air hose and fix it collars, as it is shown in drawing 2.434.
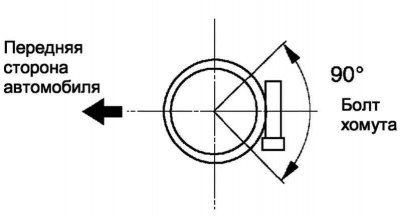
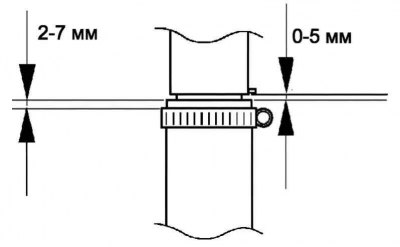
Pic. 2.435. Clamp tightening scheme
Tighten the hose clamps, as shown in Figure 2.435.
Tightening torque: 6.0 Nm.
Installing the intercooler duct
Insert the protruding part of the air duct into the concave part of the intercooler, then fix with 2 bolts.
Tightening torque: 5.0 Nm.
Install the front bumper cover.
Install the grille.
Install the upper radiator shroud.
Install the lower left engine shield.
Connect the negative terminal to the battery terminal.
Tightening torque: 5.4 Nm.