



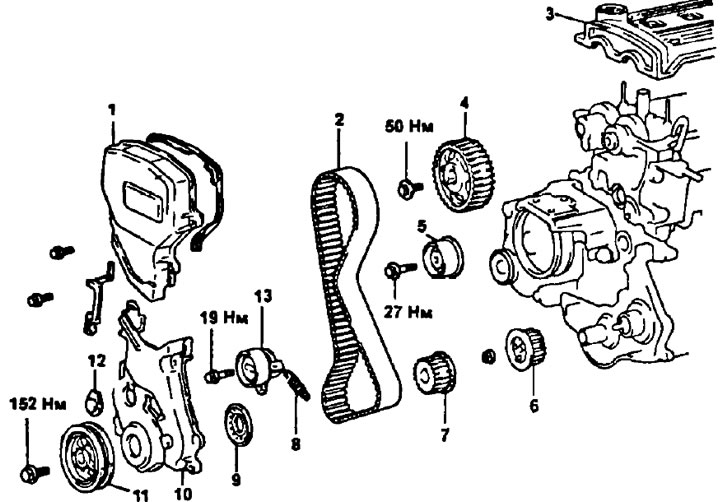
Parts for removal and installation.
1 - timing belt cover No.2T, 2 - timing belt, 3 - cylinder head cover, 4 - camshaft toothed pulley, 5 - intermediate pulley, 6 - oil pump drive pulley, 7 - crankshaft toothed pulley, 8 - tension spring. 9 - timing belt guide, 10 - timing belt cover No.1, 11 - crankshaft pulley, 12 - timing belt cover No.3, 13 - tension roller.
Installing the timing belt
1. Install the oil pump pulley.
- a) Align the pulley and shaft profiles and install the pulley.
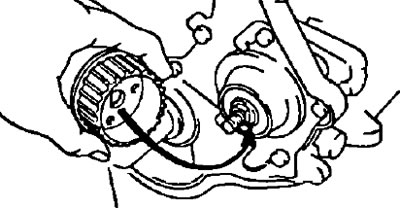
- 6) Tighten the oil pump pulley mounting nut.
- Tightening torque - 36 Nm
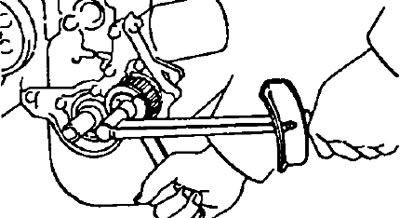
2. Install the crankshaft timing pulley.
- a) Align the dowel pin on the crankshaft with the recess in the pulley.
- b) Install the crankshaft timing belt guide pulley inside.
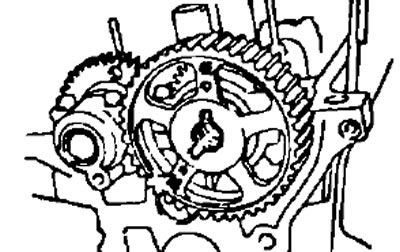
- c) Hold the camshaft with one wrench and tighten the pulley mounting bolt with another wrench
- Tightening torque - 50 Nm
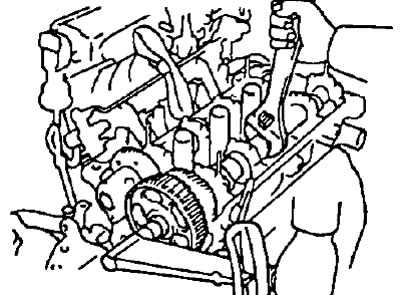
3. Install the crankshaft timing pulley.
- a) Align the dowel pin on the crankshaft with the recess in the pulley.
- b) Install the crankshaft timing belt guide pulley inside.
- c) Turn the crankshaft by the pulley bolt and align the timing marks on the crankshaft toothed pulley and the oil pump housing.
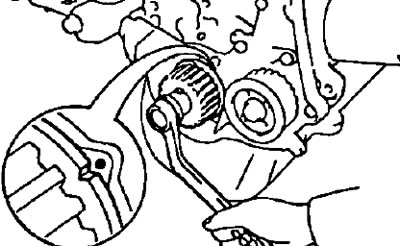
4. Install the idler pulley by tightening the bolt.
- Tightening torque - 27 Nm
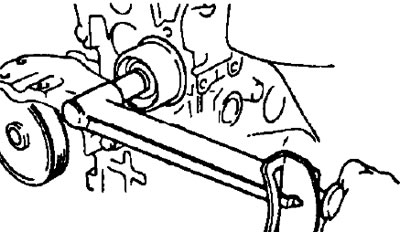
5. Temporarily install the tension roller and tension spring
- a) Install the tensioner roller and bolt. Do not tighten the bolt.
- b) Install the tension spring.
- c) Press the tensioner roller to the left as far as possible and tighten the bolt.
Note: Remove any oil or water from the crankshaft pulley, oil pump pulley, tensioner pulley and idler pulley.
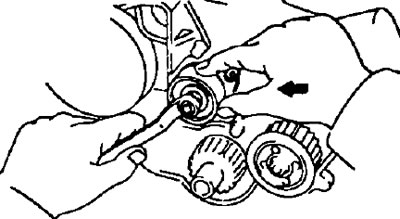
Note: The engine must be cold.
6. Install the timing belt onto the crankshaft sprocket, oil pump pulley, tension roller and idler pulley.
Note: When reusing the timing belt, align the marks made during removal and install the belt with the arrow pointing in the direction of crankshaft rotation.
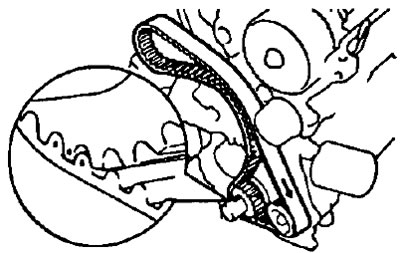
7. Install the timing belt guide with the front side facing out.
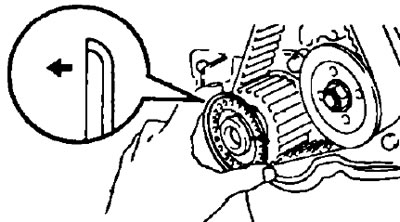
8. Install timing belt cover No.1
- a) Install the gasket on the timing belt cover.
- b) Install the timing belt cover by tightening the three bolts.
9. Install the crankshaft pulley.
- a) Align the pulley key with the pulley keyway and install the pulley
- b) Tighten the pulley bolt.
- Tightening torque - 152 Nm
10. Set the piston of cylinder No.1 to TDC of the compression stroke.
- a) Turn the crankshaft pulley and align its mark with the installation mark "0" on the timing belt cover No.1
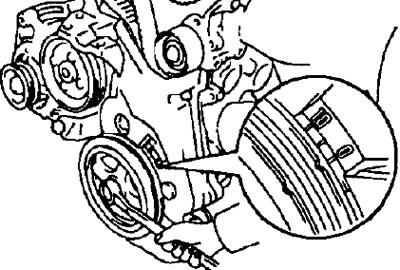
- b) Turn the camshaft and align the hole in the camshaft toothed pulley with the timing mark on the bearing cap.
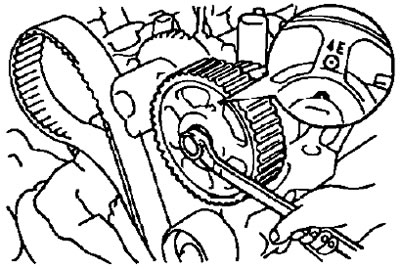
11. Install the timing belt.
Note: When reusing the timing belt, first align the marks on the belt and the camshaft sprocket.
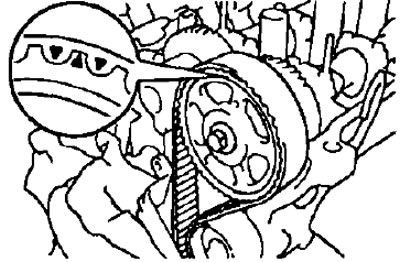
Install the timing belt and check that there is tension between the crankshaft sprocket, oil pump sprocket and camshaft sprocket.
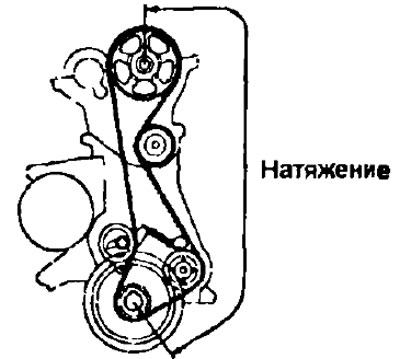
12. Check the valve timing.
- a) Loosen the tension roller bolt until the tensioner roller moves under the action of the spring.
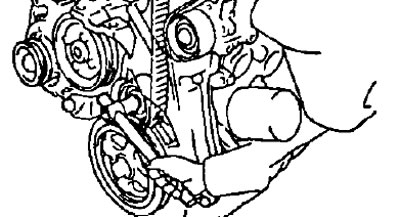
- 6) Turn the crankshaft pulley two turns from TDC to TDC clockwise.
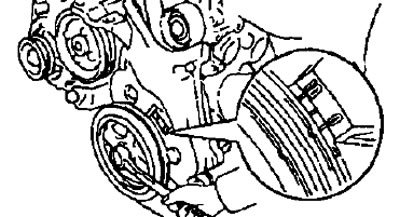
- c) Check that the timing marks on each pulley are aligned as shown in the figure.
- If the timing marks are not aligned, remove the timing belt and reinstall it.
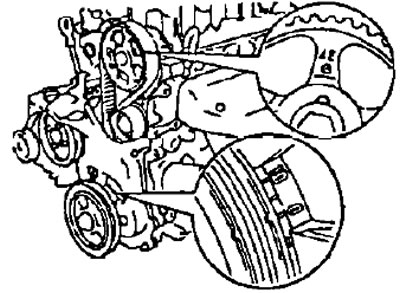
- d) Tighten the tensioner roller mounting bolt No.1.
- Tightening torque - 19 Nm
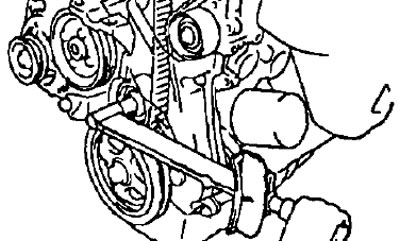
13. Install timing belt cover No.3.
14. Install timing belt cover #2 with gasket and tighten four bolts.
15. Install the cylinder head cover
- a) Apply sealant to the cylinder head as shown in the figure.
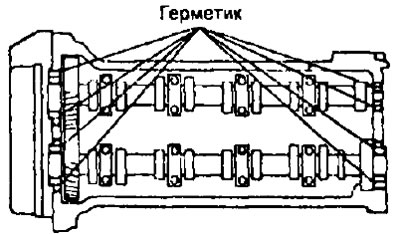
- b) Install the gasket on the cylinder head cover.
- c) Install the cylinder block cover and tighten the five nuts.
- Tightening torque - 7 Nm
16. Install the spark plugs and connect the high-voltage wires.
- Tightening torque - 18 Nm
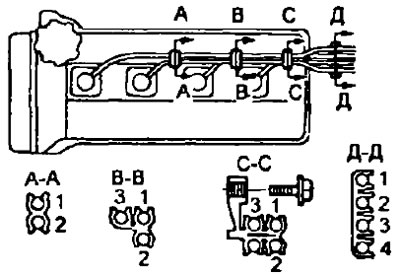
17. Install the alternator drive belt by tightening the axle bolt nut and adjusting bolt.
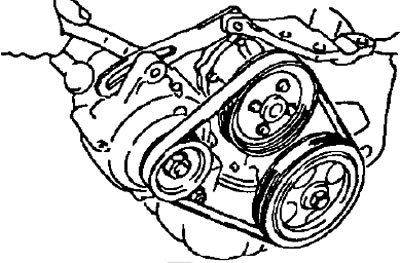
18. If the vehicle is equipped with air conditioning and/or power steering, install the drive belts.
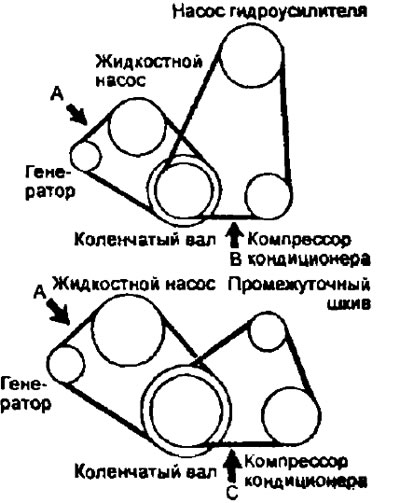
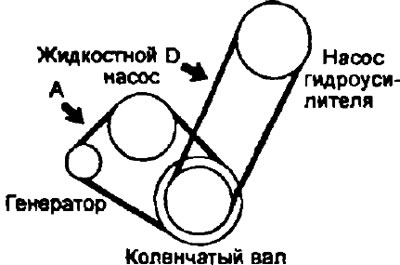
19 Adjust the deflection of the accessory drive belt by pressing on the belts at the points shown in the figure with a force of 98 N.
Drive belt deflection:
- New belt:
- A - 3.50-4.50 mm
- B - 9.00-10.5 mm
- C - 5.50-7.00 mm
- D — 8.00-10.0 mm
- Belt used:
- A - 5.00-6.50 mm
- B - 12.0-15.0 mm
- C -7.50-9.50 mm
- D — 9.00-11.0 mm
If necessary, adjust the drive belt deflection.
Note:
- The term "New Belt" refers to a belt that has been used for less than 5 minutes on a running engine.
- The term "Used Belt" refers to a belt that has been used with the engine running for 5 minutes or more.
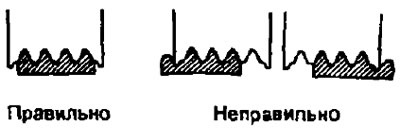
- After installing the drive belt, check that it is correctly positioned on the pulleys.
- After installing the belt, run the engine for 5 minutes and recheck the belt deflection.
(The text is quoted from the source website: toyotaman)