
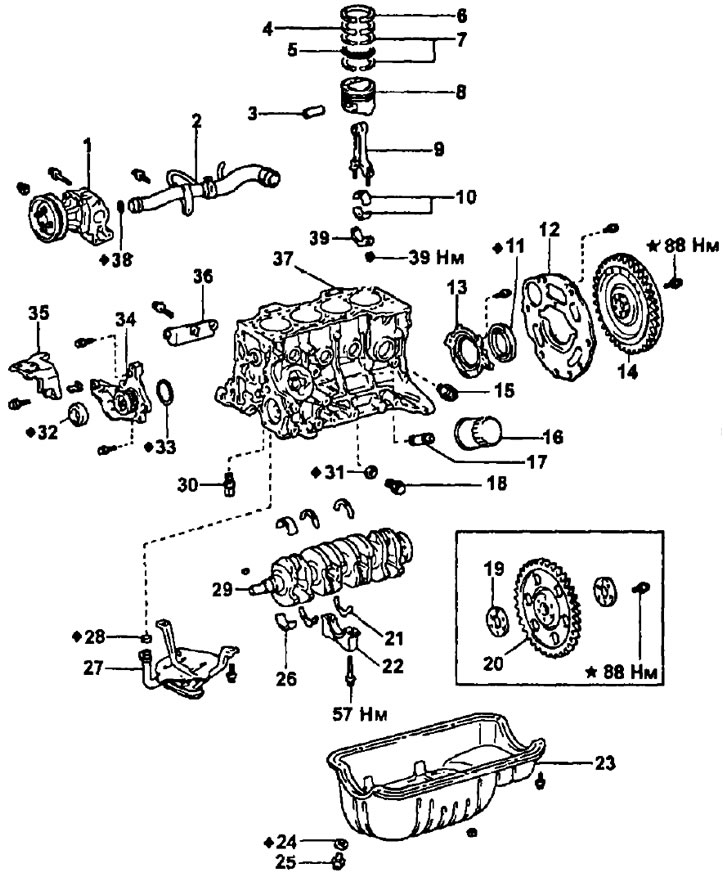
Parts for removal and installation (5E-FE). 1 - coolant pump; 2 - inlet pipeline of the cooling system; 3 - piston pin; 4 - compression ring No. 2; 5 - oil scraper ring expander; 6 - compression ring No. 1; 7 - scrapers of the oil scraper ring; 8 - piston; 9 - connecting rod; 10 - connecting rod bearing shells; 11 - rear crankshaft oil seal; 12 - back plate; 13 - holder of the rear oil seal; 14 - flywheel (M/T); 15 - oil pressure sensor; 16 - oil filter; 17 - oil filter fitting; 18 - drain plug; 19 - spacer sleeve; 20 - torque converter drive plate; 21 - persistent half ring; 22 - crankshaft bearing cover; 23 - oil pan; 24 - gasket; 25 - drain plug; 26 - main bearing shell; 27 - oil receiver; 28 - ring seal; 29 - crankshaft; 30 - safety valve; 31 - gasket; 32 - front crankshaft oil seal; 33 - ring seal; 34 - oil pump; 35 - right engine mounting bracket; 36 - generator bracket; 37 - cylinder block; 38 - ring seal; 39 - the bottom cover of the connecting rod.
Operations before disassembly
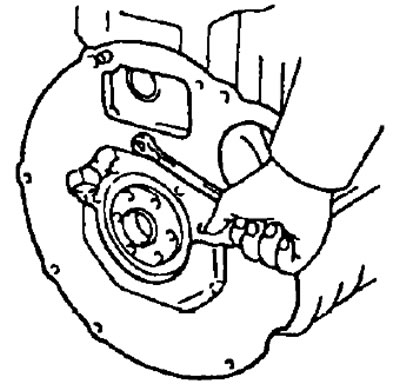
1. (Models with manual transmission) Remove the clutch cover and disc.
2. Remove the flywheel (models with manual transmission) or torque converter drive plate (models with automatic transmission).
3. Remove the back plate.
4. Place the engine on an engine disassembly stand.
5. (Models with power steering) Remove the power steering pump adjusting bracket.
6. Remove the timing belt.
7. Remove the cylinder head.
8. Remove the dipstick guide and generator adjusting bracket.
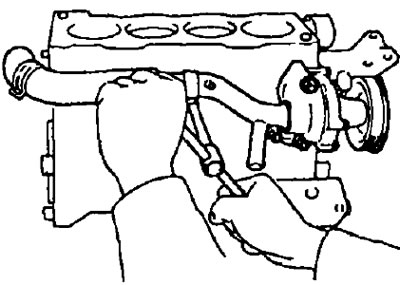
9. Remove the liquid pump together with the inlet pipeline of the cooling system.
10. Remove the generator bracket.
11. Remove the right engine mounting bracket.
12. Remove the oil filter.
13. Remove the oil pressure sensor.
14. Remove the oil pan, oil receiver, pressure regulator valve and oil pump
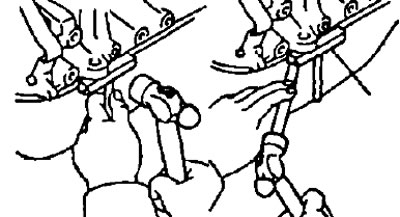
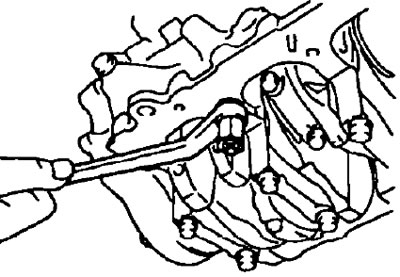
- A) Remove two nuts and eight bolts.
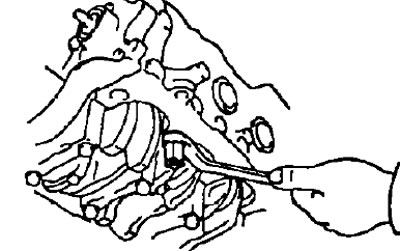
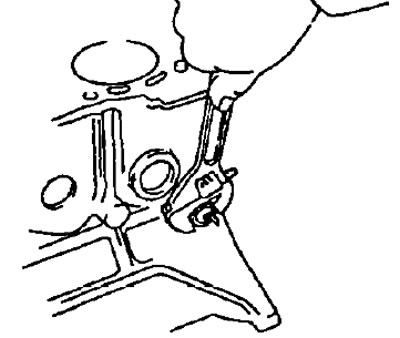
- b) Remove the oil pan by inserting a blade between the cylinder block and the oil pan, being careful not to damage the contact surfaces.
Note:
- Do not use this method when removing the oil pump and rear oil seal retainer.
- Be careful not to damage the oil pan flange.
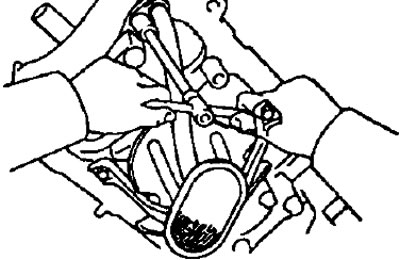
- V) Remove the oil receiver with O-ring by unscrewing the three bolts.
- G) Remove the pressure regulator valve.
- d) Remove the nine bolts and remove the tension spring bracket.
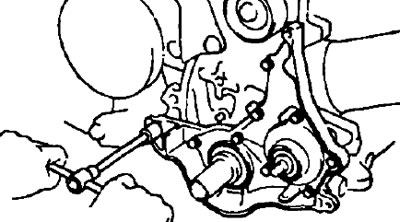
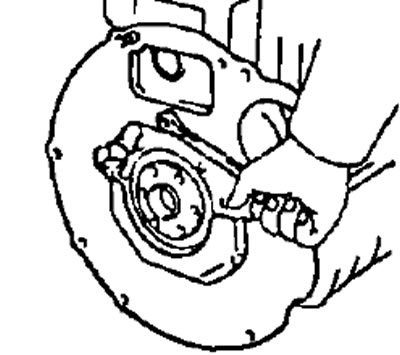
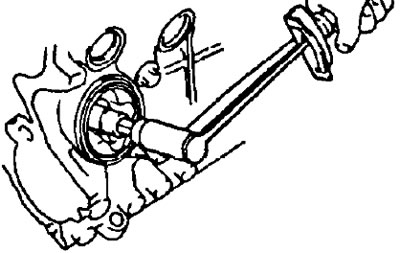
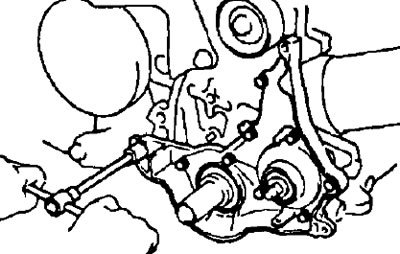
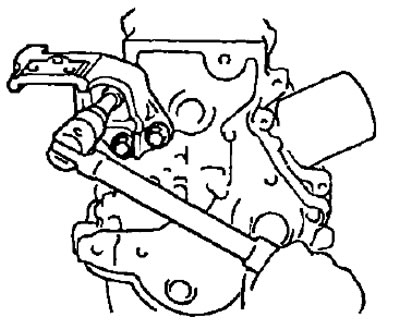
- e) Using a plastic-headed hammer, carefully remove the oil pump.
- and) Remove the oil pump housing and O-ring.
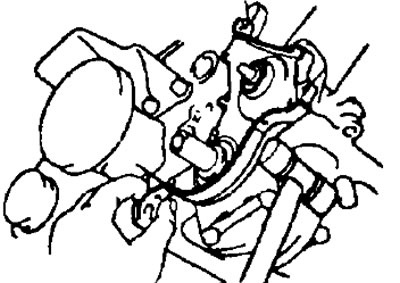
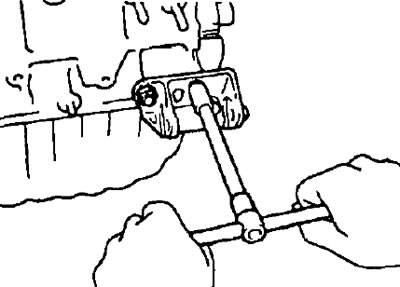
15. Remove the oil filter fitting with a 12mm socket wrench.
Final engine assembly
1. Install the oil filter fitting with a 12mm socket wrench.
- Tightening torque - 25 Nm
2. Install the oil pump and pressure regulator valve.
- A) Remove any remaining gasket material and be careful not to drop oil on the contact surfaces of the oil pump housing and cylinder block.
Using solvent, clean the contact and seal surfaces.
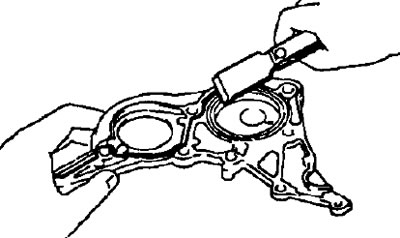
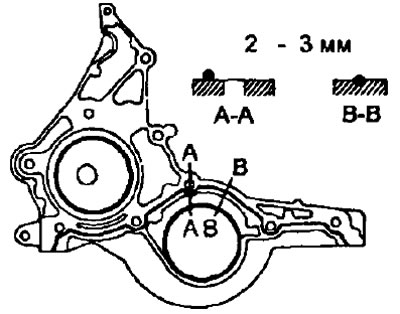
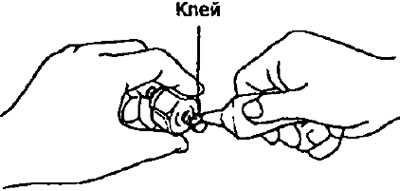
- b) Apply sealant to the oil pump housing as shown.
Note: Do not apply too much sealant to surfaces.
The mating parts must be assembled within 5 minutes after applying the sealant. Otherwise the material must be removed and reapplied.
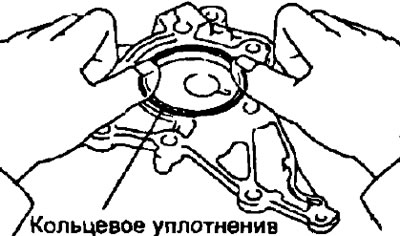
- V) Place a new O-ring.
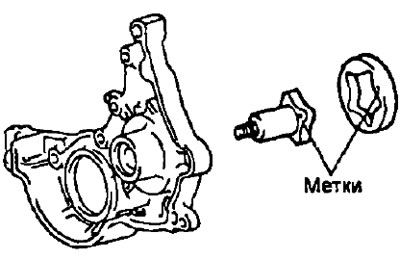
- G) Install the male and female rotors into the oil pump housing with the marks forward.
- d) Install the oil pump and tension spring bracket by tightening the nine bolts.
- Tightening torque - 7.5 Nm
- e) Install the pressure regulator valve.
- Tightening torque - 29 Nm
3. Install the oil receiver.
- A) Apply a small amount of engine oil to the new O-ring.
- b) Install the O-ring on the oil receiver.
- V) Install the oil receiver by tightening the three bolts.
- Tightening torque - 10 Nm

4. Install the oil pan.
- A) Remove the remaining sealing material and do not allow oil to get on the contact surfaces of the oil pan and cylinder block.
- Using solvent, clean the contact surfaces.
Note: Do not use solvents that may damage painted surfaces.
- b) Apply sealant to the contact surface of the oil pan as shown in the illustration.
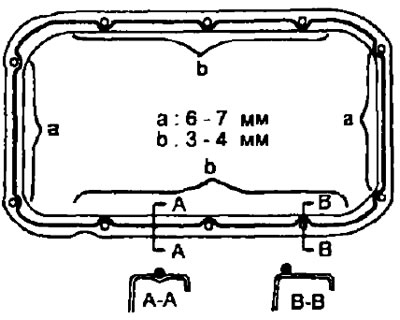
Note:
- Do not apply too much sealant.
- Mating parts must be assembled within 15 minutes of sealant application. Otherwise the material must be removed and reapplied.
- V) Install the oil pan and tighten the two nuts and eight bolts.
- Tightening torque - 8 Nm
5. Install the oil pressure switch.
- A) Clear a carving of the gauge and an aperture under it in the block of cylinders of sealant, oil or extraneous materials Remove oil with kerosene or gasoline.
- b) Apply sealant to 2 or 3 threads of the sensor.
Note: The sealant functions as a seal or bonding element only as long as the sensor is in the cylinder block.
- V) Install the oil pressure sensor.
6. Install the oil filter.
7. Install the right engine mount bracket.
- Tightening torque - 58 Nm
8. Install the generator bracket.
- Torque:
- 4E-FE - 25 Nm
- 5E-FE - 18 Nm
7. Install the fluid pump with the coolant inlet tube.
9. Install the dipstick guide and alternator adjustment bracket.
10. Install the cylinder head.
11. Install the timing belt.
12 Remove the engine from the stand.
13. Install the back plate.
- Tightening torque - 10 Nm
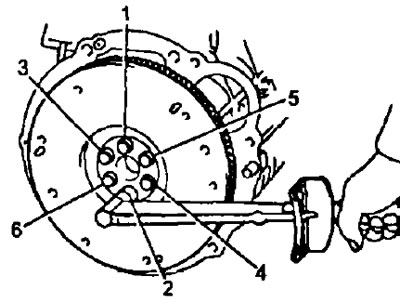
14. (Models with manual transmission) Install the flywheel.
- A) Apply sealant to two or three threads of the new mounting bolt.
- b) Install the flywheel on the crankshaft.
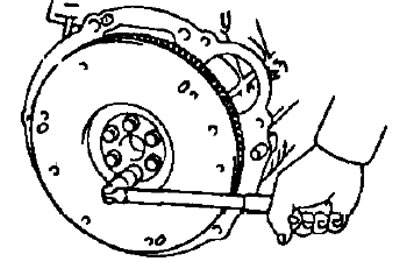
- V) Install and evenly tighten the flywheel mounting bolts in several passes in the sequence shown in the figure.
- Tightening torque - 88 Nm
15. (Models with automatic transmission) Install the torque converter drive plate.
16. (Models with manual transmission) Install the clutch disc and cover.