
Camshaft drive parts (3.0 l)
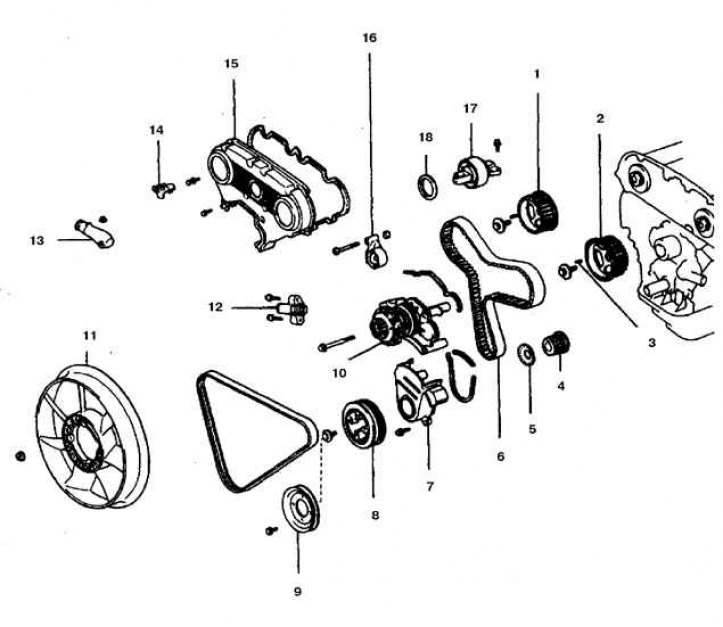
1. Camshaft sprocket (right); 2. Camshaft sprocket (left); 3. Pin; 4. Drive sprocket; 5. Cup; 6. Toothed belt; 7. Cover N1; 8. Crankshaft pulley; 9. Power steering belt pulley; 10. Fan bracket; 11. Impeller; 12. Tensioner; 13. Branch pipe; 14. Clamp of high-voltage wires; 15. Cover N2; 16. Tensioner pulley N1; 17. Tensioner pulley N2; 18. Gasket
Camshaft drive parts (3.4 l)
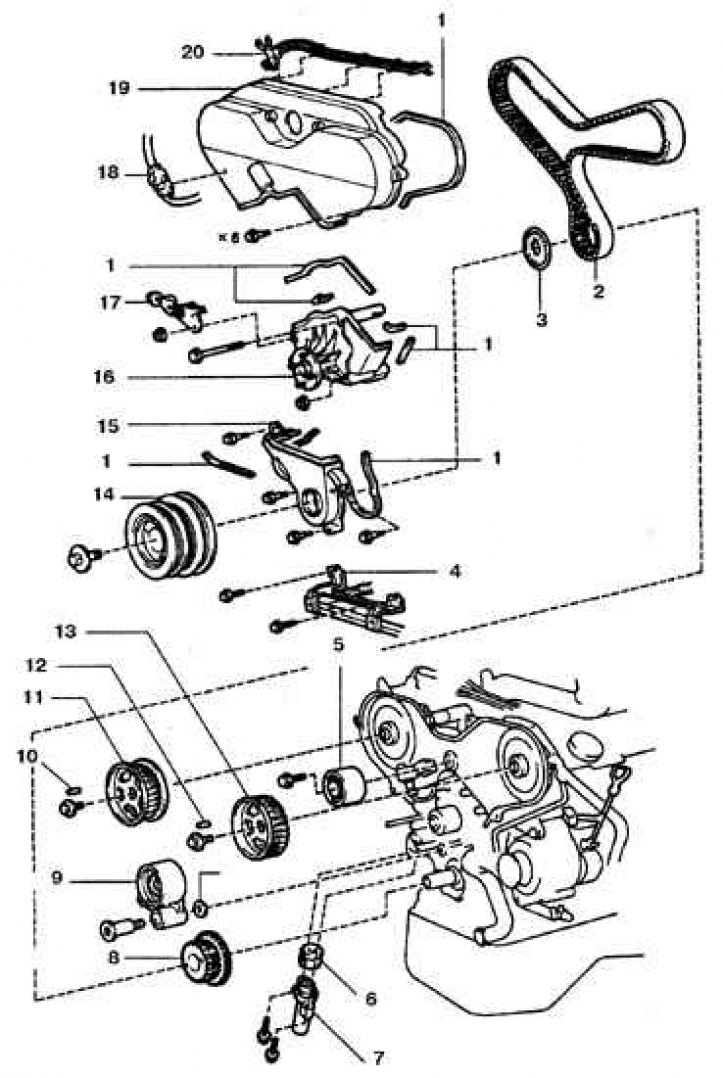
1. Gasket; 2. Toothed belt; 3. Guide; 4. Bracket for starter wires; 5. Tensioner pulley N2; 6. Protective case; 7. Tensioner; 8. Drive sprocket; 9. Tensioner pulley N1; 10, 12. Pin; 11. Camshaft sprocket (right); 13. Camshaft sprocket (left); 14. Crankshaft pulley; 15. Lid; 16. Fan bracket; 17. Power steering belt pulley; 18. Connector for crankshaft rotation sensor; 19. Cover N2; 20. Clamp high-voltage wires
Removing
1. Disconnect the battery from the ground.
2. Remove the bottom engine cover.
3. Remove the shroud and fan.
4. Drain the fluid and remove the radiator.
5. Remove the alternator and power steering pump belts.
6. Disconnect wires from spark plugs.
7. Raise the front of the car, block the rear wheels.
8. On 3.0L engines, remove the studs from the coolant pipe.
9. On 3.4L engines, remove the power steering pump and set aside.
10. Remove the A/C compressor (see subsection 4.13).
11. Turn out the candles.
12. Remove the upper belt cover and gasket. On 3.4L engines, remove the fan hub and bracket.
13. Set the piston of the 1st cylinder to the TDC of the compression stroke.
14. Check for alignment marks on the toothed belt. Mark if necessary.
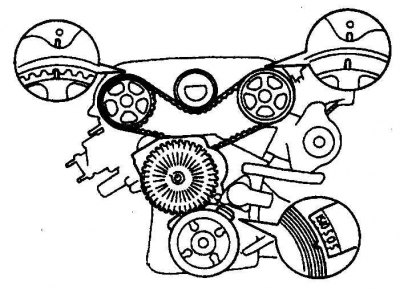 | 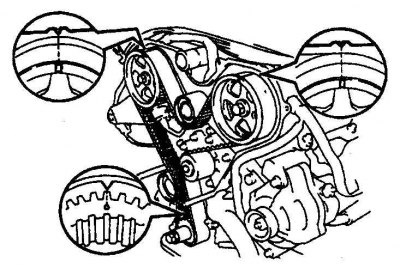 |
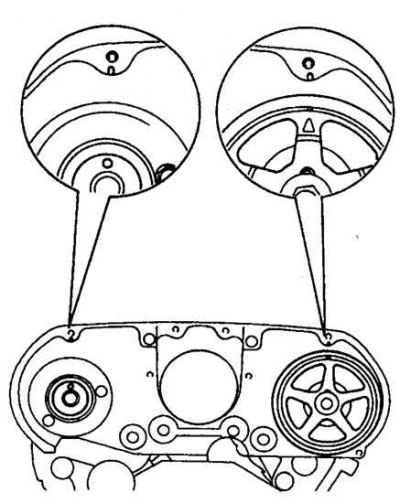
15. Make sure the marks on the camshaft gear are aligned (on the left - marks on the 3.0 l engine, on the right - marks on the 3.4 l engine).
 | 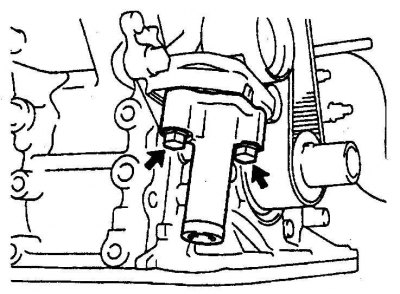 |
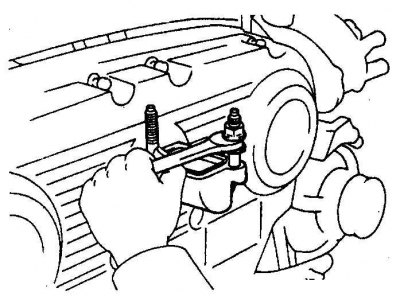
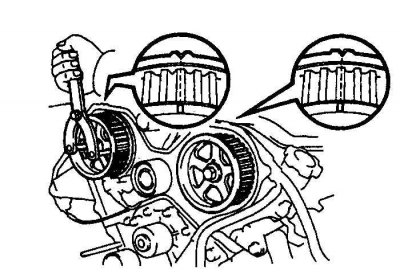
16. Remove the tensioner and cover (on the left - the toothed belt tensioner on the 3.0 l engine, on the right - the toothed belt tensioner on the 3.4 l engine, the arrows indicate the tensioner bolts).
17. If the toothed belt will not change, mark its position on the exhaust camshaft sprocket with marks.
18. Remove the toothed belt from the camshaft sprockets.
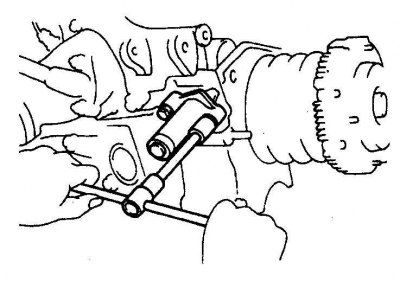
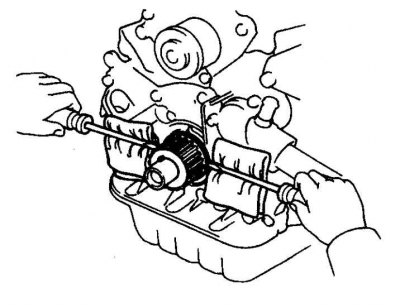
19. Inspect the camshaft sprockets, replace if necessary. To do this, remove the cover (lids) and holding the camshaft with a wrench by the flats, unscrew the bolt and remove the sprocket.
20. Remove tensioner pulley No. 2.
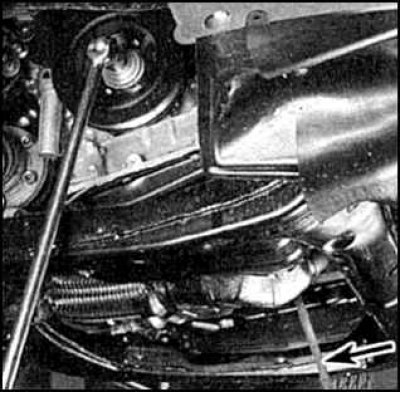
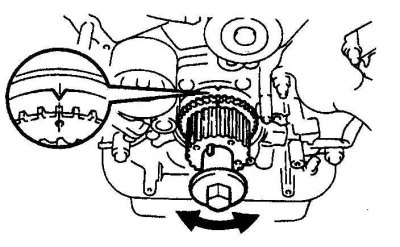
21. Loosen the crankshaft bolt (arrow) flywheel crown (or holding the torque converter disc bolt).
22. Once again check the alignment of the TDC marks on the crankshaft pulley and the fixed scale.
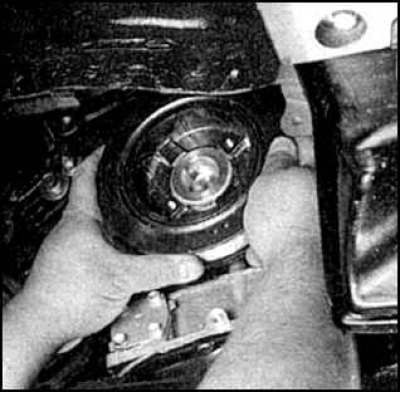
23. Remove the pulley by hand or with two screwdrivers, acting as levers.
24. Remove the lower belt cover and gasket. On 3.4L engines, first remove the fan bracket.
25. Remove the belt from the drive sprocket.
26. Remove tensioner pulley N1.
27. Check the presence of a mark on the belt opposite the recess in the drive sprocket, apply a new mark if necessary (if the belt does not change).
28. If necessary, remove the drive sprocket by hand or with two screwdrivers, acting as levers.
Examination
1. Check the condition of the belt. If there are cracks, tears, cuts, sheared teeth, or if the service life has expired, replace the belt.
2. Check for oil leaks on the tensioner. The tensioner oil seal is good if only slight traces of oil are observed from the side of the plunger.

3. Check plunger travel by resting it against a fixed surface. If the plunger moves, replace the tensioner.
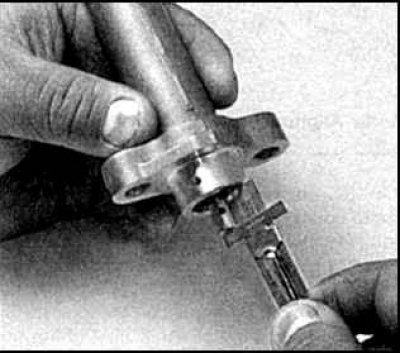
4. Check tensioner plunger protrusion. If protrusion differs from normal, replace the tensioner.
5. Check the freedom of rotation of the tensioner rollers.
Installation
1. Clean the front of the engine.
2. On 3.0L engines, align the marks on the crown of the drive sprocket and on the oil pump housing. Install the drive sprocket with the flange facing towards the engine.
3. On 3.4L engines, be careful not to damage the crankshaft rotation sensor insert on the drive sprocket. Check the alignment of the indicated labels.
4. Install the belt tensioner pulley No. 1, lubricating 2-3 threads of the thread of the tensioner bolt with a friction compound. Tighten the bolt to the specified torque.
5. Put on the toothed belt by running it on the drive sprocket. If a removed belt is installed, then align the marks on the belt, sprockets and covers made during removal.
6. Put the guide cup on the crankshaft, turning its convex surface towards the engine.

7. Put on the crankshaft pulley and tighten the bolt to the specified torque while holding the crankshaft (arrow).
8. Install the upper tensioner pulley. Tighten the bolt and check the freedom of rotation of the roller.
9. Install the left camshaft sprocket with the flange facing out, aligning the hole in the sprocket with the camshaft pin.
10. Tighten the sprocket bolt to the specified torque.
 |  |
11. Check the marks again and make sure that the crankshaft has not rotated relative to its original position (on the left - the alignment of marks on the 3.0 liter engine, on the right - the alignment of marks on the 3.4 liter engine). If the removed belt is worn, then install it according to the marks made during removal. If the marks do not match, then move the belt on the drive sprocket. The mark on the left camshaft sprocket should point up and align with the mark on the back of the belt cover.
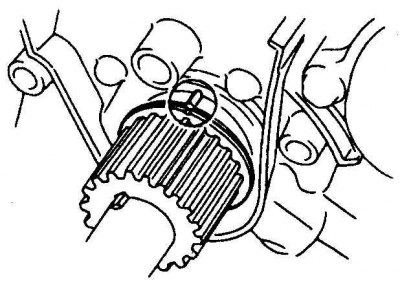
12. The pin hole in the right camshaft sprocket must face up (at 12 o'clock). Remove the cylinder head cover if necessary (if not filmed) and turn the camshaft until the marks on the camshaft and on the back cover are aligned.
13. Rotate the left camshaft clockwise about one step between the teeth. If a removed belt is worn, then align the alignment mark with the mark on the camshaft sprocket. Put the belt on the sprocket and turn the camshaft counterclockwise, returning it to its original position. The belt should now have a slight tension.
14. Aligning the hole with the pin, install the right camshaft sprocket with the flange part facing inward.
15. Tighten the sprocket bolt while maintaining the position of the marks.
16. Put a belt on the sprocket, aligning the marks (if a removed belt is installed).
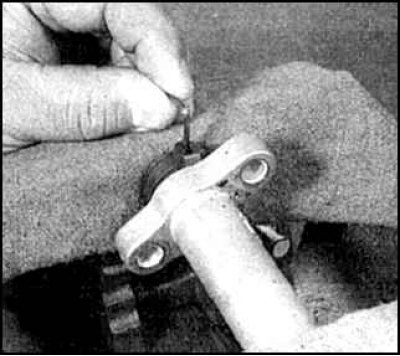
17. Squeeze the tensioner in a vise and sink the plunger. Fix the plunger by inserting a 1.2 mm drill into the transverse through holes.
18. Install tensioner and tighten bolts.
19. Turn the crankshaft 2 turns and check the alignment of the marks. If the marks are not aligned, then repeat all the steps to install the belt. Do not start the engine until you are sure that the belt is correctly installed.
20. Install the rest of the parts in reverse order.