
Removing
1. Disconnect the ground wire from the battery (see paragraph 1 of chapter 5).
2. Remove the cover (And) engine (pic. 4.2, a, b).
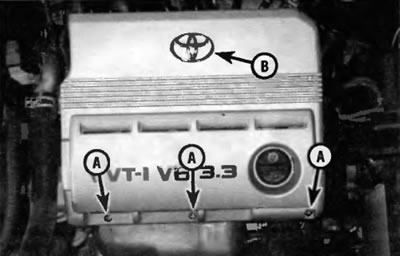
Ryas. 4.2, a. To remove the engine cover, remove the oil filler cap, then align the three bolts (A) and release the latch (IN)
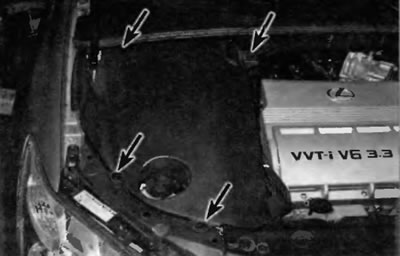
Pic. 4.2b. The location of the fastening elements on the side cover of the engine
3. Remove ignition coils (see chapter 5).
4. Remove the upper intake manifold to access the rear cylinder head cover (see paragraph 5).
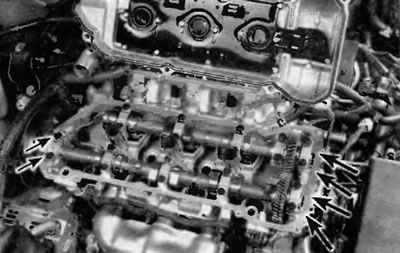
5. Disconnect the engine wiring harness from the right side of the engine, the No. 3 timing belt cover, the rear of the engine, and the left side of the engine distance (pic. 4.5, a, b).

Pic. 4.5, a. Operate the nuts and disconnect the left engine wiring harness...
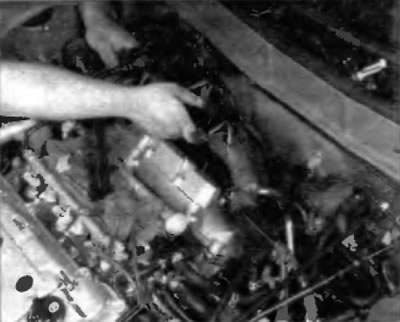
Ryas. 4.5b.... release the wiring clamps on the timing belt cover and unscrew the five bolts securing the right-hand wiring harness, and then move the wiring harness away from the rear cylinder head cover.
6. Remove the bolts, remove the sealing washers and then detach the cover (And) (pic. 4.6). If the cover does not move away from the cylinder head, hit its edge with a hammer through a block of wood to move the cover in place. If this does not help, try inserting a flexible spatula between the cylinder head and the cover to «open» seal.
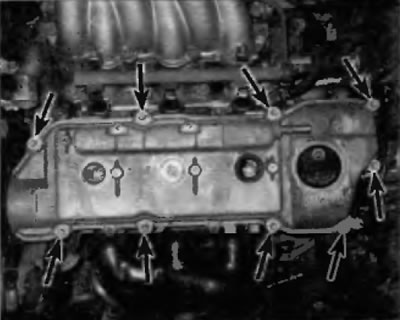
Pic. 4.6. Turn out bolts, remove sealing washers and remove a cover of a head of cylinders (3.8L V6 engine shown, similar for 3.3L V6 engine)
Warning. Do not open the joint between the cover and the cylinder head with various makeshift levers. This can lead to damage to the sealing surfaces of both elements and, as a result, after installing the cylinder head cover, there is no place for oil to leak through this joint.
Installation
7. When installing the cover, clean the mating surfaces of the cylinder head and cover. Use a scraper to remove all traces of sealant and old gasket material, and then clean mating surfaces with lacquer thinner or acetone. If gasket material remains on the mating surfaces or oil sags, oil leaks may occur when the cylinder head cover is installed.
8. Install new spark plug port seals.
9. Apply RTV Sealant (abbreviation for «Room Tamparatura Vulcanizer» — «curable at room temperature») on the sealing joints at the front and rear camshaft-to-cylinder head interfaces and install the cylinder head cover using a new gasket (pic. 4.9).
Pic. 4.9. Apply RTV sealant to the indicated areas and install the cover with a new gasket
10. Tighten the bolts a little at a time to the prescribed torque specified in Specifications at the beginning of this chapter.
11. Reinstall the rest of the components by starting the engine and checking for oil leaks.