
Note. During the removal and installation of bumpers, the help of an assistant will be useful.
Front bumper
Front bumper installation details
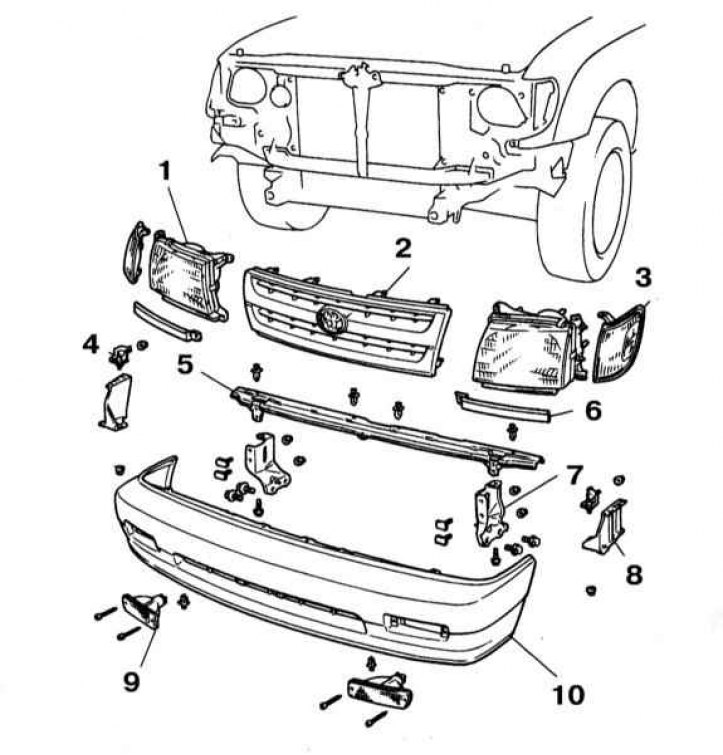
1 - block headlight; 2 - Decorative grille; 3 - Front marker light; 4 - Bumper support bracket; 5 - Central holder; 6 - Remote bar; 7 - Front bumper lever; 8 - Side support; 9 - Turn indicator; 10 - Spoiler
1. Remove the decorative grille (see Section Removal and installation of a decorative grille of a radiator).
2. Remove direction indicators (see Onboard electrical equipment).
3. Turn out bolts of levers of a bumper and bolts of fastening of a bumper to body elements (refer to illustration above).
4. Installation is carried out in the reverse order.
Rear bumper
Rear bumper installation details
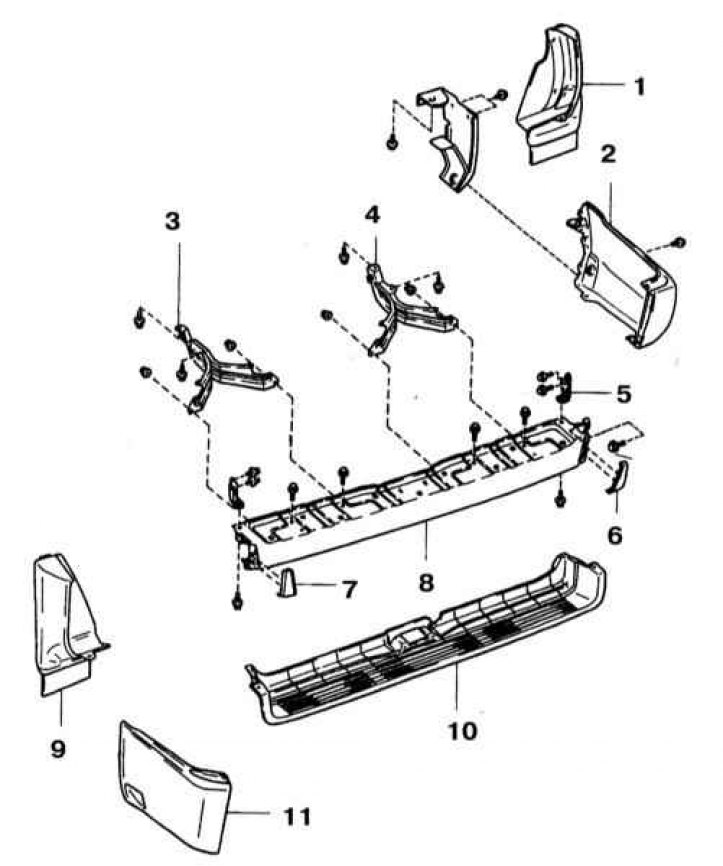
1 - Right rear mudguard; 2 - Right side bumper pad; 3 - Left bumper lever; 4 - Right bumper lever; 5 - Bumper support bracket; 6.7 - Sealant; 8 - Rear bumper; 9 - Left rear mudguard; 10 - Bumper pad; 11 - Left side bumper pad
1. If you do not plan to replace the rear bumper and its support brackets, unbolt the brackets from the vehicle's supporting frame (refer to illustration above).
2. If the bumper is to be replaced, unbolt the brackets from it.
3. Rear bumper installation details are presented.
4. Installation is carried out in the reverse order. Track the reliability of tightening / snapping fasteners.