
Warning! The car models covered in this manual are equipped with an additional security system (SRS). Before doing any work near the airbag unit, steering column or instrument panel, turn off the SRS to avoid injury if it is accidentally deployed (see Onboard electrical equipment). SRS circuit wiring is easily identified by the yellow color of the insulation.
1. Remove the decorative grille (see Section Removal and installation of a decorative grille of a radiator).
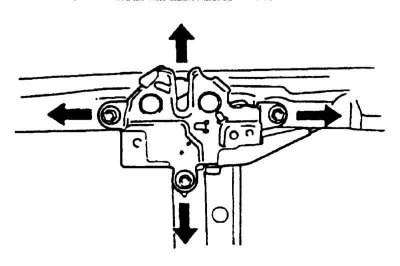
2. Trace around the latch assembly with a marker or scriber to ensure it is properly seated during assembly. Loosen the fixing screws (refer to illustration) and remove the latch from the radiator support beam.
3. Having pressed a latch, disconnect a drive cable from it.
4. Installation is carried out in the reverse order. To adjust the lock, loosen the fixing bolts and adjust the position of the latch accordingly. Track reliability of a tightening of fixture.
5. To replace the drive cable «take a walk» along it from the latch to the bulkhead of the engine compartment, releasing from all provided intermediate clamps and guide brackets.
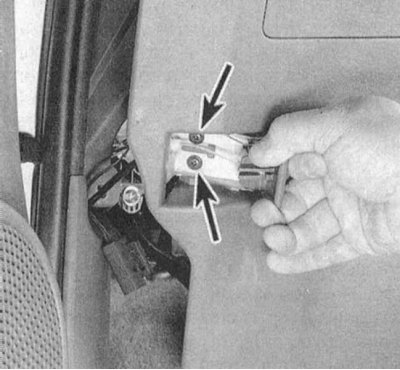
6. Go to the salon and remove the left section of the lower trim of the instrument panel (see Section Removal and installation of finishing and main sections of the instrument panel). Separate the hood release lever from the instrument panel (refer to accompanying illustration).
7. Separate from the lever a tip of a driving cable.
8. Tie a piece of string to the end of the cable and pull the assembly inside the engine compartment.
9. Untie the cable from the string left threaded through the bulkhead.
10. Installation is carried out in the reverse order.