Share information:

Diesel engine repair car Toyota Land Cruiser 70

Removing the timing belt
Note: The indicator on the instrument cluster signals the need to replace the timing belt every 100,000 km. After replacing the timing belt, it is necessary to reset the belt mileage counter, which is part of the...
Note: The indicator on the instrument cluster signals the need to replace the timing belt every 100,000 km. After replacing the timing belt, it is necessary to reset the belt mileage counter, which is part of the...

Checking the timing belt
1. Inspect the timing belt. Attention: Do not bend, twist or turn the belt inside out. Do not allow the belt to come into contact with oil, water or steam. When installing or removing the camshaft pulley mounting bolt,...
1. Inspect the timing belt. Attention: Do not bend, twist or turn the belt inside out. Do not allow the belt to come into contact with oil, water or steam. When installing or removing the camshaft pulley mounting bolt,...

Timing belt installation (L series engines)
1. Install the crankshaft pulley. A) Install the pulley key into the crankshaft keyway. b) Using a hammer, lightly tap the pulley with the flange inwards. 2. Install tensioner pulley #2. A) Install the spacer and idler...
1. Install the crankshaft pulley. A) Install the pulley key into the crankshaft keyway. b) Using a hammer, lightly tap the pulley with the flange inwards. 2. Install tensioner pulley #2. A) Install the spacer and idler...

Timing belt installation (engine 1KZ-T)
1. Installation of the driven camshaft pulley. A) Install the key into the groove of the shaft. b) Align the groove of the pulley with the key, put the pulley on the shaft. V) While holding the camshaft, tighten the...
1. Installation of the driven camshaft pulley. A) Install the key into the groove of the shaft. b) Align the groove of the pulley with the key, put the pulley on the shaft. V) While holding the camshaft, tighten the...

Gear drive mechanism for timing and injection pump (engine 1KZ-T)
Removing the gears of the timing drive and injection pump 1. Remove accessory drive belts, fan and water pump pulley. 2. Remove the timing belt and gear wheels. 3. Turn out 7 bolts and remove a back cover of a timing...
Removing the gears of the timing drive and injection pump 1. Remove accessory drive belts, fan and water pump pulley. 2. Remove the timing belt and gear wheels. 3. Turn out 7 bolts and remove a back cover of a timing...

Checking the parts of the gears of the timing drive and injection pump (engine 1KZ-T)
1. Measure the inside diameter of the idle gear. Nominal size - 44.0-44.025 mm 2. Measure the outer diameter of the idle gear shaft. Nominal size - 43.965-44.0 mm 3. Calculate the clearance between the shaft and the...
1. Measure the inside diameter of the idle gear. Nominal size - 44.0-44.025 mm 2. Measure the outer diameter of the idle gear shaft. Nominal size - 43.965-44.0 mm 3. Calculate the clearance between the shaft and the...

Idle gear assembly (engine 1KZ-T)
1. Secure the idle gear in a vise with the notched mark down. 2. Install: (1) compensation spring; (2) compensation gear; (3) spring washer. Attention: spring cut (1) should cover the pin in the idle gear. 3. Install...
1. Secure the idle gear in a vise with the notched mark down. 2. Install: (1) compensation spring; (2) compensation gear; (3) spring washer. Attention: spring cut (1) should cover the pin in the idle gear. 3. Install...

Installing the gear mechanism (engine 1KZ-T)
Note: The marks on the gears must face the front of the vehicle. A. Crankshaft gear. A) Turn the crankshaft with the keyway up Install the key and gear so that the mark «1» on the gears of the crankshaft and the oil...
Note: The marks on the gears must face the front of the vehicle. A. Crankshaft gear. A) Turn the crankshaft with the keyway up Install the key and gear so that the mark «1» on the gears of the crankshaft and the oil...
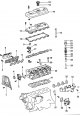
Cylinder head
Block head (2L engines; 3L): 1 - rear timing belt cover; 2 - camshaft seal holder; 3 - bolt (M. 3. 52 N.m); 4 - stuffing box; 5; 8; 10; 13; 36 - gasket; 6 - heat shield; 7 - exhaust manifold; 9 - bolt (M. 3. 25 N·m); 11...
Block head (2L engines; 3L): 1 - rear timing belt cover; 2 - camshaft seal holder; 3 - bolt (M. 3. 52 N.m); 4 - stuffing box; 5; 8; 10; 13; 36 - gasket; 6 - heat shield; 7 - exhaust manifold; 9 - bolt (M. 3. 25 N·m); 11...

Cylinder Head Removal — L Series Engines
1. Drain engine coolant ( see related section ). 2. (2L-T) Remove turbocharger (see related section). 3. Remove the timing belt ( see related section ). 4 (2L-T) Remove injection pump ( see related section ). 5. Remove...
1. Drain engine coolant ( see related section ). 2. (2L-T) Remove turbocharger (see related section). 3. Remove the timing belt ( see related section ). 4 (2L-T) Remove injection pump ( see related section ). 5. Remove...

Removing the cylinder head — KZ series engines
Note: Ceramic glow plugs are installed on this engine. Do not remove spark plugs unnecessarily to avoid damaging them. 1. Drain the coolant. 2. Remove the intake duct (see above). 3. Removing the bracket and accelerator...
Note: Ceramic glow plugs are installed on this engine. Do not remove spark plugs unnecessarily to avoid damaging them. 1. Drain the coolant. 2. Remove the intake duct (see above). 3. Removing the bracket and accelerator...

Dismantling of a head of the block of cylinders
1. (Only L) Remove the camshaft oil seal housing and gasket by unscrewing the four bolts. 2. (Only L) Remove the camshaft. A) Rotate the camshaft so that the camshaft keyway is facing up. b) Evenly loosen and remove the...
1. (Only L) Remove the camshaft oil seal housing and gasket by unscrewing the four bolts. 2. (Only L) Remove the camshaft. A) Rotate the camshaft so that the camshaft keyway is facing up. b) Evenly loosen and remove the...

Condition monitoring, cleaning and repair of cylinder head components
1. Clean the bottom of the pistons and the mating surface of the cylinder block. A) Turning the crankshaft, bring each piston in sequence to TDC. Using a scraper, remove carbon deposits from the bottom of each piston....
1. Clean the bottom of the pistons and the mating surface of the cylinder block. A) Turning the crankshaft, bring each piston in sequence to TDC. Using a scraper, remove carbon deposits from the bottom of each piston....

Camshaft oil seal replacement
Note: there are two ways (A and B) oil seal replacements described below. A. If the camshaft oil seal holder is removed: A) Using a screwdriver and hammer, knock out the oil seal with light blows. b) Using an...
Note: there are two ways (A and B) oil seal replacements described below. A. If the camshaft oil seal holder is removed: A) Using a screwdriver and hammer, knock out the oil seal with light blows. b) Using an...

Cylinder head assembly
Note: Thoroughly clean all parts to be assembled. Apply engine oil to all mating surfaces before installing parts. Replace all gaskets and oil seals with new ones. (Only for 2L-T and 1KZ-T engines) 1. Install the...
Note: Thoroughly clean all parts to be assembled. Apply engine oil to all mating surfaces before installing parts. Replace all gaskets and oil seals with new ones. (Only for 2L-T and 1KZ-T engines) 1. Install the...

Installing the cylinder head
Check piston protrusion and adjust cylinder head gasket thickness. A. Check protrusion of No. 1 and No. 4 pistons. A) Align the TDC mark on the crankshaft pulley with the benchmark. L series engines Engine 1KZ-T b)...
Check piston protrusion and adjust cylinder head gasket thickness. A. Check protrusion of No. 1 and No. 4 pistons. A) Align the TDC mark on the crankshaft pulley with the benchmark. L series engines Engine 1KZ-T b)...

Engine dosborka
Series L 1. Install the valve cover. A) Apply sealant to the cylinder head as shown. b) (2L-T) Apply sealant in the places shown in the picture. V) Place the gasket on the cylinder head cover. G) Reinstall the head...
Series L 1. Install the valve cover. A) Apply sealant to the cylinder head as shown. b) (2L-T) Apply sealant in the places shown in the picture. V) Place the gasket on the cylinder head cover. G) Reinstall the head...

Preparation for disassembly of the cylinder block
1. (Manual transmission) Remove cover and clutch disc. 2. (Manual transmission) Remove flywheel. 3. (Automatic transmission) Remove the drive disk. 4. Remove the rear end cap. Remove the two bolts, end cap and dust...
1. (Manual transmission) Remove cover and clutch disc. 2. (Manual transmission) Remove flywheel. 3. (Automatic transmission) Remove the drive disk. 4. Remove the rear end cap. Remove the two bolts, end cap and dust...

Dismantling of the block of cylinders
1. Turn out bolts of fastening and remove the holder of a back epiploon. KZ engine only 2. Checking the axial clearance of the balance shaft Measure the axial clearance with an indicator. Nominal clearance - 0.065 -...
1. Turn out bolts of fastening and remove the holder of a back epiploon. KZ engine only 2. Checking the axial clearance of the balance shaft Measure the axial clearance with an indicator. Nominal clearance - 0.065 -...
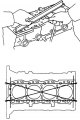
Checking the block of cylinders
1. Using a scraper, remove all gasket material from the surface of the cylinder block. 2. Clean the cylinder block using a soft brush and solvent. 3. Check up warpage of a plane of a socket of the block of cylinders...
1. Using a scraper, remove all gasket material from the surface of the cylinder block. 2. Clean the cylinder block using a soft brush and solvent. 3. Check up warpage of a plane of a socket of the block of cylinders...

Disassembly of the piston and connecting rod
1. Check piston and piston pin fit by rocking the piston on the piston pin. If any movement is felt (backlash), then replace the piston and pin as a set. 2. Remove compression piston rings using an expander. Manually...
1. Check piston and piston pin fit by rocking the piston on the piston pin. If any movement is felt (backlash), then replace the piston and pin as a set. 2. Remove compression piston rings using an expander. Manually...

Assessment of the technical condition of connecting rods, pistons and piston rings
1. Clean the piston. A) Using a scraper, remove carbon deposits from the piston crown. b) Using the broken ring, clean the piston ring grooves. V) Using solvent and a soft brush, thoroughly clean the piston. Caution: Do...
1. Clean the piston. A) Using a scraper, remove carbon deposits from the piston crown. b) Using the broken ring, clean the piston ring grooves. V) Using solvent and a soft brush, thoroughly clean the piston. Caution: Do...

Checking the balance shafts (KZ series only)
1. Measure the diameter of the shaft bearings. Bearing: #1 - 42,000 - 42.02 mm No. 2 - 41.000-41.02 mm #3 - 32,000 - 32.02 mm 2. Measure the diameters of the shaft journals No. 1 - 41.941 -41.960 mm No. 2 - 40.931...
1. Measure the diameter of the shaft bearings. Bearing: #1 - 42,000 - 42.02 mm No. 2 - 41.000-41.02 mm #3 - 32,000 - 32.02 mm 2. Measure the diameters of the shaft journals No. 1 - 41.941 -41.960 mm No. 2 - 40.931...

Cylinder boring
Note: Bore all four cylinders to match the outside diameter of the oversized pistons. Replace piston rings with ones that will fit oversized pistons. Piston diameter of the 1st repair size (+0.50 mm): Engines 2L, 2L-T -...
Note: Bore all four cylinders to match the outside diameter of the oversized pistons. Replace piston rings with ones that will fit oversized pistons. Piston diameter of the 1st repair size (+0.50 mm): Engines 2L, 2L-T -...
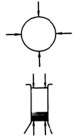
Condition monitoring and repair of the crankshaft
1. Check the beating of the crankshaft. A) Lay the shaft on the prisms. b) Use a dial indicator to measure the runout of the crankshaft on the middle neck. Maximum runout - 0.06 mm If the runout exceeds the maximum...
1. Check the beating of the crankshaft. A) Lay the shaft on the prisms. b) Use a dial indicator to measure the runout of the crankshaft on the middle neck. Maximum runout - 0.06 mm If the runout exceeds the maximum...

Replacing the crankshaft seals
Note: There are two ways (A and B) replacement of seals. 1. Replace the crankshaft front oil seal. A. If the oil pump is removed from the cylinder block: A) Using a screwdriver and hammer, lightly pry the seal out. b)...
Note: There are two ways (A and B) replacement of seals. 1. Replace the crankshaft front oil seal. A. If the oil pump is removed from the cylinder block: A) Using a screwdriver and hammer, lightly pry the seal out. b)...

Pistons and connecting rods — assembly
1. Assemble the piston and connecting rod. A) Install a new circlip in one of the piston bosses. b) Gradually heat the piston to a temperature of approximately 60°C (L-series) or 80°С (KZ-series). V) Align the front...
1. Assemble the piston and connecting rod. A) Install a new circlip in one of the piston bosses. b) Gradually heat the piston to a temperature of approximately 60°C (L-series) or 80°С (KZ-series). V) Align the front...

Cylinder block assembly
Note: Thoroughly clean all parts to be assembled. Apply new engine oil to all sliding and rotating surfaces before installing parts. Replace all gaskets, o-rings and oil seals with new items. 1. Install oil jets and...
Note: Thoroughly clean all parts to be assembled. Apply new engine oil to all sliding and rotating surfaces before installing parts. Replace all gaskets, o-rings and oil seals with new items. 1. Install oil jets and...

Final engine assembly
Series L Install (see relevant sections). 1. Oil cooler. 2. Oil pump and oil pan. 3. Water pump. 4. injection pump. 5. Cylinder head. 6. Pulleys and timing belt. 7. Generator. 8. Back plate. Tightening torque 12 Nm. 9....
Series L Install (see relevant sections). 1. Oil cooler. 2. Oil pump and oil pan. 3. Water pump. 4. injection pump. 5. Cylinder head. 6. Pulleys and timing belt. 7. Generator. 8. Back plate. Tightening torque 12 Nm. 9....
This section is available on: russian, bulgarian, belarusian, ukrainian, serbian, croatian, romanian, polish, slovak, hungarian
Similar sections for other Toyota models
➥ Power unit: Engine overhaul Toyota Camry Vista V40 (1994-1998)
➥ Power unit: Engine overhaul Toyota Corona T190 (1992-1997)
➥ Power unit: Engine repair Toyota Carina T190 (1992-1996)
➥ Power unit: Overhaul of engines Toyota Highlander 1 (2000-2007, petrol)
➥ Power unit: Engine overhaul Toyota 4Runner N120 (1989-1995)
➥ Power unit: Engine overhaul Toyota RAV 4 XA10 (1994-2000)
➥ Power unit: Engine overhaul Toyota Duet (1998-2004)
Link in different formats to this article
TEXTHTMLBB Code
- General information
- Introduction to the guide
- Controls and instruments
- Maintenance
- Power unit
- Petrol engines
- Diesel engines
- Cooling and heating
- Power and exhaust systems
- Engine electrical equipment
- Engine management systems
- Transmission
- Automatic gearbox
- Transmission line
- Chassis, running gear
- Brake system
- Car suspension
- Steering
- Body and interior
- Exterior (external elements)
- Interior (internal elements)
- Doors, locks and windows
- Electrical equipment
- Equipment and devices
- Electrical circuits
- General information
- User manual
- Maintenance
- Power unit
- Petrol engines 2F and 3F-E
- Petrol engines 1FZ-FE
- Engine overhaul
- Engine electrical equipment
- Cooling and heating
- Fuel system (carburetor)
- Fuel system (injector)
- Toxicity reduction system
- Transmission
- Car gearbox
- Clutch
- Transfer case
- Drive shafts and axles
- Chassis, running gear
- Brake system
- Car suspension
- Steering
- Body and interior
- Exterior and interior
- Doors, locks and windows
- Electrical equipment
- Equipment and devices
- Electrical circuits
- General information
- User manual
- Maintenance
- Power unit
- Engine adjustment
- Engine repair
- Fuel system
- Control system
- Turbocharging system
- Cooling and lubrication system
- Charge and start system
- Transmission
- Clutch
- Mechanical gearbox
- Automatic gearbox
- Transfer case
- Chassis, running gear
- Car suspension
- Brake system
- Steering
- Body and interior
- Body elements
- Heating and air conditioning
- Electrical equipment
- Equipment and devices
- Electrical circuits