



Share information:
Car clutch repair Toyota Land Cruiser 60/80

Clutch and drive shaft specifications
Clutch Hydraulic fluid DOT3 Friction disc runout no more than 0.8 mm Maximum distance from the friction lining surface to the disc rivet heads 0.3 mm Deviation of the diaphragm spring from the plane no more than 0.5 mm...
Clutch Hydraulic fluid DOT3 Friction disc runout no more than 0.8 mm Maximum distance from the friction lining surface to the disc rivet heads 0.3 mm Deviation of the diaphragm spring from the plane no more than 0.5 mm...

Clutch — design description
Clutch parts 1. Flywheel; 2. Guide bearing; 3. Fork; 4. Bracket; 5. Release bearing; 6. Clutch housing; 7. Friction disc The clutch is dry, single-disc, diaphragm type, with hydraulic drive. The hydraulic drive circuit...
Clutch parts 1. Flywheel; 2. Guide bearing; 3. Fork; 4. Bracket; 5. Release bearing; 6. Clutch housing; 7. Friction disc The clutch is dry, single-disc, diaphragm type, with hydraulic drive. The hydraulic drive circuit...
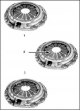
Clutch parts — removal, inspection and installation
Clutch wear 1. Normal wear of petals; 2. Increased wear of petals; 3. Breakage or deformation of the spring petals Attention! Remove dust from wear of linings with a special cleaner. Do not use gasoline or solvent....
Clutch wear 1. Normal wear of petals; 2. Increased wear of petals; 3. Breakage or deformation of the spring petals Attention! Remove dust from wear of linings with a special cleaner. Do not use gasoline or solvent....

Release bearing — replacement
1. Disconnect the battery from ground. 2. Remove the transmission. 3. Remove the spring clip from the fork ball joint, disconnect the fork from the ball joint and remove the release bearing. 4. The bearing must rotate...
1. Disconnect the battery from ground. 2. Remove the transmission. 3. Remove the spring clip from the fork ball joint, disconnect the fork from the ball joint and remove the release bearing. 4. The bearing must rotate...

Guide Bearing — Checking and Replacing
The ball guide bearing is the support for the primary shaft of the gearbox and is pressed into the hole in the rear flange of the crankshaft. The condition of the bearing should be checked every time the clutch is...
The ball guide bearing is the support for the primary shaft of the gearbox and is pressed into the hole in the rear flange of the crankshaft. The condition of the bearing should be checked every time the clutch is...

Clutch Master Cylinder — Repair
Clutch Master Cylinder Parts for Early Cars 1. Washer; 2. Tank; 3. Pin; 4. Cotter pin; 5. Cover; 6. Spring ring; 7. Pusher; 8. Cup; 9. Piston; 10. Main line nipple; 11. Cylinder Clutch Master Cylinder Parts for Late...
Clutch Master Cylinder Parts for Early Cars 1. Washer; 2. Tank; 3. Pin; 4. Cotter pin; 5. Cover; 6. Spring ring; 7. Pusher; 8. Cup; 9. Piston; 10. Main line nipple; 11. Cylinder Clutch Master Cylinder Parts for Late...

Clutch slave cylinder — removal and installation
Clutch slave cylinder parts 1. Cylinder; 2. Air bleed nipple; 3. Cover; 4. Pusher; 5. Piston; 6. Spring Removal 1. Disconnect the battery from ground. 2. Raise the front of the car. 3. Disconnect the hydraulic line from...
Clutch slave cylinder parts 1. Cylinder; 2. Air bleed nipple; 3. Cover; 4. Pusher; 5. Piston; 6. Spring Removal 1. Disconnect the battery from ground. 2. Raise the front of the car. 3. Disconnect the hydraulic line from...

Clutch hydraulic drive — air removal
Bleeding the system will be required every time after disassembling and assembling the clutch hydraulic line. Removal air 1. Fill the reservoir with fresh brake fluid (use of waste liquid is prohibited). 2. Raise the...
Bleeding the system will be required every time after disassembling and assembling the clutch hydraulic line. Removal air 1. Fill the reservoir with fresh brake fluid (use of waste liquid is prohibited). 2. Raise the...
Clutch pedal — removal and installation
1. Disconnect the spring(s) from the pedal. 2. Remove the cotter pin and disconnect the master cylinder pushrod from the pedal. 3. Remove the pedal axle. 4. Remove the pedal. 5. Installation is carried out in reverse...
1. Disconnect the spring(s) from the pedal. 2. Remove the cotter pin and disconnect the master cylinder pushrod from the pedal. 3. Remove the pedal axle. 4. Remove the pedal. 5. Installation is carried out in reverse...
This section is available on: russian, bulgarian, belarusian, ukrainian, serbian, croatian, romanian, polish, slovak, hungarian
Similar sections for other Toyota models
➥ Clutch and drive shafts Toyota Camry XV10 (1991-1996)
➥ Clutch Toyota 4Runner N120 (1989-1995)
➥ Clutch Toyota Corona T190 (1992-1997)
➥ Clutch Toyota RAV 4 XA10 (1994-2000)
➥ Clutch and drive shafts Toyota Corolla Verso 3 (2004-2009)
➥ Clutch Toyota Carina T190 (1992-1996)
Link in different formats to this article
TEXTHTMLBB Code
- General information
- Introduction to the guide
- Controls and instruments
- Maintenance
- Power unit
- Petrol engines
- Diesel engines
- Cooling and heating
- Power and exhaust systems
- Engine electrical equipment
- Engine management systems
- Transmission
- Automatic gearbox
- Transmission line
- Chassis, running gear
- Brake system
- Car suspension
- Steering
- Body and interior
- Exterior (external elements)
- Interior (internal elements)
- Doors, locks and windows
- Electrical equipment
- Equipment and devices
- Electrical circuits
- General information
- User manual
- Maintenance
- Power unit
- Petrol engines 2F and 3F-E
- Petrol engines 1FZ-FE
- Engine overhaul
- Engine electrical equipment
- Cooling and heating
- Fuel system (carburetor)
- Fuel system (injector)
- Toxicity reduction system
- Transmission
- Car gearbox
- Clutch
- Transfer case
- Drive shafts and axles
- Chassis, running gear
- Brake system
- Car suspension
- Steering
- Body and interior
- Exterior and interior
- Doors, locks and windows
- Electrical equipment
- Equipment and devices
- Electrical circuits
- General information
- User manual
- Maintenance
- Power unit
- Engine adjustment
- Engine repair
- Fuel system
- Control system
- Turbocharging system
- Cooling and lubrication system
- Charge and start system
- Transmission
- Clutch
- Mechanical gearbox
- Automatic gearbox
- Transfer case
- Chassis, running gear
- Car suspension
- Brake system
- Steering
- Body and interior
- Body elements
- Heating and air conditioning
- Electrical equipment
- Equipment and devices
- Electrical circuits