
To remove the heater core, the manufacturer recommends dismantling the entire instrument panel and steering column. This requires a large number of connectors to be disconnected, so there is a potential risk of breakage of fragile plastic latches, latches, etc. on various details. Using this method on your own in garage conditions is impractical due to its complexity.
On early 60 series models, the heater core can be removed without dismantling the instrument panel.
Removing
Attention! Deactivate the airbag before starting work.
1. Disconnect the battery from the ground.
2. Drain the coolant.
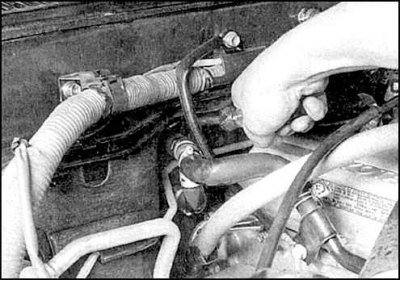
3. Working from the engine compartment side, disconnect the heater hoses at the bulkhead of the engine compartment.
4. Push the rubber seal on the bulkhead of the engine compartment into the passenger compartment, disconnecting the flanges of the seal from the edges of the hole in the bulkhead.
5. Remove center section, glove box, glove box trim, ashtray, receiver with bezel and front trim panel (see fig. Details of the dashboard and front trim of the car FJ60, pic. Details of the instrument panel and front trim of the car FJ80).
6. Remove the heater/air conditioner control panel (see subsection 4.11).
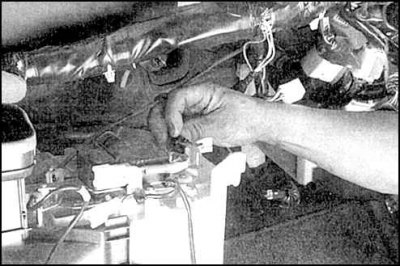
7. Remove the electronic control unit without disconnecting the connectors and set aside to ensure sufficient working space under the heater core housing.
8. Remove heater brackets.
9. Turn away bolts of fastening and remove the channel of the central air duct.
10. Remove the air duct section assembly with the dividing damper, which is located directly above the heater core and is slightly offset forward.
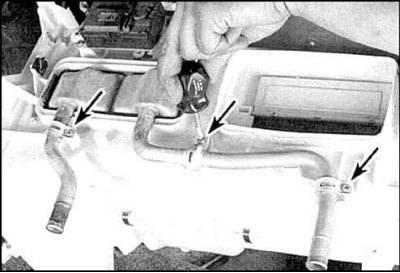
11. Loosen the fixing screws (indicated by arrows) heater pipes to the body.
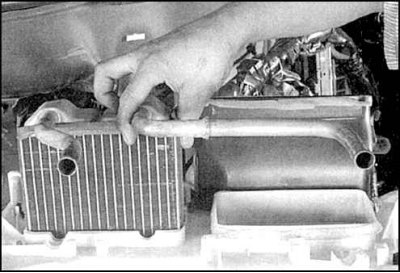
12. Remove the radiator from under the front panel.
13. Place a large amount of rags on the floor mat to soak up spilled coolant.
Attention! When performing this operation, be careful not to damage the plastic parts of the heater. The radiator and tube assembly can be removed by gently pulling away from the engine bay wall to release the plastic tabs from the adjacent parts.
Installation
14. Installation is carried out in the reverse order.
15. Fill the cooling system with liquid, start the engine, make sure there are no leaks and check the operation of the heater.