



Cylinder head
1. A thorough cleaning and inspection of the valves will help determine what work needs to be done to restore the head during engine repair.
Note: If the engine has been seriously overheated or the head gasket has been blown, be sure to check the cylinder head for warpage or other mechanical damage. Grinding the mating surfaces of many modern heads is not acceptable - please refer to Specifications.
Cleaning
2. Scrape off all traces of old gasket and sealant from the cylinder head, being careful not to damage the mating surface.
3. Scrape off all carbon deposits from the combustion chambers and passages, then wash the head thoroughly with kerosene or other suitable solvent.
4. Scrape off all carbon deposits from the valves. To make the job easier, you can use a round wire brush with an electric or pneumatic drive.
Examination
Note: Before deciding to seek help from an engine parts remanufacturing shop, please follow these steps and make a list of items that require attention.
Cylinder head
5. Carefully inspect the head for cracks, visible signs of coolant leakage, and other damage. If cracks are found, the head must be replaced.
6. Using a steel ruler and a set of flat feeler gauges, inspect the head for any curvature of the surface of the connector with the block (see Figure 10.6).
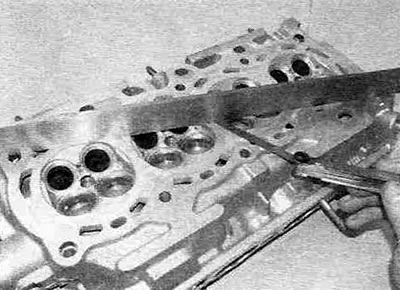
Figure 10.6. Checking the curvature of the mating surface of the cylinder head using a steel ruler and a set of flat feeler gauges.
Compare the measurement results with the data given in the Specifications. Measurements should be taken not only along and across the head, but also diagonally. If grinding is required, please note the minimum allowable height of the rebuilt head.
7. Check the valve seats. If there are serious cracks, burnouts, or cavities, they can be milled out in the workshop. Minor seat wear can be removed by lapping the valves as described below.
8. Check the condition of the valve guides by placing all the valves in their places and pouring kerosene over them. A small amount of play is acceptable, but if the valve guides are worn to the point where the valve is loose and blue smoke is coming out of the exhaust pipe (when the afterburner was still working), they need to be replaced. Please note that it is better to entrust the replacement of bushings to specialists: this requires special equipment. If at least one valve stem has unacceptable wear, consult your dealership for advice on the best course of action.
9. If you have any doubts regarding the condition of the cylinder head, take it to a specialized workshop for inspection.
Valves
10. Inspect the valve stems and plates for cracks, burnout, pitting and general wear. Rotate the valve and make sure there is no visible bend. Inspect the valve stem heel - there should be no significant wear or pitting. Replace faulty valves.
11. If the valves are in satisfactory condition, they should be lapped to the corresponding seats to obtain a high-quality seal. If there is minor carbon buildup on the working chamfers, lap them only using a fine finishing paste. Deep cavities cannot be removed by lapping. If in doubt, contact a specialist workshop, where they will advise you on the best restoration method: lapping, milling or replacing the seats.
12. Lapping of valves is performed as follows. Place the head on a workbench, with the mating surface facing up, placing wooden blocks on both sides to create a gap between the workbench and the valve stem.
13. Apply a layer of lapping paste of the appropriate grade to the seat chamfer and attach the valve lapping tool (suction cup, for example) to the valve plate. Insert the valve into the guide sleeve and, using rotational and return movements, half a turn per pass, so that the paste is evenly distributed over the contact chamfers of the seat and the valve, grind the valve to the seat (see Figure 10.13).
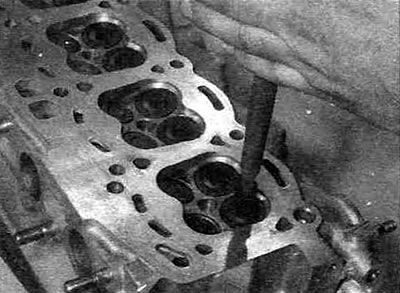
Figure 10.13. Grinding the valve to the seat.
A small spring located under the valve will make the job easier.
14. If a coarse lapping compound is used, work until a uniform matte surface appears on the contact chamfers of the valve and seat, then wash off traces of the coarse paste and apply a fine one to continue the process. When you get an even, matte, continuous light-grey strip, the grinding can be considered complete. Don't try to rub the saddle all the way to the head, just enough to create a matte strip.
15. After finishing grinding all valves, before assembling the head, thoroughly wash off all traces of lapping abrasive paste with a suitable solvent.
Valve parts
16. Inspect the valve springs for signs of damage or discoloration. According to Toyota's method, the condition of valve springs is checked by measuring the amount of force required to compress the spring to a certain size. This can't be done without specialized Toyota testing equipment, so a precise spring check can only be performed at a Toyota dealer. The condition of the valve springs can be roughly determined by measuring their free length and then comparing the measurement results with the data Specifications this chapter (see Figure 10.16).
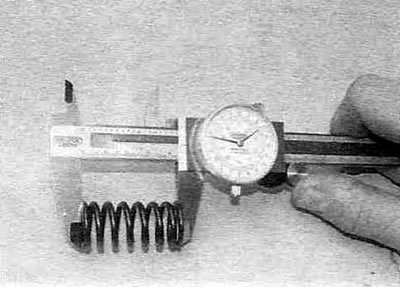
Figure 10.16. Measuring the length of the valve spring in a free state.
17. Place all springs on a flat surface and check them for geometric distortion. This can be done by using a square by placing it next to the spring and measuring the gaps between the top and bottom edges of the spring and the square.
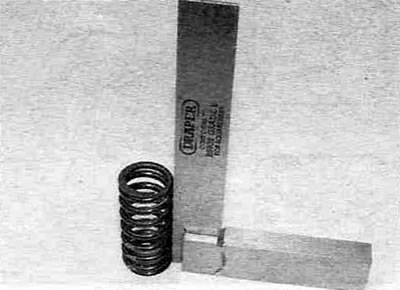
Figure 10.17. Checking the spring for geometric distortion.
18. If the springs are damaged, bent or have lost elasticity, purchase a new set of springs. It is a good idea to replace all valve springs as a set during an engine overhaul, regardless of their condition.
19. Valve seals ("oil scraper caps") must be replaced without fail. Typically, a set of valve stem seals is included in the engine overhaul kit.