
Oil pump parts
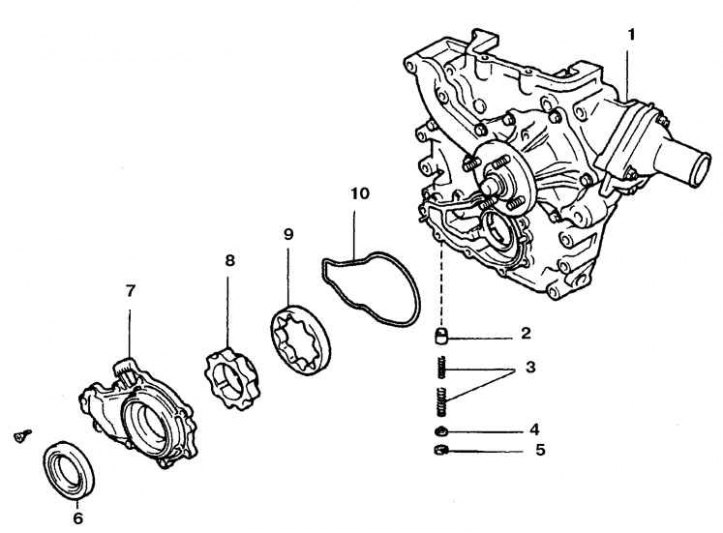
1. Pump (chain cover); 2. Pressure reducing valve; 3. Springs; 4. Plate; 5. Retaining ring 6. Crankshaft oil seal; 7. Pump cover; 8. Leading rotor; 9. Driven rotor; 10. Gasket
Removing
1. Remove belts and tensioner pulley.
2. Remove the tray.
3. Remove the crankshaft pulley. To access the pressure reducing valve, remove the chain cover.
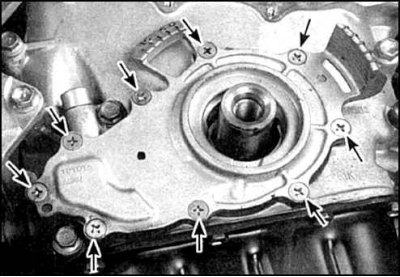
4. Remove 9 screws (indicated by arrows) and remove the oil pump housing.
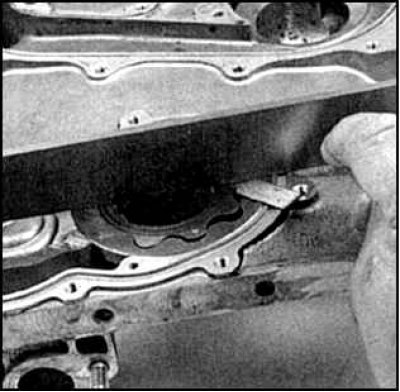
5. Remove the remnants of the seal from the split planes of the pump and cylinder block, wash the planes with a solvent.
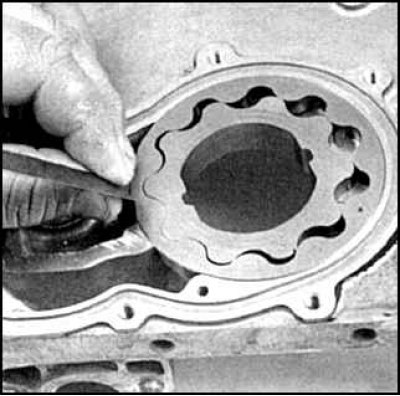
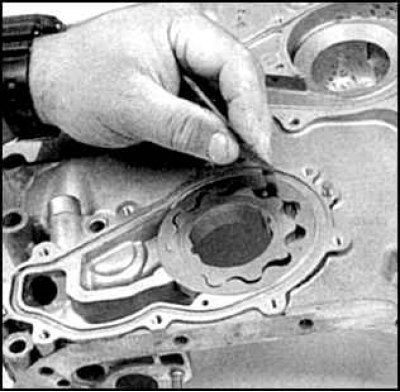
6. Remove the driving and driven rotors.
7. Carefully disassemble the pressure reducing valve.
Examination
1. Wash all parts in solvent, check for wear and damage.
2. Check the condition of the sliding surface of the pressure reducing valve piston and the spring. If damage is found, replace the piston complete with spring.
3. Check the gap between the driven rotor and the housing with a feeler gauge.
4. Check the end gap of the rotor between the rotor and the cover with a feeler gauge.
5. Check the clearance between the male and female rotors with a feeler gauge.
6. Compare the measurement results with the normative ones. If the clearances are out of specification, replace the rotors as a set. Replace pump housing if necessary (chain cover).
Installation
1. Lubricate the rotors with engine oil and install in the housing.
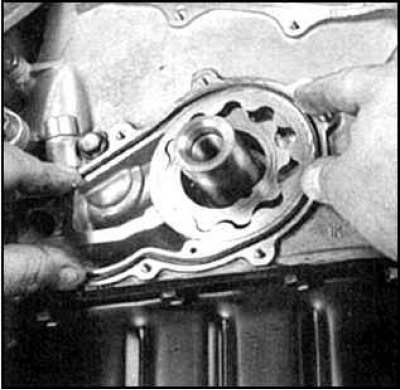
2. Lay technical vaseline in the pump cavity, lay the gasket, put the cover on and tighten the screws.
3. Lubricate the pressure reducing valve piston with fresh engine oil and install the valve parts.
4. Install a new chain cover gasket onto the guide pins.
5. Install the chain cover by engaging the oil pump drive shaft with the crankshaft drive gear.
6. Install the rest of the parts in reverse order.
7. Fill with oil, start the engine, check for leaks.