



(Models since 1996.) Install the lower arm.
- a) Install the sleeve holder and tighten the bolt. Tightening torque 8 Nm.
- b) Connect the lower arm and temporarily install the bolt.
- c) Install the bushing.
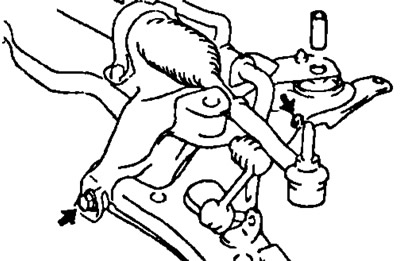
2. (Models up to 96.) Install the cross beam.
- a) Install the cross beam with the lower suspension arm.
- b) Tighten the two bolts. Tightening torque 181 Nm.
- c) Install the rear engine mount bolt and tighten the nut. Tightening torque 78 Nm.
- d) Install the power steering oil cooler pipe clamp mounting bolt. Tightening torque 12 Nm.
- d) Install the engine mount center support beam. Tightening torques:
- Front Engine Mount Bolts 58 Nm
- Central beam mounting bolts 35 Nm
- Bolts for fastening the central beam protection 39 Nm
- e) Connect the return hose.
- g) Install the exhaust pipe. Tightening torques:
- Downpipe mounting bolts 43 Nm
- Downpipe bracket bolts 19 Nm.
- c) Connect the oxygen sensor connector.
- i) Install the universal joint. Tightening torque 35 Nm.
- k) Connect the pressure and return pipes. Tightening torque 51 Nm.
- l) Connect the return hose to the tank and fill with working fluid. Working fluid ATF DEXRON II.
(Models from 96 g) Install the engine mount center beam and cross beam.
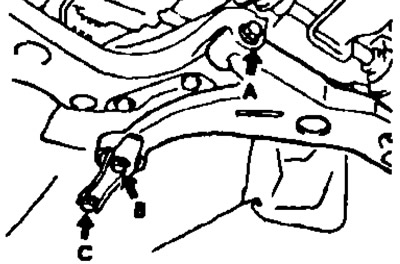
- a) Install the cross member with the steering gear assembly and tighten the 6 bolts. Tightening torques:
- Bolt A 181 Nm
- Bolt B 165 Nm
- Bolt C 165 Nm
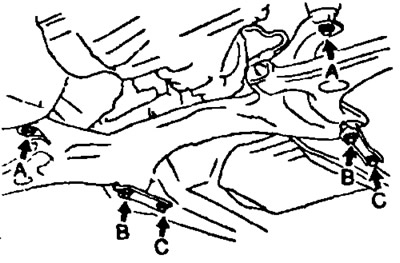
- b) Tighten the bolt and two nuts. Tightening torques:
- Bolt 72 Nm
- Nut 59 Nm
- c) Install the engine mount center support beam, tighten the three bolts and install the three plugs. Tightening torques:
- Bolt A 72 Nm
- Bolt B 35 Nm
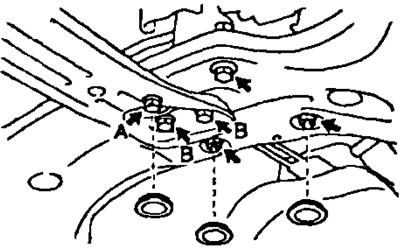
- d) Tighten the five bolts and install the two plugs. Tightening torques:
- Bolt A 35 Nm
- Bolt B 72 Nm
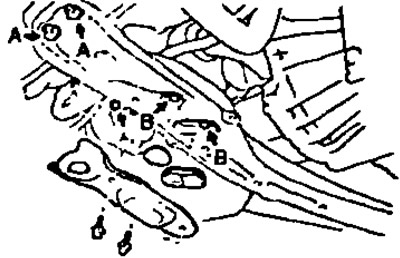
- d) Install the engine mount center support beam guard and tighten the two bolts. Tightening torque 39 Nm.
- e) Connect the following parts:
- intermediate shaft No.2,
- discharge pipeline,
- return pipeline,
- pipeline clamp bracket.
3. (Models up to 96.) Except for models with automatic transmission (left side) Install the lower control arm. Temporarily install the three bolts.
4. Connect the lower ball joint to the lower control arm. Tighten the bolt and two nuts. Tightening torque 127 Nm.
5. Connect the anti-roll bar link to the lower suspension arm. Tightening torque 64 Nm.
6. Connect the tie rod end to the steering knuckle.
- a) Tighten the nut. Tightening torque 49 Nm.
- b) Install a new cotter pin.
Note: If the cotter pin holes do not match, turn the nut a little further.
7. (Models since 1996.) Install the exhaust pipe.
- a) Install the exhaust pipe with the gasket and tighten the bolts and nuts. Tightening torque 43 Nm.
- b) Install the exhaust pipe bracket and tighten the bolts. Tightening torque 19 Nm.
- c) Install the springs and gasket and tighten the bolts. Tightening torque 62 Nm.
- d) Install the exhaust gas temperature sensor with the gasket and tighten the bolts.
8. (Models up to 1996.) Install the lock nut, cap
- c) Install and tighten the lock nut. Tightening torque 226 Nm.
- b) Install the lock nut cap and new cotter pin.
9. Install the lower engine guard.
10. Stabilize the suspension.
- a) Install the front wheel and lower the vehicle. Tightening torque 103 Nm.
- b) By pressing down on the body and lifting it up, stabilize the suspension.
10. (Models up to 96.) Tighten the bolts. Tightening torques:
- Bolt A 235 Nm
- Bolt B 165 Nm
- Bolt C 176 Nm
(Models since 1996.) Tighten the bolt. Tightening torque 235 Nm.
11. Check the front wheel alignment.