Contents: Front door adjustment ↓ Disassembling the front door ↓ Door glass replacement ↓ Front door assembly ↓
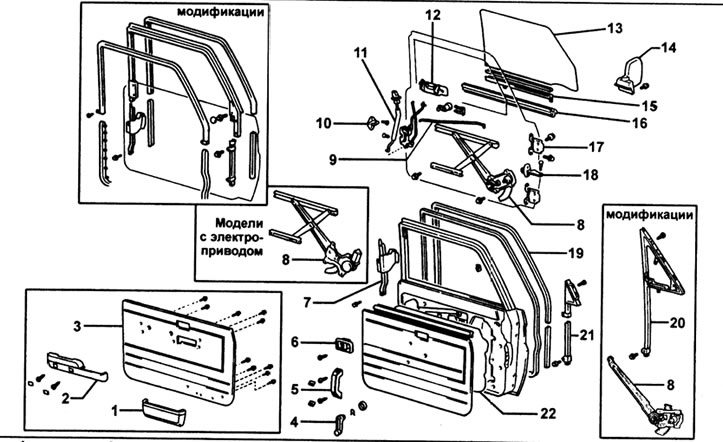
Front door. 1 - pocket, 2 - armrest, 3 - door trim, 4 - window lift handle, 5 - door closing handle, 6 * door opening handle, 7 - rear window guide, 8 - window lift mechanism assembly, 9 - door lock rod, 10 - door latch, 11 - door lock button assembly, 12 - outer door handle, 13 - door glass, 14 - rearview mirror, 15 - glass clip, 16 - lower outer glass seal, 17 - door hinge, 18 - door travel limiter, 19 - upper outer glass seal, 20 - window with glass guide, 21 - front glass guide, 22 - waterproof film.
Front door adjustment
1. Adjusting the door in longitudinal and vertical directions.
Using a special tool, loosen the bolts securing the door hinges to the body, then adjust the door.
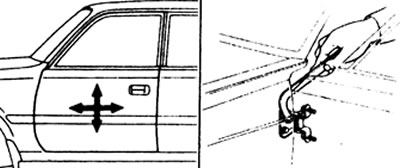
2. Adjusting the door in transverse and vertical directions.
Loosen the bolts that secure the door hinges to the door and adjust the door.
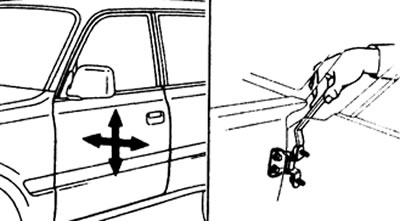
3. Adjusting the door lock bracket.
a) Make sure the door hinge and door lock levers are adjusted correctly.
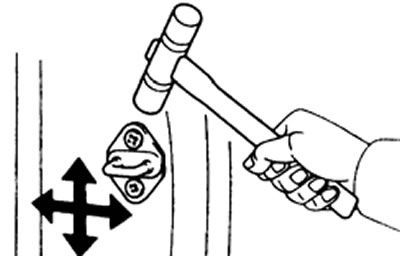
b) Slightly loosen the bracket mounting screws and use a hammer to adjust the position of the bracket
c) Tighten the bracket mounting screws
Disassembling the front door
1. For models with manual window lift: Use a rag to remove the retaining ring and remove the window lift handle together with the gasket.
2. Loosen the screw, then disconnect the lever from the door opening handle and remove the handle.
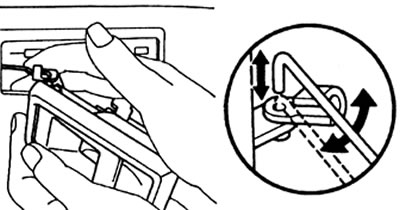
3. Loosen the two screws and remove the rearview mirror.
4. For models with electric window lift: remove the armrest base cover.
a) Insert a screwdriver between the armrest base and the cover.
Note: The end of the screwdriver should be wrapped with electrical tape.
b) Move the base cover forward and upward, remove it, then disconnect the connector with wires.
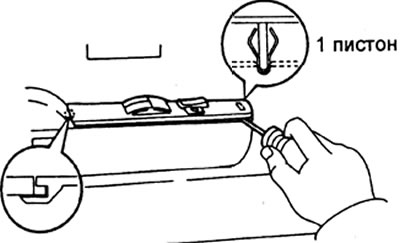
5. Removing the inner door trim (for models with manual window lift).
a) Remove two screws and remove the armrest, or two screws with plugs and remove the door closing handle.
b) Insert a screwdriver between the trim and the door and use it as a lever to remove the door trim.
Note: The end of the screwdriver should be wrapped with electrical tape.
c) Remove the five screws and remove the pocket from the door trim.
6. Removing the inner door trim (for models with electric window lift).
a) Remove the two plugs and two screws from the armrest.
b) Insert a screwdriver between the trim and the door and use it as a lever to remove the door trim.
Note: The end of the screwdriver should be wrapped with electrical tape.
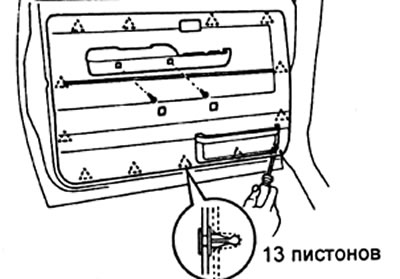
c) Unscrew the five screws and remove the armrest from the door trim.
d) Unscrew the five screws and remove the pocket from the door trim.
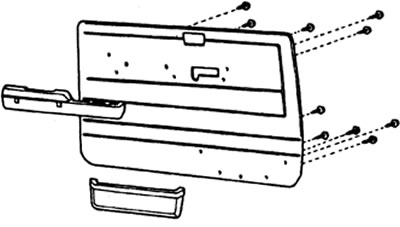
7. Remove the panel edge clips and remove the lower outer door glass seal.
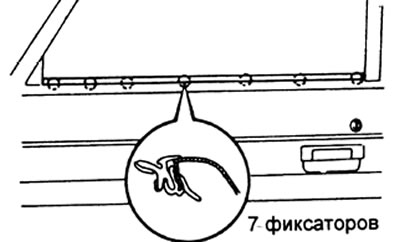
8. Remove the panel edge clips and remove the lower inner door glass seal.
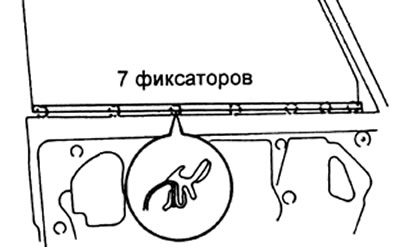
9. For models with electric door lock: Unscrew the three bolts and remove the door lock control relay.
10. Remove the waterproof film.
11. Remove the upper glass seal from the door body.
12. For models without a window: unscrew two screws and two bolts, remove the front glass guide.
13. For models with a window: unscrew the three screws and bolt, remove the window with the glass guide through the top of the door.
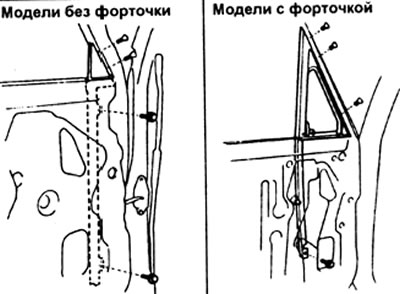
14. Remove the two glass frame mounting bolts, then remove the glass through the top of the door.
Note: Place a rag on the inside of the panel to avoid scratching the glass.
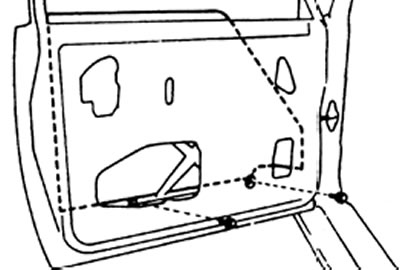
15. Removing the window lift mechanism.
a) For models without a window: unscrew the equalizer lever mounting bolts.
b) For models with electric window: Disconnect the window motor connector.
c) Unscrew the window lift mechanism mounting bolts and remove the mechanism through the inspection hole.
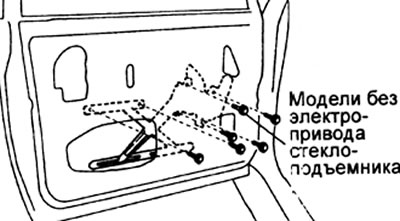
16. Loosen the bolt and remove the rear glass guide.
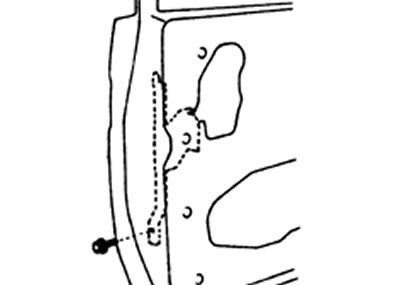
17. Removing the door lock.
a) Disconnect the rods from the outside handle and the door lock cylinder.
b) For models with electric door lock: Disconnect the connector.
c) Unscrew the three bolts and remove the door lock through the inspection hole.
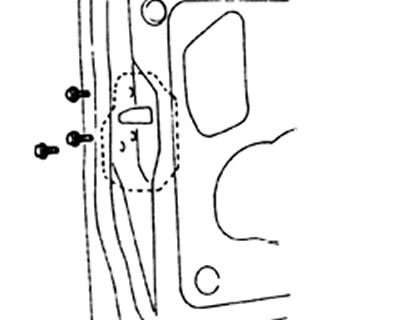
18. Loosen the screw and remove the door lock cylinder.
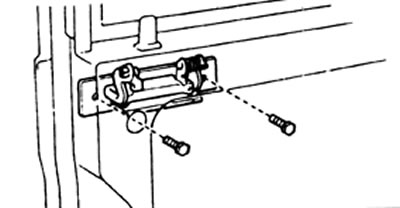
19. Unscrew the two bolts and remove the outer door handle.
Door glass replacement
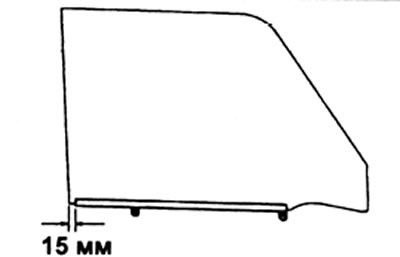
1. Remove the glass clip using a screwdriver.
2. Wet the inside of the rubber insert with soapy water.
3. Install the clip by tapping it lightly with a plastic hammer.
Front door assembly
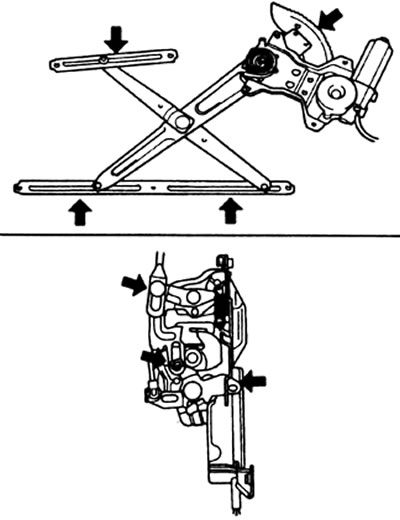
1. Apply consistent grease to the friction surfaces and gears of the window lift mechanism, and the friction surfaces of the door lock.
Caution: Do not apply grease to the mechanism spring.
2. Install the outside door handle and secure with two bolts.
3. Install the door lock cylinder and secure with the screw.
4. Installing the door lock.
a) Install the door lock and secure it with three bolts.
b) For models with electric door lock actuator: connect the connector to the door lock actuator.
c) Connect the rods to the outside handle and the door lock cylinder.
5. Install the rear glass guide and secure with the bolt.
6. Installing the window lift mechanism.
a) Place the mechanism inside the door through the inspection hole.
b) Secure the mechanism with bolts.
c) For models with electric window: Connect the connector.
d) Tighten the two equalizer lever mounting bolts.
7. Insert the door glass into the guides, then install the glass and secure with two bolts.
Note: Place a rag on the inside of the panel to avoid scratching the glass.
8. Installing the front glass guide (for models without a window): Install the guide and secure with two screws and two bolts.
9. Installing a window with a glass guide (for models with a window): Install the window with the glass guide and secure with three screws and a bolt.
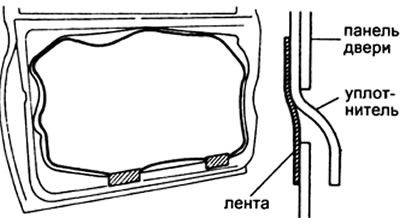
10. Installation of waterproof film.
a) Apply glue to the film.
b) Insert the bottom edge of the film into the slot of the door panel.
c) Seal the slot in the panel with cotton tape.
Note: Do not tape over the pin holes.
11. For models with electric windows: Install the door lock control relay and secure it with three bolts.
12. Insert the tabs of the mounting clips into the slot at the top of the panel and firmly install the lower inner glass seal into the panel.
13. Insert the tabs of the mounting clips into the slot at the top of the panel and firmly install the lower outer glass seal into the panel.
14. Install the rear view mirror and secure with two screws.
15. Installing the interior door trim (for models with manual window lift).
a) Place the door pocket on the door trim and secure with five screws.
b) Install the door trim and secure it with pins.
c) Install the armrest and secure with two screws, or the door closing handle and secure with two screws with plugs.
16. Installing the interior door trim (upholstery for models with electric window lift).
a) Place the door pocket on the door trim and secure with five screws.
b) Install the armrest onto the door trim and secure with five screws.
c) Install the door trim in place and secure it with pins using a hammer.
d) Screw in two screws and install two plugs into the armrest.
17. For models with electric window: Connect the connector with wires, slide the armrest base cover back and press it onto the base.
18. Connect the rods to the inner door handle, install the inner door opening handle and secure it with two bolts.
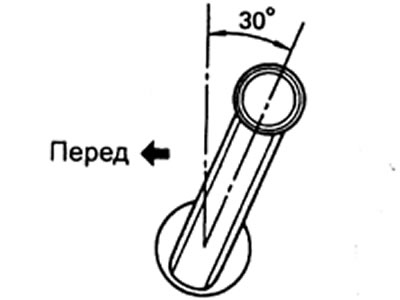
19. For models with manual window lift: Close the window completely, install the gasket and the window lift handle with the locking ring so that the angle between the handle and the vertical is 30°.