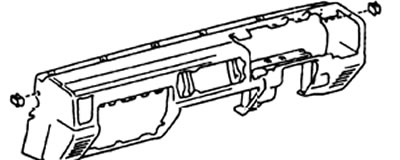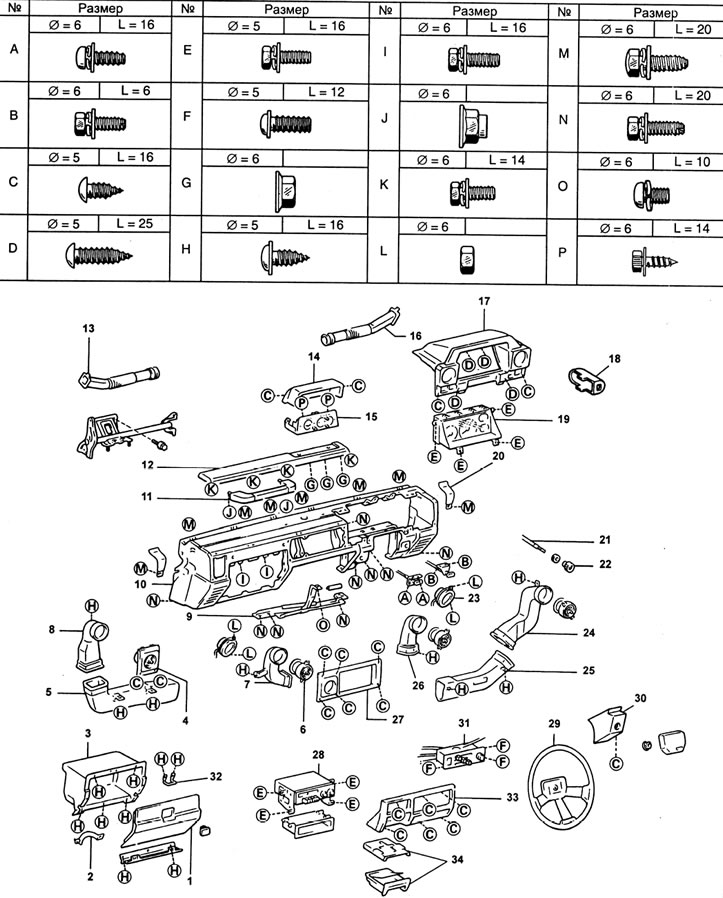
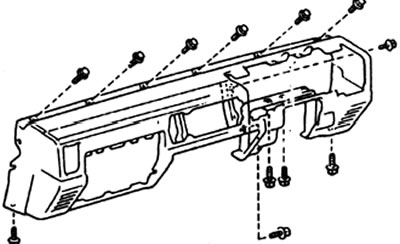
Dashboard. 1 - glove box door, 2 - door travel limiter, 3 - glove box, 4 - instrument panel side air outlet, 5 - air outlet #5, 6 - air outlet #2, 7 - air outlet #4, 8 - air outlet #6, 9 - trim panel stiffener, 10 - instrument panel, 11 - handle, 12 - decorative trim, 13 - passenger door glass defroster air duct, 14 - additional instrument cluster trim panel, 15 - additional instrument cluster, 16 - driver's door glass defroster air duct, 17 - top finishing panel, 18 - bottom finishing panel No. 2 (modifications), 19 - instrument cluster, 20 - plate, 21 - idle fuel control cable, 22 - fuel control handle, 23 - speaker, 24 - air duct No. 2, 25 - air duct No. 1, 26 - air duct No. 3, 27 - center trim panel #2, 28 - radio receiver, 29 - steering wheel, 30 - bottom trim panel #1 (modifications), 31 - heater control panel, 32 - door lock loop, 33 - central finishing panel No. 1, 34 - ashtray.
Note: the dimensions of the screws in the assembly drawing are indicated in accordance with the symbols given in the table.
Removal and installation
Note:
- Cover the pillars with protective tape before removing the dashboard.
- Installation of details of the dashboard is made in an order, the return to removal.
1. Disconnect the wire from the negative battery terminal.
2. Remove the steering wheel.
3. Remove a casing of a steering column.
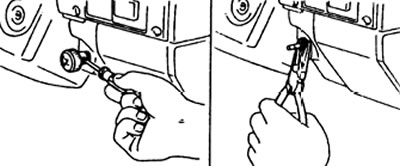
4. Remove the handle and idle fuel control cable.
5. Remove levers of a drive of locks of a cowl and the hatch of a fuel tank.

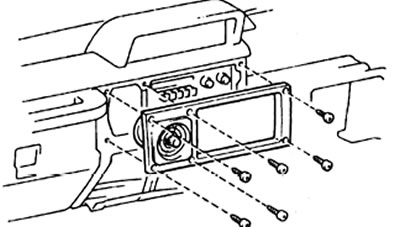
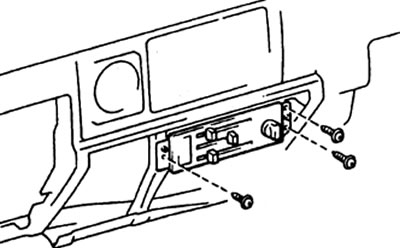
6. Remove six screws and remove center trim panel #2.
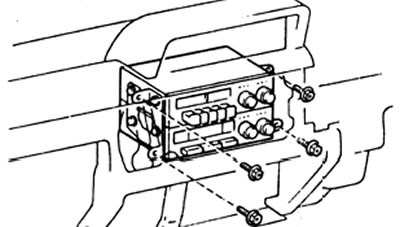
7. Remove four screws, disconnect connector and antenna cable. Remove the radio.
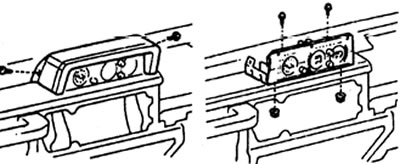
8. Removing an additional instrument cluster.
A) Loosen the two screws, remove the trim panel.
b) Disconnect the connector, unscrew the two nuts and two screws, remove the additional instrument cluster.
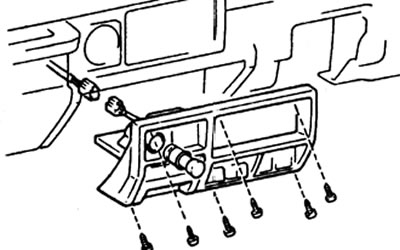
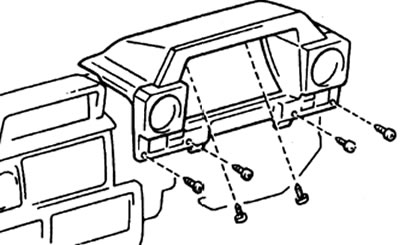
9. Turn away six screws, disconnect a socket and remove the central finishing panel No. 1.
10. Remove the four handles and the heater control panel.
11. Turn away six screws and remove the top finishing panel.
12. Removing the instrument cluster, and) Loosen four screws.
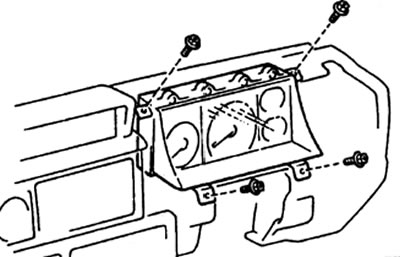
b) Disconnect air duct #3. Then disconnect the speedometer cable, two connectors and remove the instrument cluster.
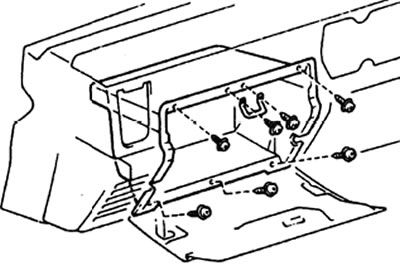
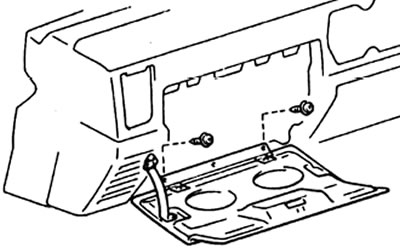
13. Removing the glove box.
A) Loosen the two screws and remove the drawer door lock hinge.
b) Loosen the five screws and remove the glove box.
14. Turn away two screws and remove a door of a box for gloves.
15. Remove the side air ducts.
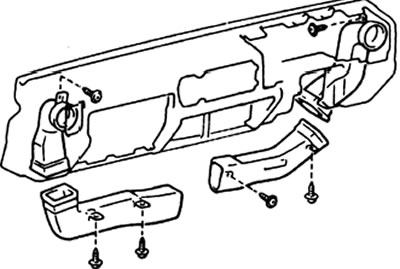
16. Remove the side air distributor of the instrument panel.
17. Remove the passenger door glass heater air duct and the driver's door glass heater air duct.
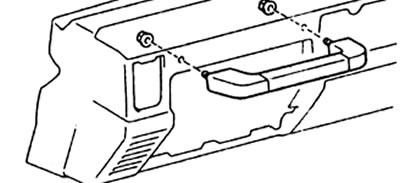
18. Turn away two nuts and remove the handle.
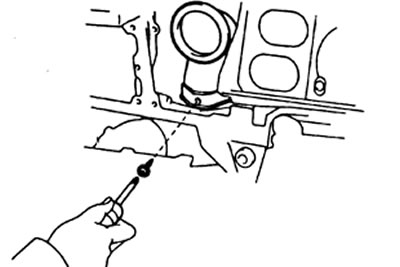
19. Turn away four screws and, using a screw-driver, remove a decorative overlay with three clips.
Note: Wrap the tip of the screwdriver with duct tape.
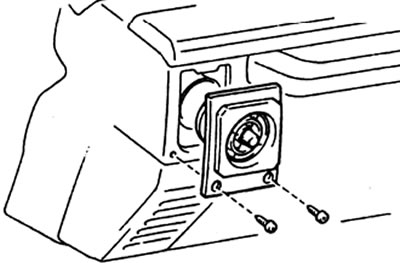
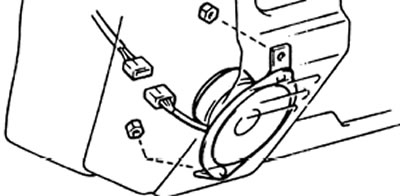
20. Disconnect the connectors, unscrew the nuts and remove the speakers.
21. Remove the instrument panel side mounting plates.
22. Turn away four bolts and remove an element of rigidity of finishing panels.
23. Removing the dashboard.
A) (Models for Europe) Remove the alarm relay, rear fog lamp relay, cold start assist timer, daytime operation lamp relay.
b) (Modifications) Remove the emission control relay.
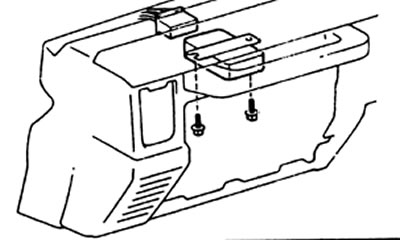
V) Remove the three wire harness clips from the dashboard.
G) Remove the upper steering column bracket.
d) Turn away twelve bolts and remove the instrument panel.
24. Remove the two clips from the side surfaces of the dashboard.