
Clutch master cylinder parts for early production cars
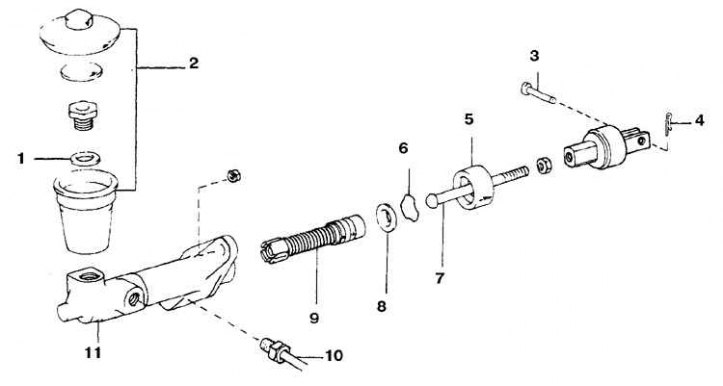
1. Washer; 2. Tank; 3. Pin; 4. Cotter pin; 5. Case; 6. snap ring; 7. Pusher; 8. Cup; 9. Piston; 10. Line fitting; 11. Cylinder
Late production clutch master cylinder parts
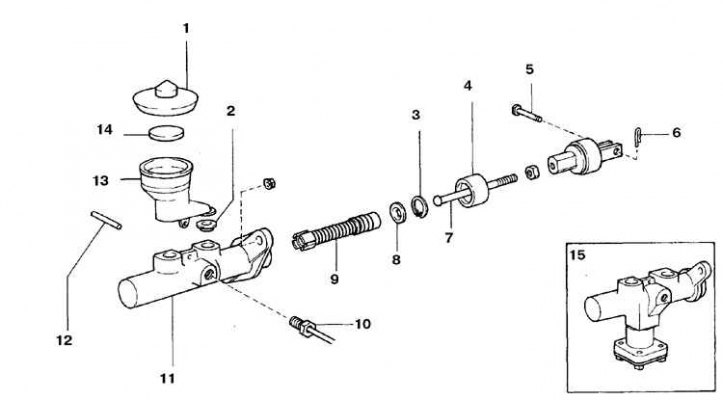
1. Tank stopper; 2. Seal; 3. snap ring; 4. Case; 5. Pin; 6. Cotter pin; 7. Pusher; 8. Cup; 9. Piston; 10. Line fitting; 11. Cylinder; 12. Tank fastening pin; 13. Tank; 14. Float; 15. Cylinder assembly
Disassembly and assembly
Attention! Purchase a cylinder repair kit before disassembly.
1. Disconnect the battery from the ground.
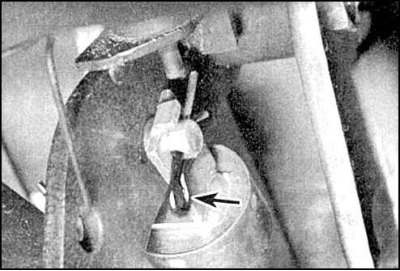
2. Disconnect the master cylinder pusher from the clutch pedal. To remove the clutch cylinder, unpin and sling the axle (arrow).
3. Disconnect the hydraulic drive line from the cylinder, drain the fluid and plug the pipes.
4. Loosen the nuts and remove the cylinder.
5. Turn away an internal bolt and remove a tank.
6. On late release vehicles, knock out the spring-loaded reservoir stud.
7. Remove the cover and spring ring.
8. Get a pusher, a washer and the piston.
9. Check the condition of the inner surface of the cylinder. If scuffing, scratches or painted areas are found, replace the cylinder.
10. If the inner surface is in good condition, then replace only the seals (supplied in repair kit).
11. Before installing parts, they must be lubricated with brake fluid.
12. Further assembly is carried out in the reverse order.
Installation
Installation is carried out in the reverse order. Bleed the air from the hydraulic drive.