
Attention! Before performing work, prepare two bolts with a thread of 6x1 mm and a length of 16–20 mm, which will be used as auxiliary during disassembly (see below).
3.4L engine
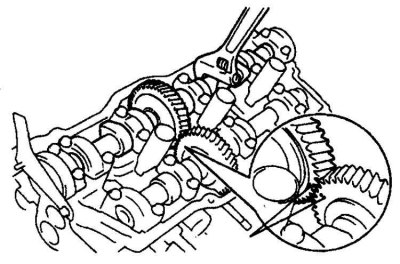
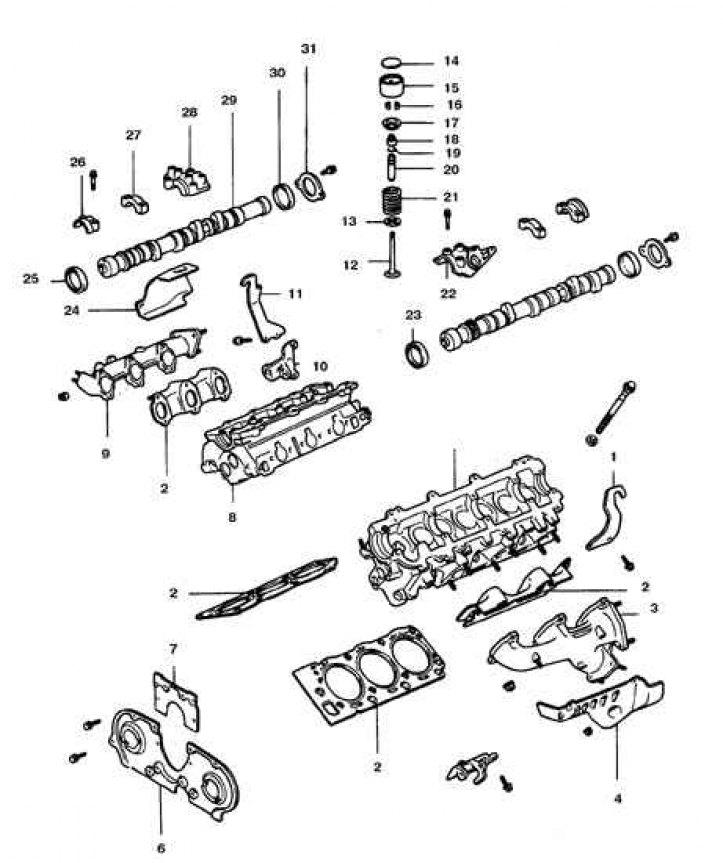
Cylinder head and timing parts of the 3.4L engine
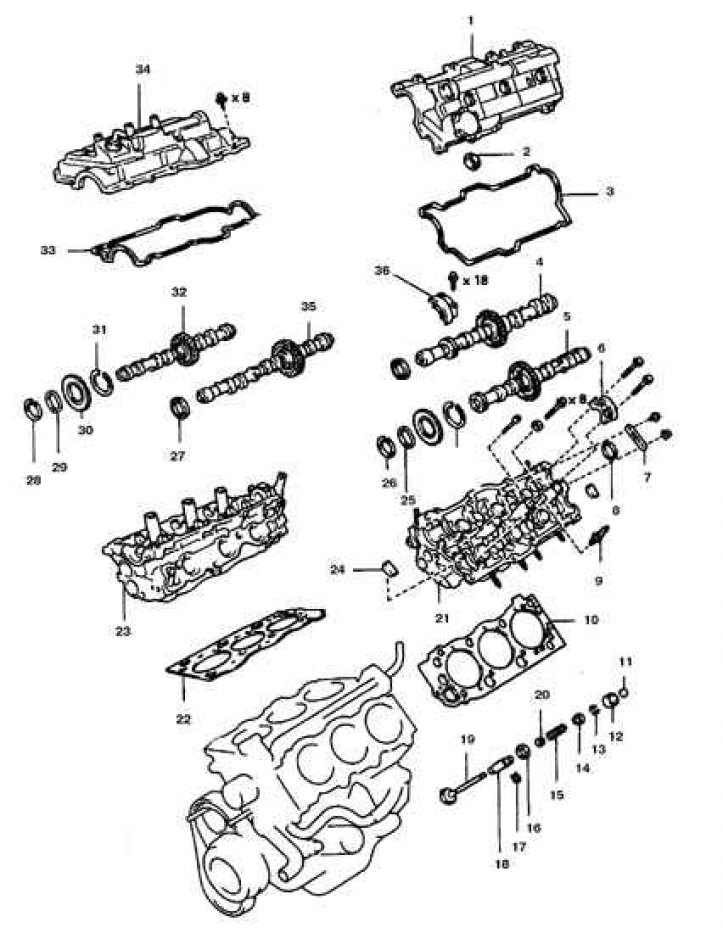
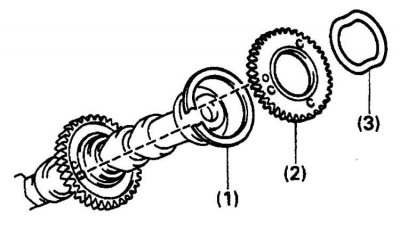
1. Head cover left; 2. Seals of casings of candles; 3. Gasket; 4. Left intake camshaft; 5. Left exhaust camshaft; 6. Lid; 7. Back plate; 8. Plug; 9. Candle; 10. Gasket left; 11. Adjusting washer; 12. Pusher; 13. Crackers; 14. Plate; 15. Spring; 16. Support washer; 17. Retaining ring; 18. Guide sleeve; 19. Valve; 20. Maslosemny cap; 21. Head left; 22. Gasket right; 23. Head right; 24. Plug; 25, 29. Spring washer; 26, 28. Retaining ring; 27. Oil seal; 30. Auxiliary gear; 31. Spring; 32. Right exhaust camshaft; 33. Gasket; 34. Head cover right; 35. Right intake camshaft; 36. Support neck cover
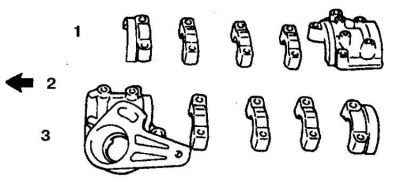
Fixation of the driven gear
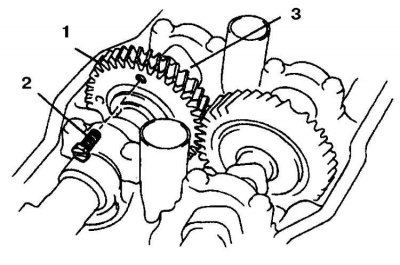
1. Auxiliary gear
2. Bolt
3. Driven gear
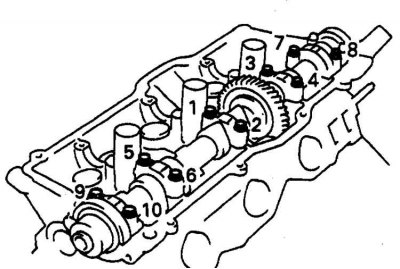
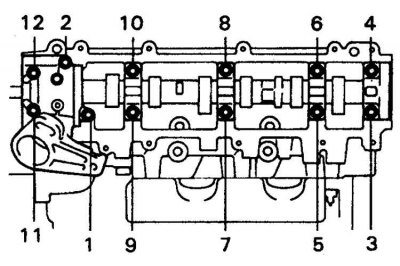
Tightening order for intake camshaft cover bolts
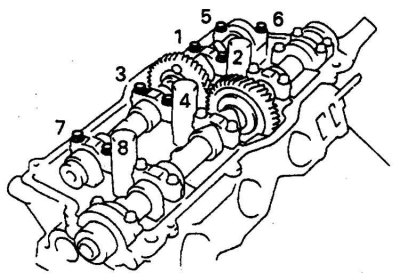
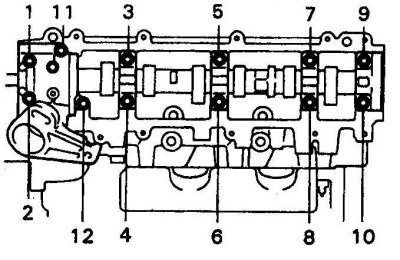
The order of tightening the bolts of the exhaust camshaft covers
Removing
1. Remove the engine cylinder head covers.
2. Set the piston of the 1st cylinder to the TDC of the compression stroke.
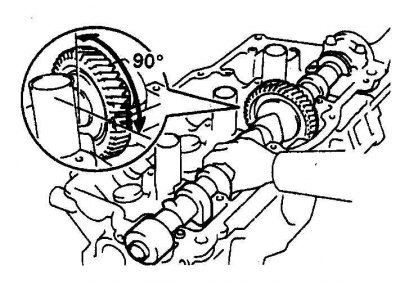
3. Removal procedure: fixing the gear spring, removing the exhaust, then the intake camshafts.
4. Align the marks, tighten the camshaft if necessary. Keep in mind that the outer camshaft is exhaust. The left and right parts are indicated in the course of the car.
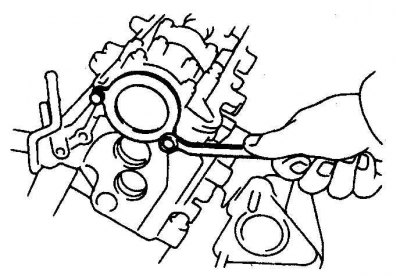
5. Attach the exhaust camshaft sub gear to the main gear with a prefabricated bolt with M6 thread and a length of 15-20 mm (see fig. Fixation of the driven gear).
Attention! Remove the camshafts keeping them parallel to the plane of the cylinder head, since the axial clearance is very small and the slightest tilt of the shaft can lead to breakage.
6. Gradually loosen the exhaust camshaft cap bolts in reverse order (see fig. The order of tightening the bolts of the exhaust camshaft covers).
7. Carefully remove the caps keeping them horizontal and remove the exhaust camshaft.
8. Loosen the intake camshaft cap bolts in reverse order as shown (see fig. Tightening order for intake camshaft cover bolts).
9. Carefully remove the covers and remove the intake camshaft.
10. Repeat the same steps for the left cylinder head.
11. If necessary, carefully remove the tappets and washers. Store all removed parts in the order of their original installation in a special box office.
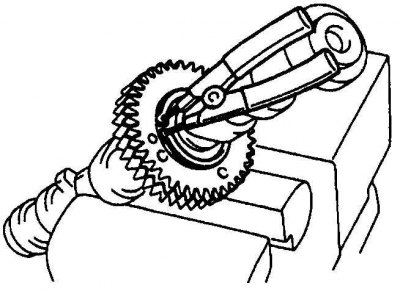
12. Disassemble the exhaust camshaft by clamping it in a vice with soft jaws on the hex neck.
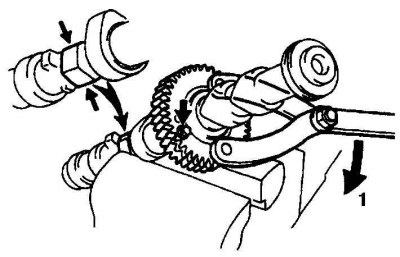
13. Using a wrench with two thrust pins, turn the auxiliary gear clockwise (1), then loosen the auxiliary bolt securing the main and auxiliary gear, and carefully loosen the force, allowing the auxiliary gear to turn counterclockwise until the spring is completely released.
14. Remove retaining ring.
15. Remove spring washer (1), auxiliary gear (2) and auxiliary gear spring (3).
Examination
The method for checking camshafts and tappets is no different from that described in subsection 3.1.7 for 4-cylinder engines.
Installation
1. Assemble the exhaust camshaft.
2. Clamp the exhaust camshaft in a vise.
3. Turn the auxiliary gear with a wrench with two pins and fix with a bolt.
4. Lubricate the tappets and shims with molybdenum grease and reinstall.
Installation of an inlet camshaft of the right head
5. Lubricate the friction surfaces of the camshaft with molybdenum grease.
6. Install the camshaft into the head with the 2 dot marks facing 3 o'clock (towards the exhaust camshaft).
7. Lubricate the bearing surfaces of the front cover with sealant.
8. Install the covers with the arrows pointing towards the belt.
9. Tighten the cap bolts in the specified sequence with the specified torque (see fig. Tightening order for intake camshaft cover bolts).
10. Install a new oil seal (see subsection 3.2.9).
Right exhaust camshaft installation
11. Lubricate the friction surfaces of the camshaft with molybdenum grease.
12. Install the camshaft into the head with the 2 dot marks facing towards the intake camshaft.
13. Install the covers with the arrows pointing towards the belt.
14. Tighten the cap bolts in the specified sequence with the specified torque (see fig. The order of tightening the bolts of the exhaust camshaft covers).
15. Turn out an auxiliary bolt.
16. Follow the steps in paragraphs. 1-15 for left head camshafts.
17. Install the toothed belt.
18. Install the rest of the parts in reverse order.
16. Install the cylinder head covers.
20. Further assembly is carried out in the reverse order.
21. Start the engine and check for leaks.
Engine 3.0L
Cylinder head and timing parts of the 3.0L engine
1, 11. Hook; 2. Gasket; 3. Left exhaust manifold; 4, 24. Heat shield; 5. Generator bracket; 6. Belt cover N3; 7. Belt cover N4; 8. Head left; 9. Right exhaust manifold; 10. Power steering pump bracket; 12. Valve; 13. Support washer; 14. Adjusting washer; 15. Pusher 16. Crackers; 17. Plate; 18. Oil scraper cap; 19. Retaining ring; 20. Guide sleeve; 21. Spring; 22. Support neck cover N4; 23, 25. Oil seal; 26. Support neck cover N1; 27. Support neck cover N2; 28. Support neck cover N3; 29. Camshaft; 30. Plug; 31. Back cover
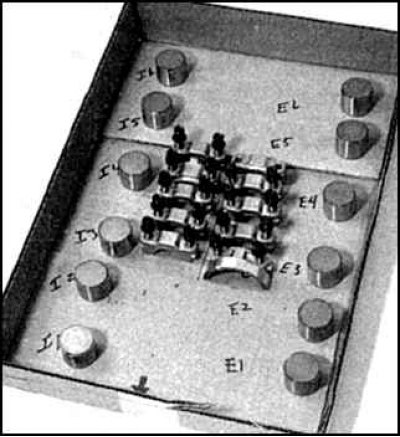
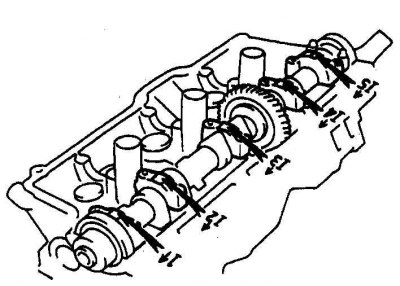
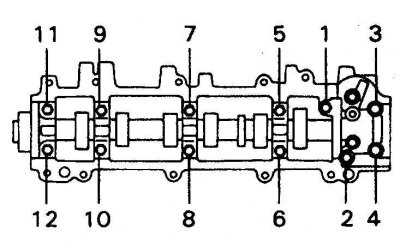
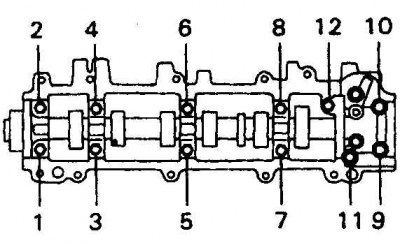
How to store removed parts
1. Details of the right head
2. Towards the front
3. Details of the left head
Removing
1. Remove the engine cylinder head covers.
2. Remove the belt cover N3.
3. Remove the right head rear camshaft covers.
4. Uniformly unscrew the bolts of the covers of the bearing necks of the right head.
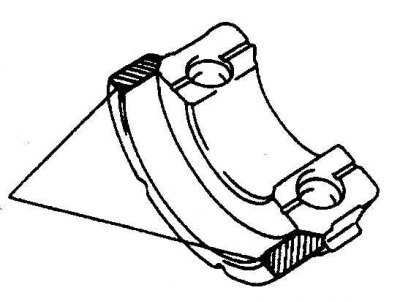
5. Remove the covers carefully.
6. Evenly unscrew the bolts of the covers of the support necks of the left head.
7. Remove the covers carefully.
8. If necessary, carefully remove the tappets and washers. Store all removed parts in the order they were originally installed (see fig. How to store removed parts).
Examination
The method for checking camshafts and tappets is no different from that described in subsection 3.1.7 for 4-cylinder engines.
Installation
1. Lubricate the tappets and shims with molybdenum grease and reinstall.
2. Lubricate the friction surfaces of the camshaft with molybdenum grease.

3. Install the camshafts in the head, install the covers, turning the arrows towards the belt (arrow 1 in the figure points towards the front of the engine).
4. Lubricate the outer edges of the camshaft covers No. 1 and 4 of the left head and 1 and 3 of the right camshaft with sealant.
5. Gradually tighten the cap bolts in the specified sequence with the specified torque (left - left head, right - right head).
6. Install a new oil seal (see subsection 3.2.9).
7. Install the rest of the parts in reverse order.
8. Install the cylinder head covers, having cleaned and lubricated with sealant the sealed places.
9. Further assembly is carried out in the reverse order.
10. Start the engine and check for leaks.