
Removing
1. Remove the cylinder head cover.
2. Remove the ignition distributor.
3. Remove the toothed belt, camshaft pulley and upper toothed belt guard.
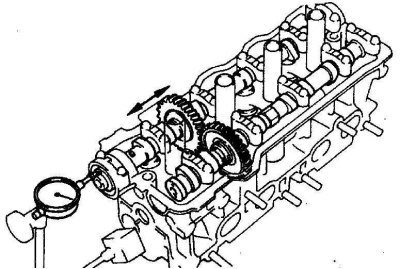
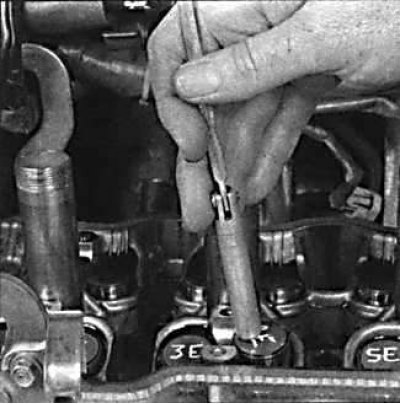
4. Using a dial gauge, measure the camshaft end play.
5. If the camshaft play exceeds the allowable limits, the camshaft and/or cylinder head must be replaced.
Examination
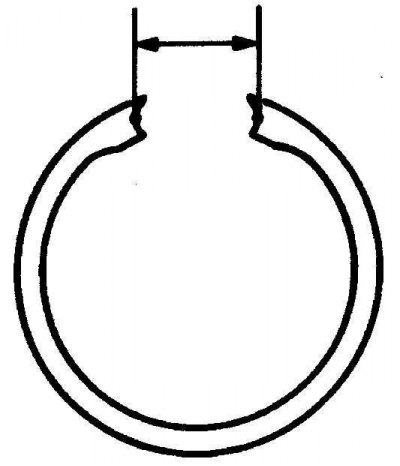
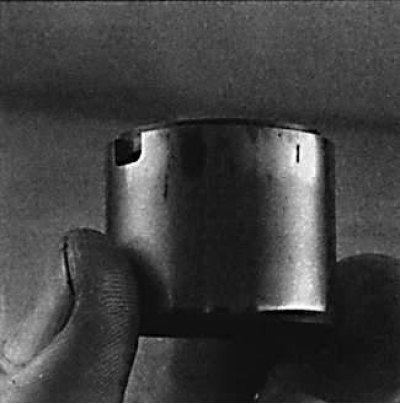
1. Measure the distance between the ends of the gear circlip on the camshaft.
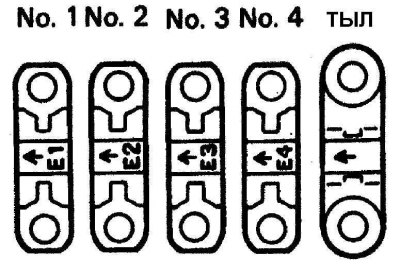
2. Mark and take pushers together with adjusting plates.
3. Inspect each pushrod for wear and scratches.
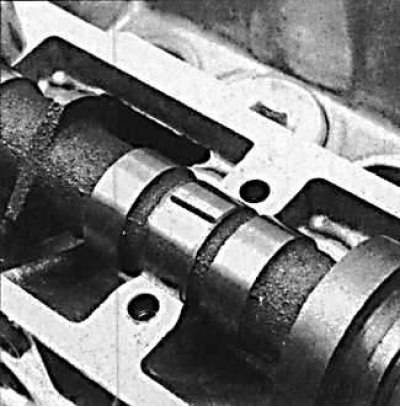
4. Check the running surfaces of the camshaft bearings and the contours of the camshaft lobes for wear. If there is any wear, replace the camshaft.
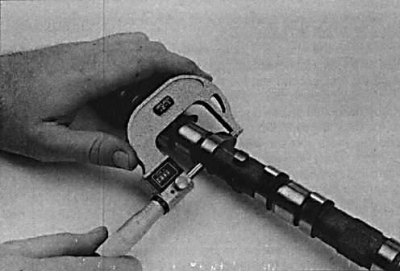
5. Using a micrometer, measure the height of the camshaft lobes...
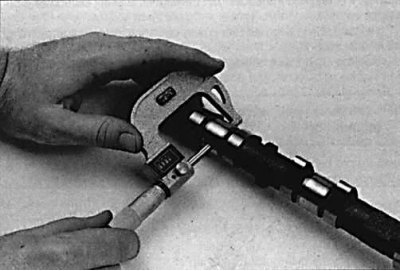
6....and the diameters of the camshaft bearing journals.
7. Check the operating clearance of the camshaft bearings as follows.
7a. Clean the bearing caps and camshaft journals.
7b. Install the camshaft in the cylinder head, do not install tappets and do not lubricate the camshaft.
7th century Cut off a piece of plastic Plastigage rod (it should be slightly shorter than the width of the bearing) and install on the camshaft journal.
7y. Install the bearing cap with the arrow on the bearing cap pointing towards the front of the motor.
7d. Tighten the camshaft bearing cap bolts to the required torque and in several steps.
Attention! Do not rotate the camshaft while measuring the operating clearance using the Plastigage method.
7e. Unscrew the bolts and remove the camshaft bearing cap.
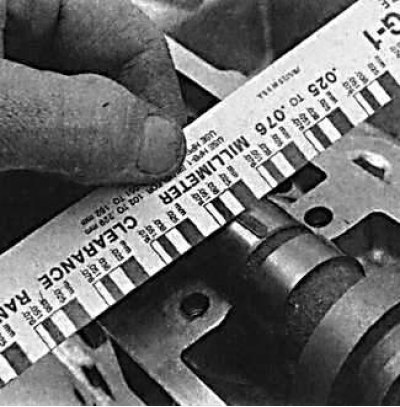
7g. Attach a scale ruler to the deformed plastic rod. Comparing the width of the deformed plastic rod with the reference width on the scale bar, determine the operating clearance.
7z. Finally, carefully clean any traces of Plastigage from the bearings and camshaft.
8. Temporarily install the camshafts without pushers into the cylinder head and measure the play between the teeth of the camshaft gears.
Installation
Camshaft controlling intake valves
1. Lubricate the tappets with clean engine oil and install them in place. Check up that adjusting linings are established in pushers.
2. Lubricate the bearing journals and camshaft lobes with clean engine oil.
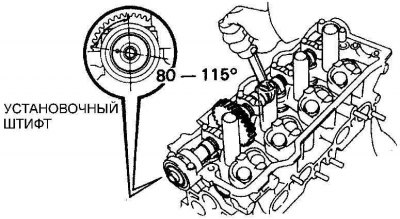
3. Install the camshaft into the cylinder head so that the locating pin is rotated 80°to the left of the vertical line.
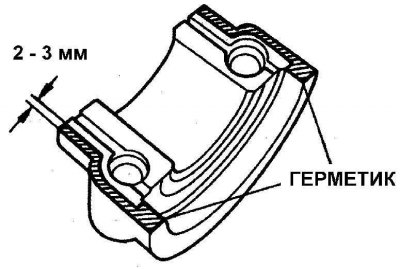
4. Apply a thin coat of sealant to the mating surface of the front camshaft cover as shown.
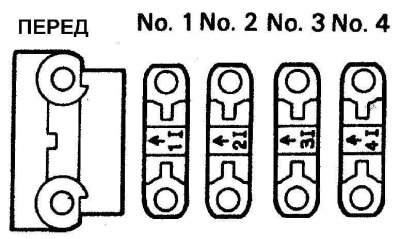
5. Install the camshaft bearing caps according to the marks with the arrows pointing towards the front of the engine.
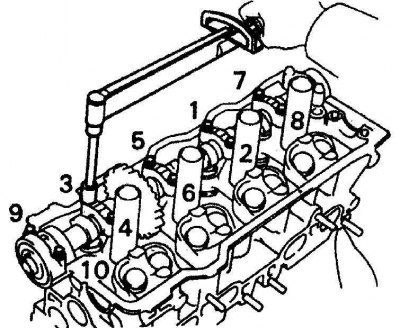
6. Gradually and sequentially, in the order shown in the figure, tighten the camshaft bearing cap bolts.
7. Install a new camshaft oil seal.
Camshaft that controls the exhaust valves
1. Lubricate the tappets with clean engine oil and install them in the cylinder head with shims.
2. Lubricate the cams and camshaft bearing journals with clean engine oil.

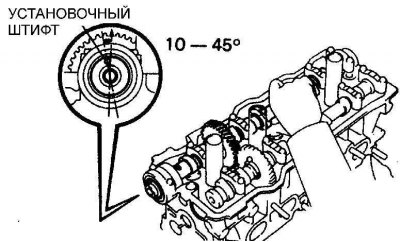
3. Rotate the intake camshaft until the dowel pin is 10°to the left of the vertical line.
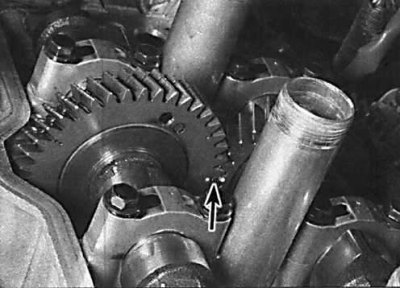
4. Install the exhaust camshaft into the cylinder head so that the marks on the gears of the shafts are aligned.
5. Install the camshaft bearing caps according to the identification marks with the arrows on the caps pointing towards the front of the engine.
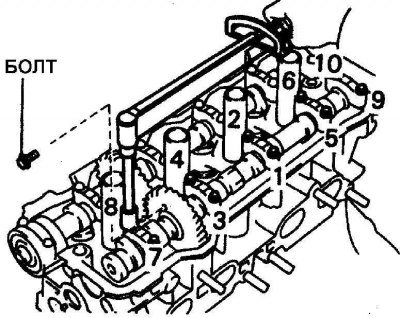
6. Gradually and sequentially, in the order shown in the figure, tighten the bolts securing the camshaft bearing caps.
7. Install the toothed belt pulley on the intake camshaft and tighten it to the required torque while holding the camshaft from turning with a second wrench.
8. Install the toothed belt.
9. Further installation is carried out in the reverse order of removal.