



1. Align and clean the contact surface of the body.
a) Use a knife to level the layer of glue remaining on the body, be careful not to damage the paintwork of the body.
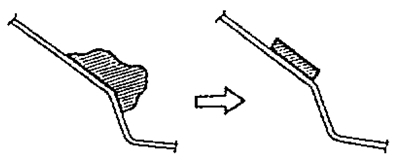
b) Clean the cut surface on the body with a piece of cloth soaked in solvent.
2. Clean the rear window.
a) Using a scraper, remove any remaining glue from the glass.
b) Clean the cut surface of the glass with solvent.
3. Install new fasteners.
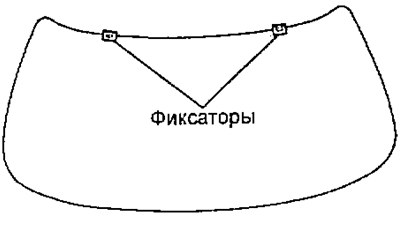
4. Apply alignment marks to the glass and the car body.
a) Position the glass as shown in the figure.
b) Make sure that the glass contact surface is absolutely flat.
c) Apply alignment marks to the glass and the car body as shown in the figure.
d) Remove the glass.
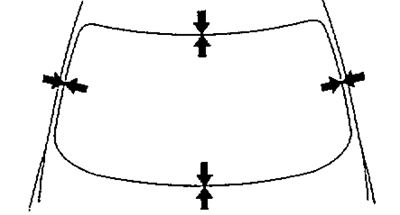
5. Clean the glass contact areas measuring 15-30 mm along the entire edge.
6. Install the seal.
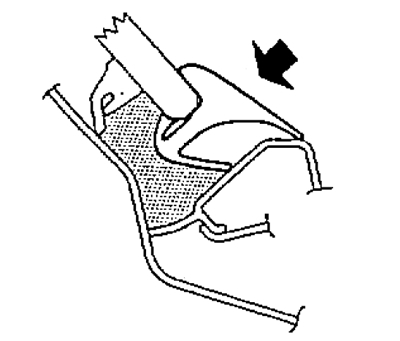
a) Stick double-sided adhesive tape to the glass, leaving 7 mm from the edge.
b) Place the seal on the adhesive tape as shown in the figure.
The material is republished from an online website ToyotaMan.ru
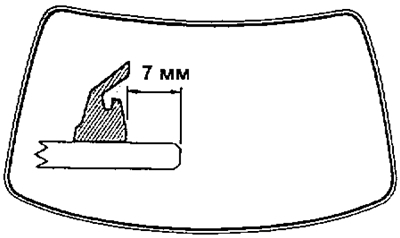
Caution: Do not touch the cleaned glass surface.
7. Cover the contact surface of the body with primer, applying it with a brush.
Attention:
- - the primer drying time is at least 3 minutes.
- - Do not apply primer to the glue.
- - open primer cannot be reused.
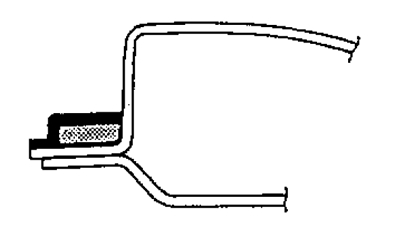
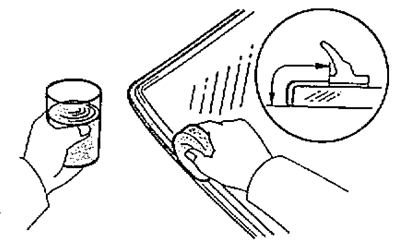
8. Using a brush or spatula, coat the edge and contact surface of the glass with primer.
Attention:
- - the primer drying time is at least 3 minutes.
- - Do not apply primer to the glue.
- - open primer cannot be reused.
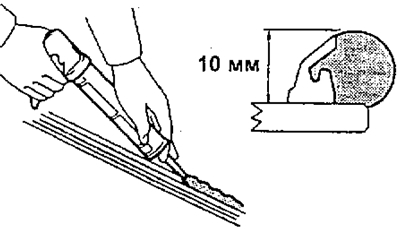
9. Using a syringe, apply adhesive to all glass contact surfaces along the seal as shown in the figure.
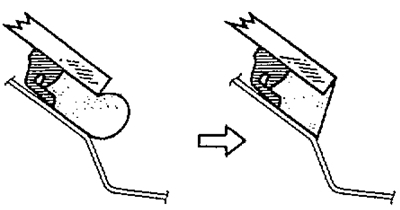
10. Install the glass.
Note: Make sure the seal is installed correctly.
a) Position the glass according to the alignment marks and gently press it along the rim.
b) Apply glue to the edge of the glass with a spatula.
c) Press the glass firmly so that it is held by the glue.
d) Remove excess glue.
11. Check and eliminate leaks in the connection.
a) After the curing time has elapsed, check the connection for leaks.
b) Seal any leaks with automotive glass sealant.
12. Apply adhesive and install the rear window molding.
13. Install the following parts:
a) Connect the rear window defroster wire connectors.
b) Install the handles and rear roof trim.
c) Install the front trunk trim.
d) Install the rear shelf.
d) Install an additional brake light.
e) Install the rear pillar upper trim.
g) Install the rear seat cushion and backrest.