
Note. Installation is carried out in the reverse order of disassembly. In this case, only additional points that are important during installation are described.
Note. If no tightening torque is specified for the bolt, refer to the Standard Bolt Torque Table.
Remove the rear trunk lining.
Remove the rear left mudguard (for vehicles with mudguards.
Remove the rear right mudguard (for vehicles with mudguards).
Removing the rear bumper
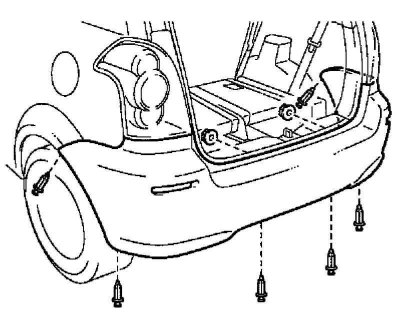
Pic. 8.15. rear bumper mount
Puller remove 6 clips (pic. 8.15).
Loosen 2 nuts.
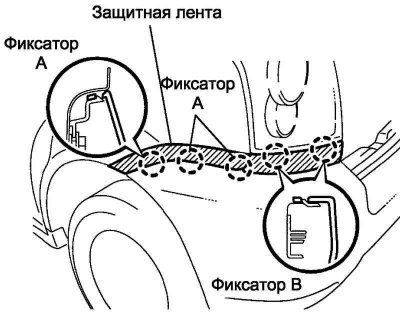
Pic. 8.16. Sticking the protective tape
Stick the protective tape on the rear side panel of the body (pic. 8.16).
Using a screwdriver, remove the 6 clips marked A and 4 clips B, then remove the bumper.
On vehicles with ultrasonic sensors: Disconnect 4 connectors.
Remove ultrasonic sensor #1 (for vehicles with ultrasonic sensor system)
Remove ultrasonic sensor #2 (for vehicles with ultrasonic sensor system)
Remove the reflectors as an assembly.
Removing the left side rear bumper bracket
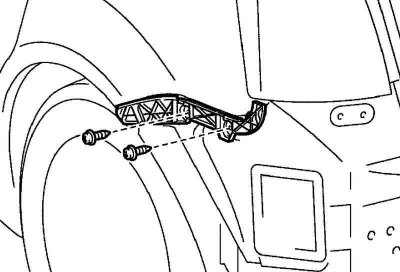
Pic. 8.17. Bracket mount
Remove 2 screws and remove bracket (pic. 8.17).
Removing the left upper bracket of the rear bumper
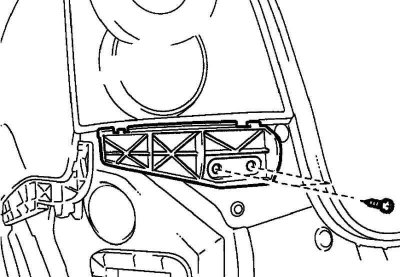
Pic. 8.18. Bracket mount
Remove 2 screws and remove bracket (pic. 8.18).
Remove the right upper rear bumper bracket.
Removing the rear bumper amplifier
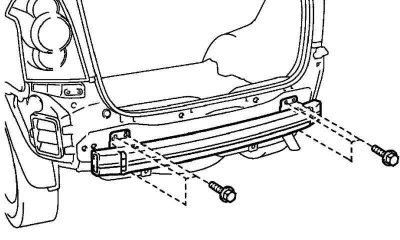
Pic. 8.19. Rear bumper reinforcement mounting
Remove 6 bolts and remove bumper reinforcement (pic. 8.19).
Note. Install the components in the reverse order of removal.