
Note. Installation is carried out in the reverse order of disassembly. In this case, only additional points that are important during installation are described.
Note. If no tightening torque is specified for the bolt, refer to the Standard Bolt Torque Table.
Removing the upper radiator shroud
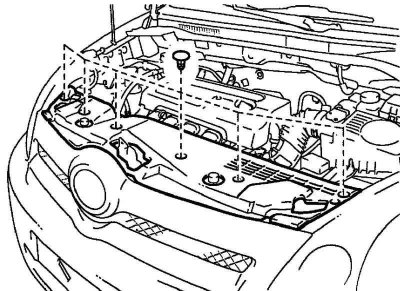
Pic. 8.8. Radiator shroud fixing
Remove the 6 clips with a puller and remove the top cover (pic. 8.8).
Removing the grille
Remove the 3 clips marked A with a puller.
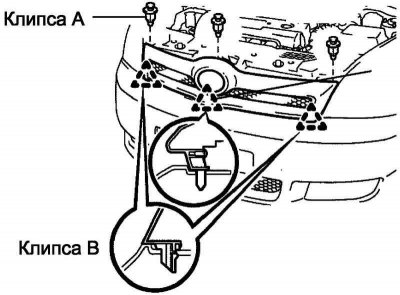
Pic. 8.9. Grille mounting
Using a screwdriver, remove the 2 clips marked B and clip C, then remove the grille (pic. 8.9).
Note. Before starting work, wrap the screwdriver blade with electrical tape.
Removing the video camera assembly (for vehicles with rear view camera)
Remove 3 screws and remove the camcorder.
Removing bracket No. 1 grille
Remove 8 screws and remove grille bracket.
Remove the front left mudguard.
Remove the front right mudguard.
Removing the front fenders
Pic. 8.10. Front fender mount
Remove 4 screws (pic. 8.10).
Remove the clips with a puller and remove the fender liner.
Partially remove the fender liner.
Note. It is not necessary to completely remove the fender liner.
Remove the front fenders.
Note. The execution order for both sides is the same.
Removing the left front spoiler
Pic. 8.11. Front spoiler attachment
Use a screwdriver to remove the 4 clips and remove the spoiler (pic. 8.11).
Note. Before starting work, wrap the screwdriver blade with electrical tape.
Remove the right front spoiler.
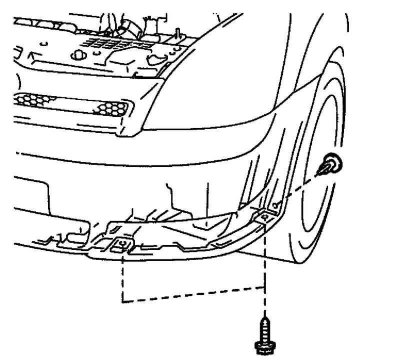
Removing the front bumper
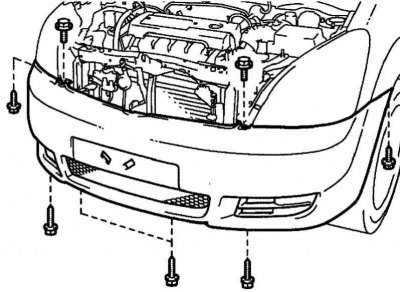
Pic. 8.12. Bolts of fastening of a forward bumper
Remove 6 screws and 2 bolts (pic. 8.12).
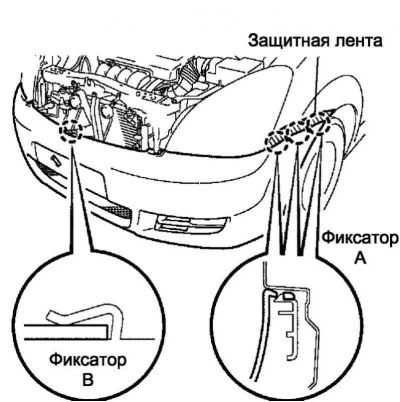
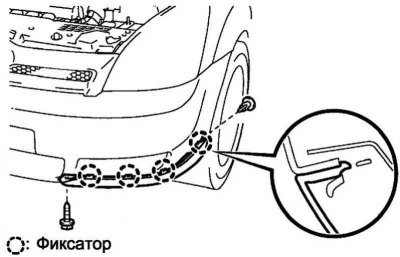
Pic. 8.13. Installing the protective tape
Place protective tape under the front fender liner (pic. 8.13).
Use a screwdriver to remove the 6 clips marked A and clip B, then remove the bumper.
For vehicles with headlight washers: Disconnect 3 washer hoses from 2 pumps and washer fluid reservoir.
For vehicles with fog lights: Disconnect 2 connectors from 2 fog lights.
For vehicles with ultrasonic sensors: Disconnect 2 connectors from the 2 ultrasonic sensors.
Removing headlight washer nozzles (for vehicles with headlight washers)
Loosen the 4 clips with a screwdriver and remove the injectors.
Removing the washer pump of the left and right headlights (for vehicles with headlight washer)
Turn out 2 bolts and remove pumps from a bumper.
Removing the ultrasonic sensor No. 1 (for vehicles with ultrasonic sensor system)
Remove 2 clips and remove 2 sensors.
Removing the lower grille
Loosen the 16 clips with a screwdriver and remove the lower grille.
Removal of fog lamps assy (for vehicles with fog lights)
Remove 4 screws and remove fog lights.
Remove covers of the left and right openings of a forward bumper.
Removing the left and right side brackets of the front bumper
Remove 4 screws and remove bracket.
Removing the front bumper reinforcement
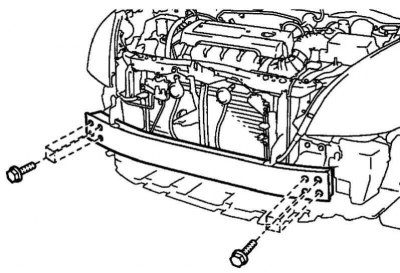
Pic. 8.14. Removing the bumper reinforcement
Turn out 8 bolts and remove the amplifier of a bumper (pic. 8.14).
Installing the front bumper amplifier
Install the front bumper reinforcement with 8 bolts.
Tightening torque: 77 Nm.