
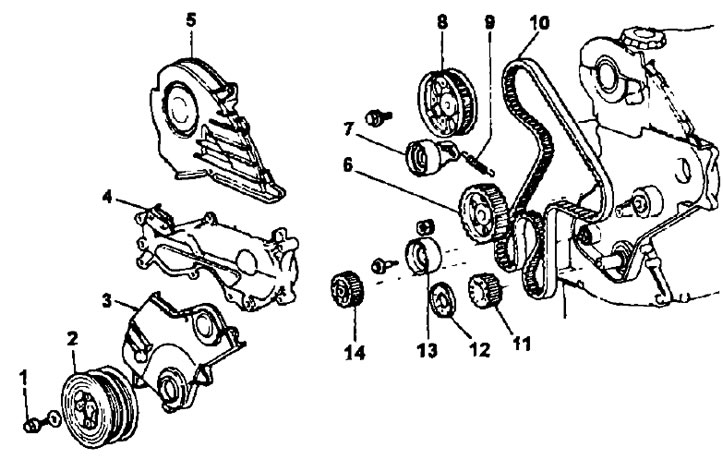
Parts for removal and installation.
1 - a bolt of fastening of a pulley of a cranked shaft (М3=196 Nm), 2 - crankshaft pulley, 3 - timing belt cover No. 1, 4 - timing belt cover and alternator bracket, 5 - timing belt cover No. 2, 6 - injection pump drive gear pulley, 7 - tension roller, 8-toothed pulley camshaft drive, 9 - tension spring, 10 - timing belt, 11 - crankshaft toothed pulley, 12 - timing belt guide, 13 - intermediate pulley, 14 - oil pump drive toothed pulley.
Timing belt installation
1. Install the crankshaft sprocket.
- A) Align the keyway on the pulley with the key on the front toe of the crankshaft.
- b) Using a special mandrel (or a tube of suitable diameter) and a hammer, seat the toothed pulley on the crankshaft.
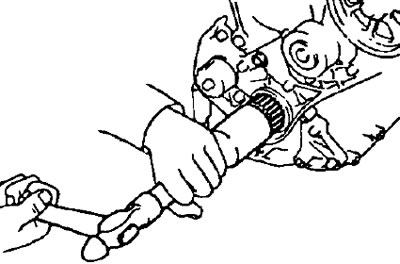
- V) Holding the toothed pulley with a special tool, install it and tighten the pulley fastening nut to the specified torque.
- Tightening torque - 47 Nm
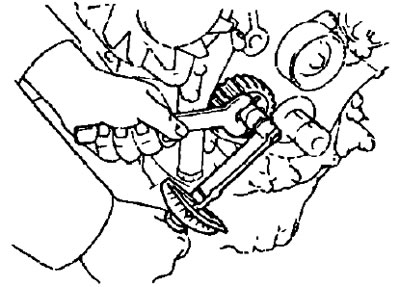
2. Install the intermediate pulley.
- Tightening torque - 37 Nm
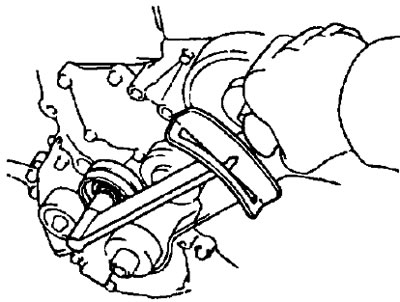
Note: Check for smooth pulley rotation.
3. Install the injection pump drive gear pulley.
- A) Align the keyway on the pulley with the key on the toe of the injection pump drive shaft.
- b) Holding the pulley with a special tool, install it and tighten the pulley fastening nut to the specified torque.
- Tightening torque - 64 Nm
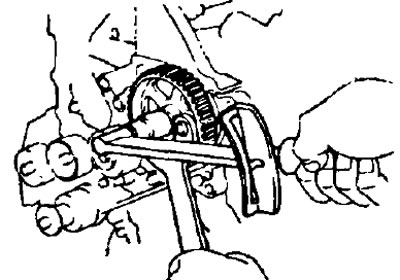
Warning: the nut must be tightened smoothly, without jerking.
4. Pre-install the tension roller.
- A) Install the idler pulley to the cylinder head and tighten the idler bracket bolt by hand until the idler moves freely.
- b) Install and tighten the roller mounting bolt to the specified torque.
- Tightening torque - 7.5 Nm
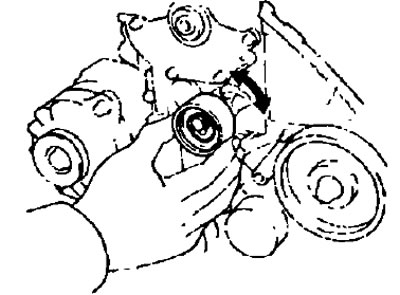
- V) Check that the idler pulley bracket moves freely to the left and right by hand.
5. Install the camshaft sprocket.
- A) Align the dowel pin hole on the pulley with the dowel pin on the front camshaft toe.
- b) Holding the camshaft pulley with a special tool, install the mounting bolt with the washer and tighten it to the specified torque.
- Tightening torque - 88 N.m
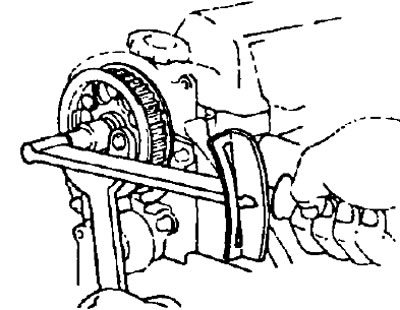
Note: Do not rotate the camshaft to avoid hitting the valves with the piston crowns.
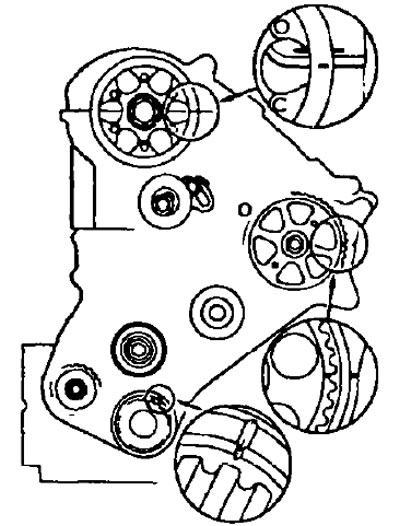
6. Align the alignment marks on the camshaft pulleys, injection pump drive shaft and crankshaft with the corresponding marks.
- A) Align the mark on the camshaft pulley with the parting plane of the cylinder head cover and cylinder head.
- b) Align the alignment mark (groove) on the crankshaft pulley with a mark on the oil pump housing.
Note: When aligning the marks on the crankshaft and camshaft pulleys, avoid turning the pulleys to prevent the valves from hitting the piston crowns.
- V) Align the mark on the injection pump pulley with the mark on the surface of the coolant pump.
7. Install the timing belt.
Note:
- Installation is carried out on a cold engine.
- When reusing the belt, align the alignment marks made when the belt was removed (see section "Removing the timing belt"), and install the timing belt so that the arrow indicating the direction of rotation matches the direction of rotation of the crankshaft.
- When installing a new timing belt, check that the numbers and letters of the markings are readable when viewed from the rear of the engine.
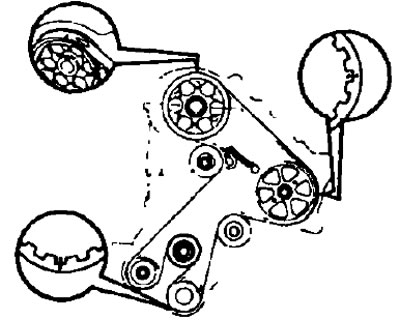
- A) Put the timing belt on the camshaft pulley.
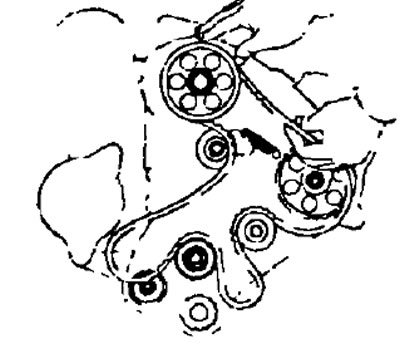
- b) While holding the nut securing the injection pump drive pulley with a wrench, put the timing belt on it.
Note: Make sure the belt teeth are engaged and there is no slack in the belt.
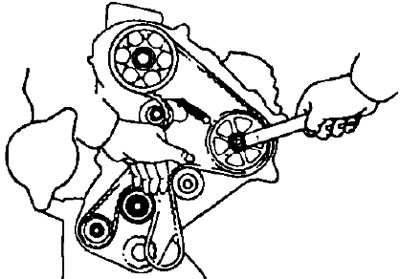
- V) Slide the timing belt over the water pump pulley and the crankshaft toothed pulley.
Note: Make sure the belt teeth are engaged and there is no slack in the belt.
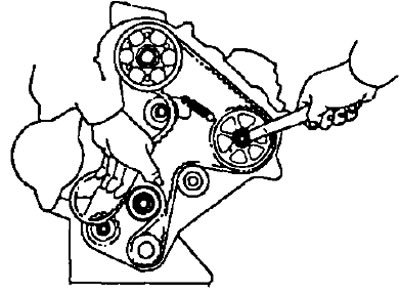
- G) Put the timing belt on the oil pump drive pulley and tensioner pulley.
Note: Make sure the belt is not twisted or too tight.
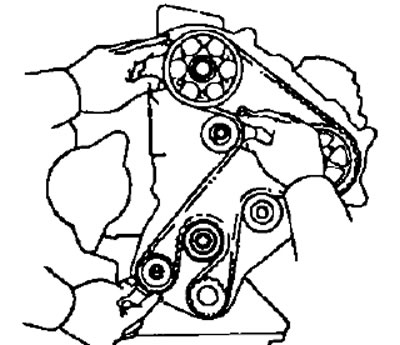
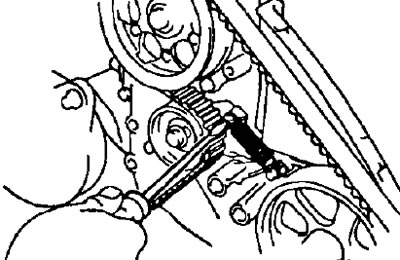
- d) Using a screwdriver, install the tension roller spring.
Note:
- Do not use pliers when tensioning the spring tension roller.
- Loosen the tensioner bolt until the spring tensions the timing belt.
8. Check up correctness of installation of phases of gas distribution.
- A) Temporarily install the crankshaft sprocket bolt.
- b) Turn the crankshaft two turns until the alignment mark on the camshaft pulley aligns with the upper plane of the cylinder head.
Note: Turn the crankshaft only clockwise. If the direction of rotation is incorrect, the belt teeth may come out of engagement due to a change in spring tension.
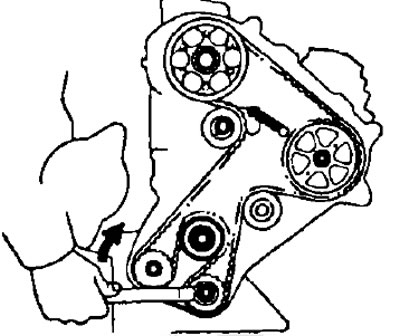
- V) Make sure the alignment marks on the other pulleys match as shown.
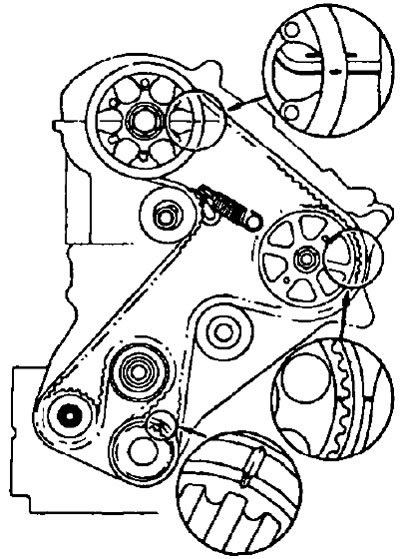
If the labels do not match, repeat the procedure from step 6.
- G) Turn away a bolt of fastening of a gear pulley of a cranked shaft.
9. Tighten a bolt of fastening of a tension roller the specified moment.
- Tightening torque - 37 Nm
Note: When tightening the bolt, do not move the idler pulley bracket.
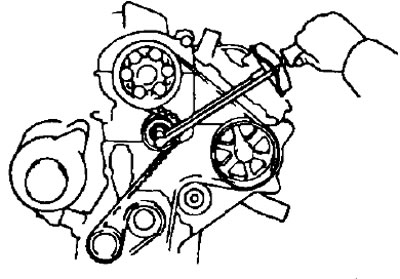
10. Install the alternator bracket and timing belt cover.
- Torque:
- wrench bolt 14 mm - 37 Nm
- wrench bolt 17 mm - 64 Nm
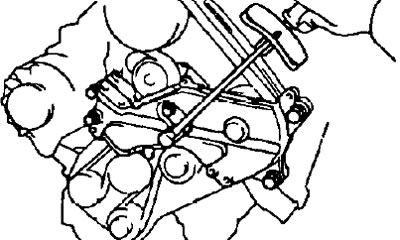
Note: 14mm wrench bolts are used on vehicles with power steering.
11. Install the timing belt guide and cover No. 1.
- A) Install the belt guide on the crankshaft sprocket with the annular notch facing out (as it shown on the picture).
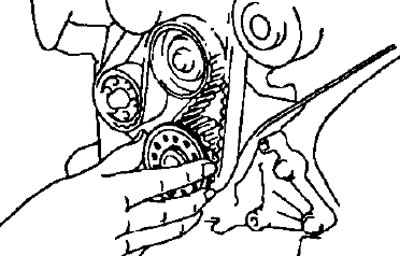
- b) Install the timing belt cover #1 together with the gasket and tighten the five mounting bolts.
12. Install the crankshaft pulley.
- A) Align the keyway on the crankshaft pulley with the key on the crankshaft.
- b) Install the pulley with a mandrel and a hammer.
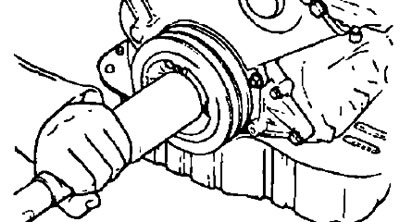
- V) While holding the crankshaft pulley with a special tool, install the pulley mounting bolt with washer and tighten it to the specified torque.
- Tightening torque - 98 Nm
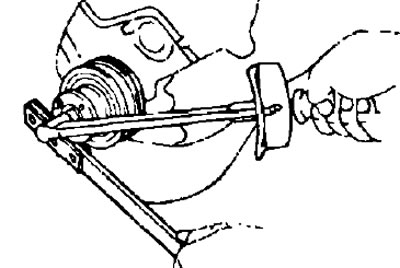
13. Install glow plugs.
14. Install the gasket and timing belt cover No. 2, three clips and tighten the five bolts.
Note: It is best to glue the gasket to the N12 timing belt cover for easier installation.
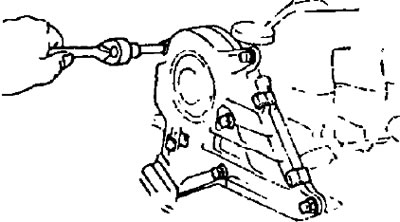
15. (Models with hydraulic booster) Install the power steering pump and drive pulley.
- A) Tighten the three bolts.
- Tightening torque - 39 Nm
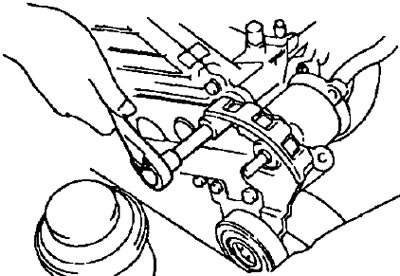
- b) Install the pump pulley and slotted key on the pump drive shaft.
- V) Tighten the pump pulley nut by hand.
16. Install and adjust accessory drive belts. See also section "Checking the alternator drive belt" chapters "General Inspection and Adjustment Procedures".
- Belt deflection under load - 98 N:
| Measuring points | New belt, mm | Used belt, mm |
| A | 9,0-11,0 | 12,0-14,0 |
| IN | 11,0-14,0 | 15,0-18,0 |
| WITH | 5,0-6,0 | 6,0-7,0 |
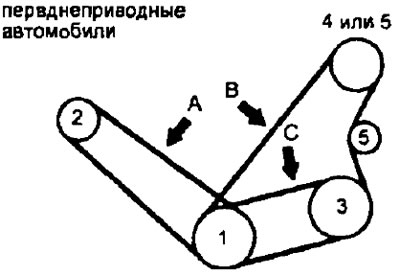
1 - crankshaft, 2 - generator, 3 - air conditioning compressor, 4 - power steering pump, 5 - intermediate pulley.
17. (Models with hydraulic booster)Install the power steering pump pulley and tighten the nut.
- Tightening torque - 43 Nm
18. Check and adjust the injection advance angle.