
Attention! If the vehicle is equipped with electronically controlled air suspension, turn off the suspension height control switch before raising the vehicle.
Removing
1. Loosen the wheel nuts on the corresponding side, raise the front of the car, place secure supports under it and remove the wheel.
2. Remove the transverse engine support from the subframe, which blocks access to the front bolts of the transverse levers.
Note. This procedure is rather cumbersome and requires the use of an engine jack or other suitable equipment (for a description of the removal/installation of engine mounts, refer to chapter 2).
3. Turn out a bolt and turn away nuts of fastening of the spherical joint (pic. 5.3, a). Use a pry bar to remove the ball joint from the control arm (pic. 5.3, b).
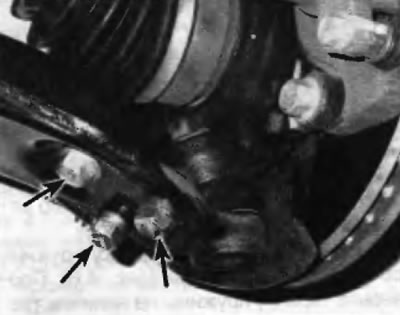
Pic. 5.3, a. To disconnect the transverse arm from the ball joint, disconnect the nuts and remove the bolt
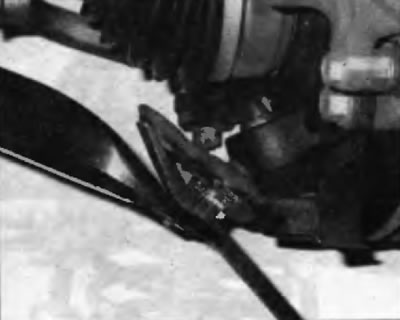
Pic. 5.3b. Separate the control arm from the ball joint with a pry bar
4. Remove the two bolts securing the front end of the transverse arm to the engine support frame (pic. 5.4).
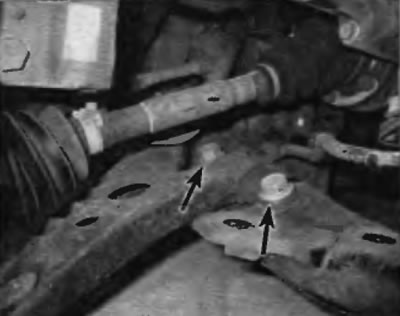
Pic. 5.4. To disconnect the front end of the transverse arm from the support frame under the engine, unscrew the two bolts
Application. On Lexus vehicles with electronically controlled air suspension, before removing the mounting bolts, disconnect the suspension height sensor arm from the transverse arm.
5. Remove the bolt and nut that secures the rear end of the transverse arm to the engine support frame (pic. 5.5).
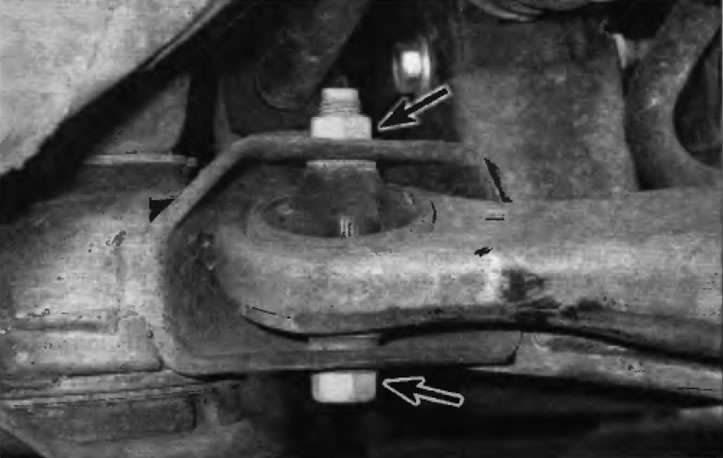
Pic. 5.5. To disconnect the rear end of the transverse arm of the front frame for the engine, unscrew the nut and remove the bolt
6. Remove the transverse arm.
Inspection
7. Make sure the transverse arm is not deformed. If it is bent, replace it. Do not attempt to straighten a deformed transverse arm.
8. Inspect bushings. If they are cracked, torn or worn, replace the control arm.
Installation
9. Installation is carried out in the reverse order of removal. Tighten all bolts/nuts to the specified torque listed in the Specifications at the beginning of this chapter.
10. Establish a wheel and screw nuts of its fastening. Lower the vehicle and tighten the wheel nuts to the specified torque specified in Specifications at the beginning of this chapter.
11. In conclusion, it is recommended to check the alignment of the front wheels and, if necessary, adjust them.