
Note. The following procedure applies to struts that are not used on vehicles with electronically controlled air suspension.
1. If the struts or springs show signs of wear (leaks, loss of damping characteristics, coating chips, sagging or cracks), before starting work, analyze all possible options. Racks / shock absorbers are not serviced and in case of failure are subject to mandatory replacement. However, racks complete with springs can be purchased on an exchange basis, which saves a lot of time and reduces labor costs. Whatever course of action you choose, check the cost and availability of spare parts before dismantling the vehicle
Attention! Disassembling the rack is a potentially hazardous procedure and should be performed with the utmost care. Otherwise, it may lead to serious injury. Use only a high quality spring extractor and carefully follow the tool manufacturer's instructions. After removing the spring from the strut, set it aside in a safe, secure location.
Disassembly
2. Remove the strut assembly with the spring (see paragraph 3 (front suspension) or paragraph 10 (rear suspension). Clamp the strut assembly in a vise. Place wooden spacers on the vise jaws or cover the vise jaws with a rag to prevent damage to the stand. Do not overtighten the vise.
3. Following the tool manufacturer's instructions, install a spring extractor onto the spring (which can be purchased at many auto parts stores or rented) and compress the spring enough to completely remove the load from the upper spring plate (pic. 4.3). This can be checked by moving the spring.
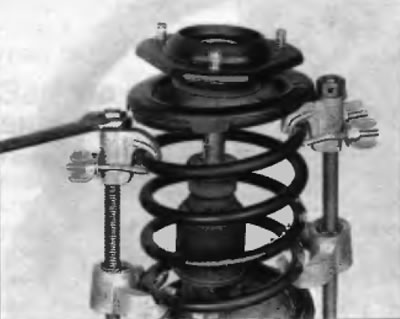
Pic. 4.3. Install the spring puller according to the tool manufacturer's instructions and compress the spring until the load is completely removed from the upper spring cup
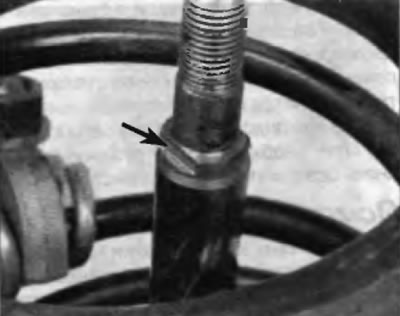
4. Loosen the damper rod nut (pic. 4.4).
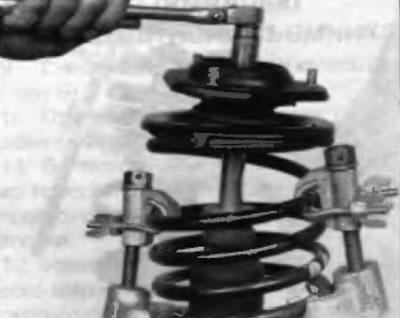
Pic. 4.4. Loosen the damper rod nut
5. Turn away a nut and remove a support of a rack (pic. 4.5). Check up uniformity of a course of the bearing in a support of a rack. If uneven travel is observed, replace the strut support. Check the rubber part of the strut mount for cracks and general deterioration. If any delamination of the rubber is observed, replace the support.

Pic. 4.5. Remove the flock support from the shock absorber rods
6. Remove the upper spring plate from the shock absorber rod (pic. 4.6). Check the spring cap for cracks and hardening. Replace them if necessary. Remove the top insulator.
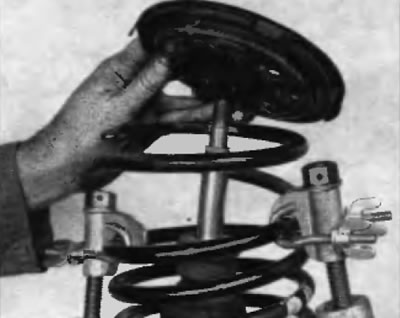
Pic. 4.6. Remove the spring plate from the shock absorber
7. Carefully remove the compressed spring from the assembly (pic. 4.7) and take it to a safe place.
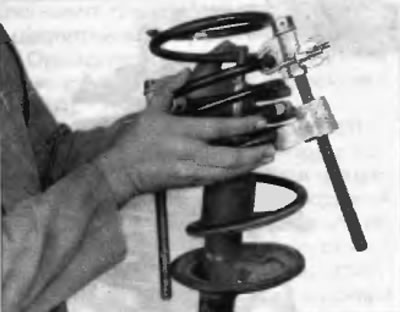
Pic. 4.7. Remove the compressed spring by pointing its ends away from the body
Attention! Keep the compressed spring away from the head by pointing its ends away from the torso!
8. Remove the rubber travel stop from the shock absorber rod.
9. Check the bottom insulator for wear, cracks, and hardening, and lure if necessary.
Assembly
10. If the bottom insulator is being replaced, align it so that the protrusion fits into the bottommost part of the cymbal. Extend the damper rod to its full length and install the rubber travel stop.
11. Carefully place the spring on the lower insulator so that the end of the spring fits into the lowest part of the insulator (pic. 4.11).
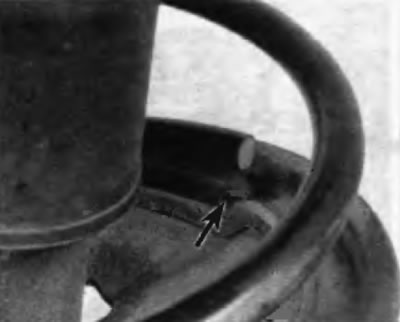
Pic. 4.11. When installing the spring, make sure that its end finds a recess in the lower plate
12. Install the top insulator onto the spring, making sure the mark on the top of the insulator is facing the same direction as the rack bracket (for steering knuckle). Install the spring plate, making sure that the straight sections in the hole match the flats on the damper rod (pic. 4.12).
Pic. 4.12. The flats on the shock absorber shaft must coincide with the straight sections of the hole in the spring plates
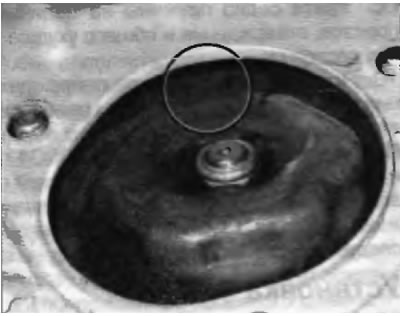
13. Align the out mark (outside) on the upper spring plate with a mark on the upper insulator.
14. If you are working with a front strut, make sure that the arrow on the spring plate is directed towards the lower bracket, towards the steering knuckle (pic. 4.14).
Pic. 4.14. Make sure that the arrows on the surface of the upper spring plate are facing the outside of the vehicle
15. Install the dust cover and strut support onto the shock absorber rod.
16. Screw the nut onto the shock absorber rod and tighten it to the prescribed torque specified in Specifications at the beginning of this chapter. Remove the spring extractor.
17. Install suspension strut assembly with spring (see paragraph 3 (front suspension) or paragraph 10 (rear).