
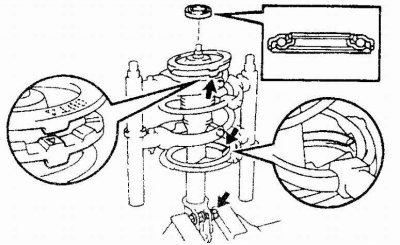
Details of the front suspension strut (rear suspension strut arrangement is similar)

1. Top support cup; 2. Bearing; 3. Top saddle; 4. Spring buffer; 5. Top insulating casing of the spring; 6. Lower spring insulating gasket; 7. Spring; 8. Suspension damper; 9. ABS speed sensor wiring; 10. Stabilizer link; 11. Brake hose; 12. Rack assembly
If there are obvious signs of wear or damage to the strut or spring (fluid leakage, spring tension, external damage, etc.), then the question of the expediency of disassembly should be decided. The shock absorber strut cannot be repaired and must be replaced as an assembly.
Disassembly
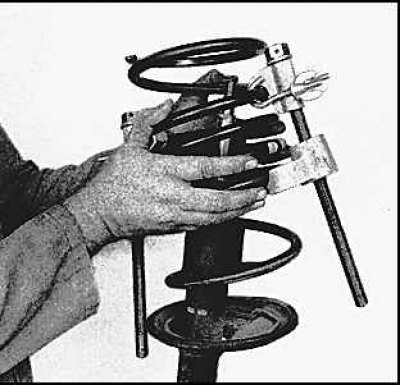
1. Remove the stand. Clamp the bottom of the rack in a vise through the wood spacers.
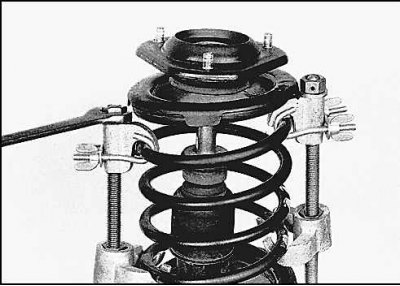
2. Compress the spring with a tool to relieve pressure on the upper spring seat (checked by rocking the top cymbal).
Attention! When removing the spring, use a special tool to compress the spring. Store the removed compressed spring in a safe place.
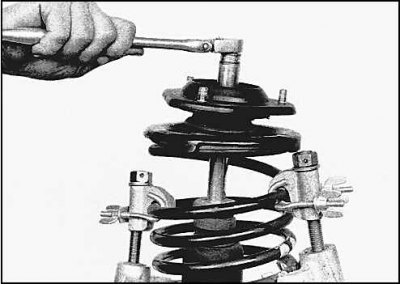
3. Loosen the damper rod nut.
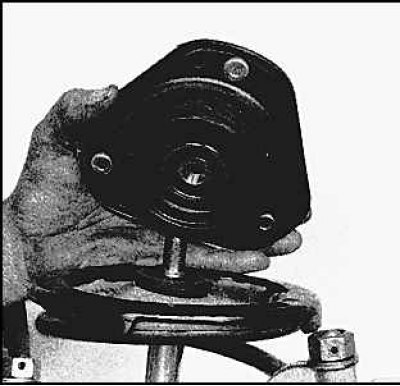
4. Loosen the nut and remove the strut top support cup. Check the condition of the cup bearing. If the bearing seizes during rotation, replace the cup. Check the integrity of the cup rubber seal for cracks and signs of wear. If the destruction of the rubber is found, then replace the gasket.
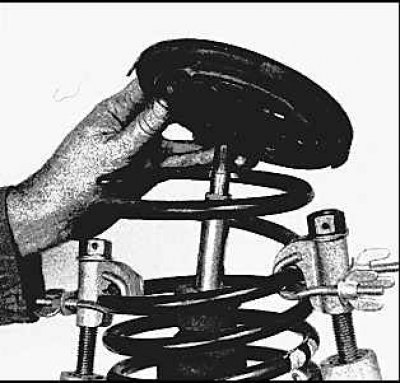
5. Remove the top spring seat. Check the seat for cracks and hardening. Replace if necessary. Remove the top spring cover.
6. Carefully remove the compressed spring.
7. Remove the rubber buffer.
8. Check the condition of the lower insulating gasket, replace if necessary.
Assembly
1. If the lower one is being changed, then reinstall it so that the protrusion on the gasket faces down and goes into the recess on the bottom cup of the rack.
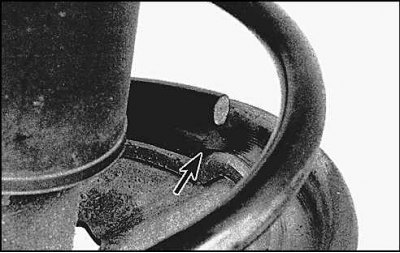
2. Install the spring so that the end of the last coil goes into the recess on the bottom insulating gasket.
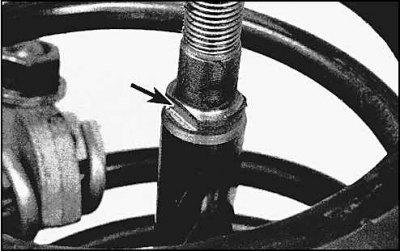
3. Install the upper insulating casing and spring seat, while aligning the flats on the damper rod with the edges of the seat hole.
4. Align the OUT mark of the upper spring seat with the mark on the upper insulating jacket.
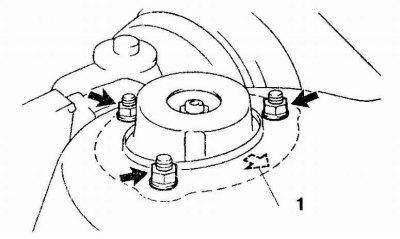
5. When assembling the front suspension strut, make sure the arrow on the saddle points outwards (1 - out).

6. When assembling the rear suspension strut, orient the upper support cup as shown in the photo.
7. Install the seal and top cup onto the rack.
8. Screw on the top cup fastening nut and tighten to the specified torque. Simulate the device that compresses the spring.
9. Install the stand on the car.