
2. Normal tread wear can be monitored using a simple and inexpensive device known as «tread depth indicator» (pic. 5.2). When the tread depth reaches approximately 16mm, the tire (s) should be replaced (it is better to do it earlier).

Pic. 5.2. Use the tread depth indicator to check tire wear. It can be purchased at auto parts stores and service stations
3. Pay attention to any abnormal tread wear (pic. 5.3). Tread defects such as one-sided wear, wear patches and uneven wear (more on one side than on the other), are a sign of incorrect wheel alignment and/or wheel balance problems. If any of these conditions are present, contact a service station that has the appropriate equipment to correct the problem.
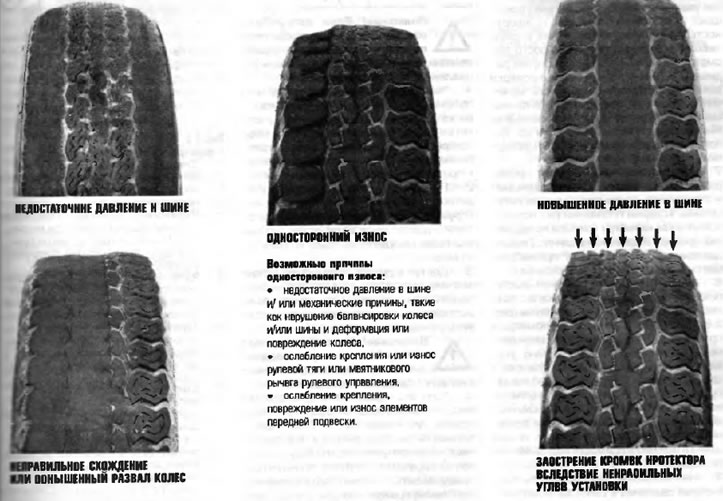
Pic. 5.3. This drawing will help with specific tire conditions, show possible causes of abnormal wear, and suggest corrective actions to be taken
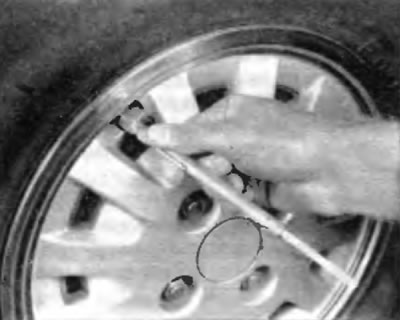
4. Carefully inspect the tire for cuts, punctures and penetrated nails. Sometimes a tire will hold air pressure for some time or let air through very slowly even after the nail has penetrated directly into the tread. If there is a slow leak, check the valve faucet to make sure it is tight (pic. 5.4,a). Inspect the tread for objects that may have embedded in the tire or for «traffic jams», that could start leaking (punctures in radial tires are repaired by installing a special plug in the place of the puncture). If a puncture is suspected, it can be easily identified by applying a soapy solution of water to the area of the puncture (pic. 5.4b). If there is a leak, the soap solution will bubble. If the puncture is not very large, a tire shop may well be able to repair a punctured tire.
Pic. 5.4, a. If the tire is constantly leaking air, first check the valve to make sure it is tight (auto parts stores can usually get inexpensive special keys for this)
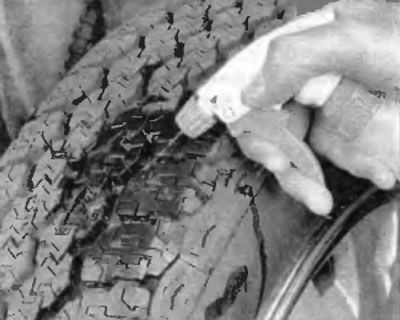
Pic. 5.4b. If the valve is leaking, raise the corner of the car with the flat tire and apply a soapy water solution to the tread while spinning the wheels slowly. Slow leaks lead to small bubbles
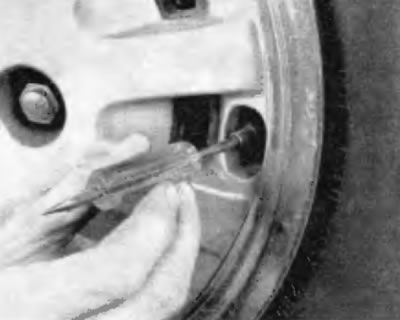
5. Carefully inspect the inner sidewall of each tire for signs of brake fluid leakage. If so, inspect the brakes immediately.
6. Proper tire pressure increases tire life, improves tire mileage and improves driving comfort. Tire pressure cannot be accurately estimated by simply looking at the tire, especially in the case of a radial tire. Therefore, a pressure gauge should be used to check the pressure. Keep an accurate pressure gauge in the storage compartment. Pressure gauges mounted on air hose ends used in tire shops are often inaccurate.
7. Tire pressure should be checked when the tires are cold. «cold» in this case, tires on a car that was last used at least three hours ago, before checking the tire pressure, are considered. Pressure rise by 0.3-0.6kg/cm2 when tires heat up is not unusual.
8. Unscrew the cap of the valve protruding from the wheel or cap, and force the pressure gauge onto the valve (pic. 5.8). Take a reading from the pressure gauge and compare this reading with the recommended tire pressure indicated on the appropriate label in the storage compartment («glover»). Be sure to replace the valve cap to prevent dirt and moisture from entering the valve spool mechanism. Check all four tires and inflate them if necessary.
Pic. 5.8. To prolong tire life, check tire pressure at least once a week with an accurate pressure gauge (don't forget the spare tire!)
9. Remember to maintain the correct spare tire pressure (refer to the owner's manual supplied with the vehicle). Please note that the air pressure prescribed for the small spare tire («dokatki»), significantly higher than the normal pressure for regular tires.