



Contents: Starter 0.8 kW ↓ Starter 2.2 kW ↓
Starter 0.8 kW
Note: Use high temperature grease on bearings and gears when assembling the starter.
1. Install the crown gear and planet carrier.
- a) Apply grease to the epicycle at the points of contact with the shock absorber and satellites.
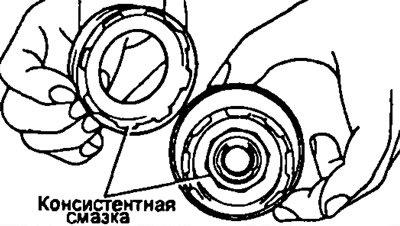
- b) Align the groove of the epicycle with the protrusion inside the shock absorber.
- c) Insert and rotate the epicycle to secure the shock absorber.
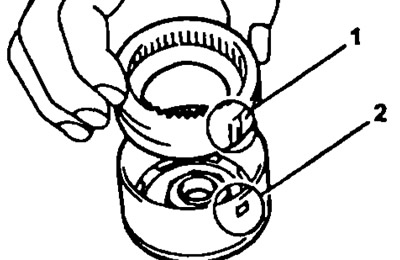
- d) Apply high quality grease with additives to the bearing.
- d) Apply grease to the washer and install it on the carrier.
- c) Install the carrier and shock absorber.
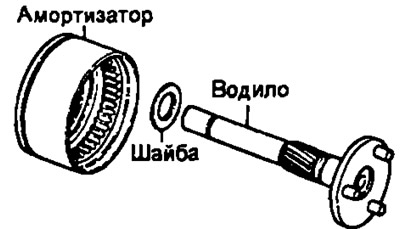
- g) Using pliers, install the washer and snap ring.
2. Install the traction relay.
- a) Apply grease to the sleeve and into the groove of the overrunning clutch limiter sleeve,
- b) Install the overrunning clutch and limiter sleeve on the planet carrier.
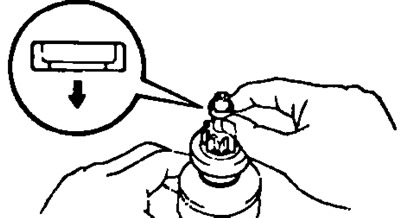
- c) Apply grease to the retaining ring and install it into the groove of the carrier.
- d) Using a vice, tighten the retaining ring.
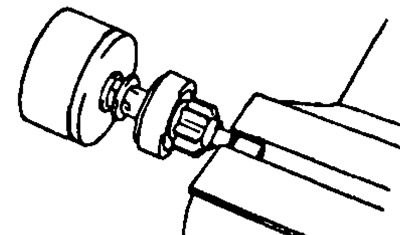
- d) Holding the overrunning clutch, seat the carrier and install the limiting sleeve on the retaining ring using a plastic-faced hammer.
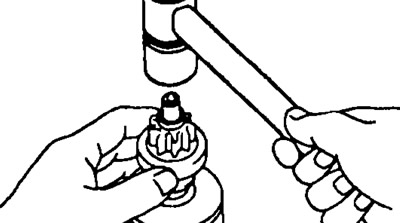
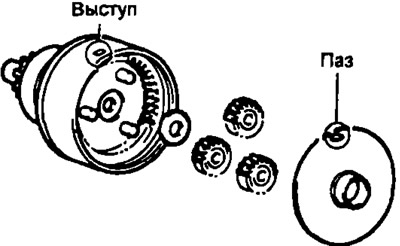
3. Install the satellites.
- a) Apply grease to the satellites and the carrier flange with guides.
- b) Install the washer and 3 satellites.
- c) Install the plate, aligning its groove with the protrusion inside the shock absorber.
4. Install the drive lever and overrunning clutch together with the shock absorber.
- a) Apply a high quality grease with additives to the bearing in the drive side cover.
- b) Apply grease to the drive lever at the fulcrum.
- c) Install the drive lever onto the overrunning clutch.
- d) Align the shock absorber protrusion with the groove in the cover on the drive side.
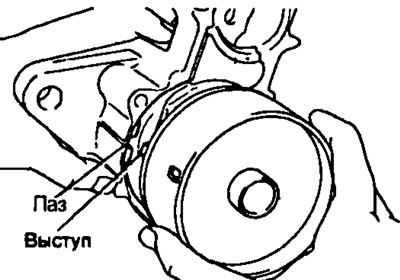
5. Install new O-rings on the starter housing
6. Install the anchor into the starter housing.
7. Install the brush holder.
- c) Install the brush holder on the anchor in the appropriate position.
- b) Using a screwdriver, press the brush spring and connect the brush to the brush holder. Install 4 brushes in this way.
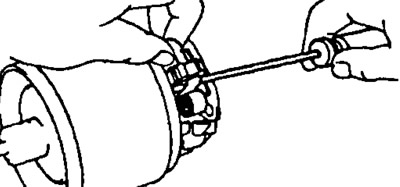
Note: Make sure that the (+) brush wires do not come into contact with the ground.
8. Install the manifold.
- a) Apply turbine oil with additives to the bearing in the cover on the manifold side.
- b) Install the cover using 2 new screws with O-rings.
The material was taken from a resource: ToyotaMAN.ru
9. Install the starter housing and armature assembly.
- a) Align the groove in the starter housing with the projection on the shock absorber.
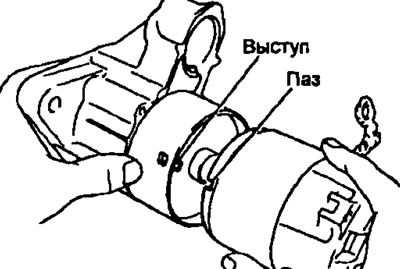
- b) Install the starter housing with the anchor assembly and secure it with 2 bolts.
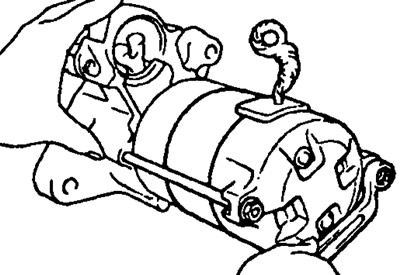
10. Install the traction relay.
- a) Install the cover on the traction relay.
- b) Install the traction relay and secure it with 2 nuts.
- e) Connect the wiring to the starter terminal C and tighten the nut.
Starter 2.2 kW
Note: Use high temperature grease on bearings and gears when assembling the starter.
1. Install the drive lever onto the overrunning clutch.
2. Install the overrunning clutch on the shaft.
- a) Apply grease to the overrunning clutch and shaft.
- b) Install the overrunning clutch and limiter sleeve on the shaft.
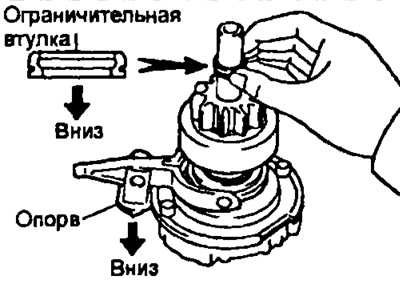
- c) Install a new retaining ring onto the shaft.
- d) Using pliers, press in the retaining ring.
- d) Make sure the snap ring is installed correctly.
- e) Using a screwdriver, push the stop sleeve onto the retaining ring.
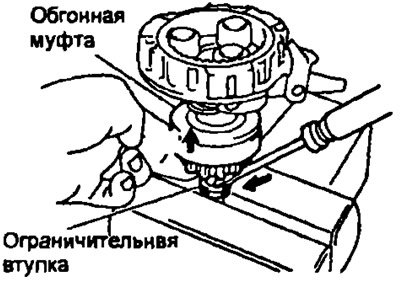
3. Install the shaft assembly and overrunning clutch.
- a) Install the shaft and drive lever.
- b) Align the holes on the starter cover with the pins.
- c) Install the shaft and overrunning clutch into the cover on the drive side.
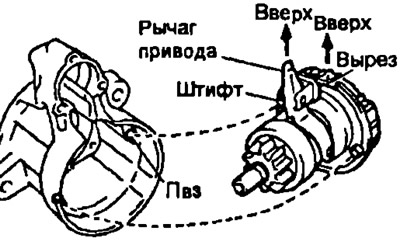
- d) Install the shock absorber.
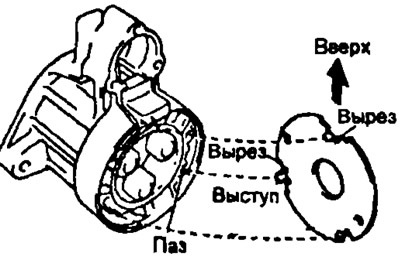
4. Install the anchor plate.
- a) Install the anchor plate as shown in the figure.
- b) Align the grooves on the epicycle and the protrusions of the anchor plate.
- c) Install the anchor plate on the epicycle.
5. Install the brush holder on the anchor.
- a) Install 4 holders and four springs on the brush holder.
- b) Install 4 brushes on the brush holder.
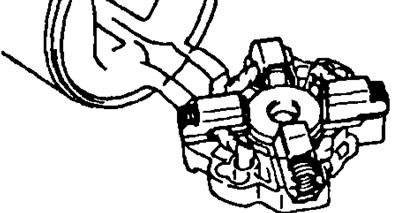
- c) Install the brush holder on the anchor.
6. Install the drive side cover onto the starter housing.
- a) Install the washer, drive side cover and thrust washer with retainer.
- b) Check the gap between the retainer and the cover.
- a) Apply grease to the drive side cover.
- d) Install the drive side cover and secure it with two screws. Tightening torque: 1.7 Nm.
7. Install the starter housing onto
- a) Align the shock absorber with the cutout on the body.
- b) Install the starter housing and the anchor assembly, securing with two bolts. Tightening torque: 8.5 Nm.
8. Install the traction relay.
- a) Install the core on the drive lever.
- 6) Install the return spring and traction rod, securing it with three screws. Tightening torque: 5.0 Nm.
- c) Connect the wiring harness to terminal C and secure it with a nut. Tightening torque: 8.0 mm.