



Contents: Removal ↓ Installation ↓
Attention! In the procedures described below, the gearbox is removed and installed together with the transfer case.
Removal
1. Disconnect the battery from ground.
2. Unscrew the lever handle, unscrew the screws and remove the lever cover.
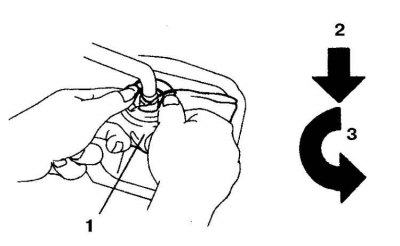
3. Press the limit ring at the base of the lever (2) while turning it counterclockwise (3) and remove the lever (1 – fabric).
4. Raise the vehicle and place it on stands
5. Remove the lower shield (if provided) and drain the oil from the gearbox and transfer case.
6. Remove the propeller shafts (see subsection 7.4.3.2).
7. Disconnect the connectors and vacuum hoses from the gearbox.
8. Disconnect the speedometer cable and remove the starter.
9. Loosen the bolts and remove the clutch slave cylinder. Move the cylinder to the side.
10. Remove the lever from the transfer case.
11. Remove the exhaust pipes to provide adequate access.
12. Hang the engine with a hoist or support it with a jack over a board. When the transmission is removed, the engine should always be suspended.
13. Support the gearbox with a jack dolly.
14. Unscrew the bolts securing the gearbox to the crossmember.
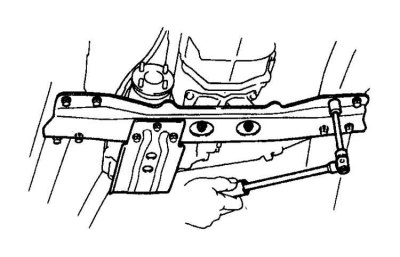
15. Raise the transmission and unscrew the bolts securing the crossmember to the frame, remove the crossmember.
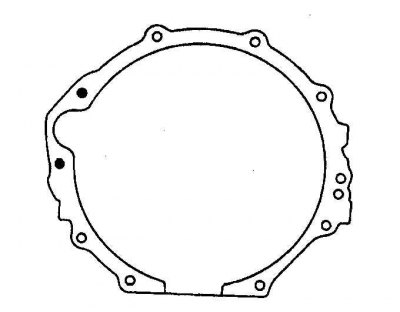
16. Unscrew the bolts securing the gearbox to the engine (in the figure – holes for the bolts).
17. Make sure all necessary wires and hoses are disconnected, move the transmission back so that the transmission housing comes off the pins on the cylinder block, without allowing the transmission to sag on the input shaft.
18. Lower the gearbox with the transfer case.
19. Replace the clutch (see subsection 7.4.2).
Installation
1. Installation is carried out in reverse order.
2. Tighten the gearbox mounting bolts securely.
3. After connecting the wires, fill the gearbox with oil and lower the car.
4. Install the levers.
5. Check the vehicle's performance.