



Disassembly
1. Remove the distributor cover without disconnecting the wires.
2. Remove the distributor rotor and dust deflector (if installed).
3. Disconnect the distributor wire and terminal.
a) Unscrew the nut and spring washer.
b) (Type A) Remove the distributor wire and capacitor.
c) (Type B) Disconnect the distributor wire.
d) Remove the insulator and terminal.
4. Remove the contact group by unscrewing the two screws, removing the plate washers and the connecting wire.
5. Remove the damper spring.
6. Remove the vacuum regulator of the ignition timing angle.
a) Remove the screw and the capacitor (Type B) from the distributor housing.
b) Remove the split lock washer, then remove the vacuum timing adjuster with a slight twist.
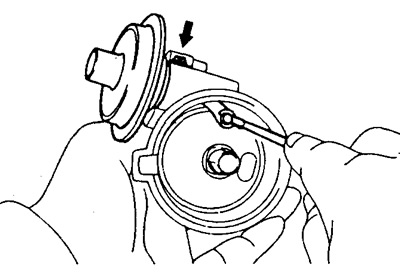
7. Remove the contact group plate (breaker plate), by unscrewing two screws, removing the pressure washers and the connecting wire.
8. Remove the centrifugal governor springs.
9. Remove the breaker cam.
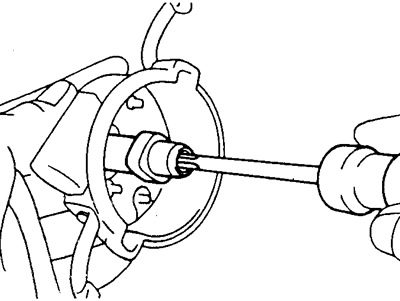
Remove the oil seal plug, unscrew the screw from the end of the regulator drive shaft and remove the cam.
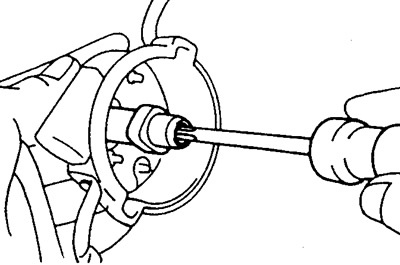
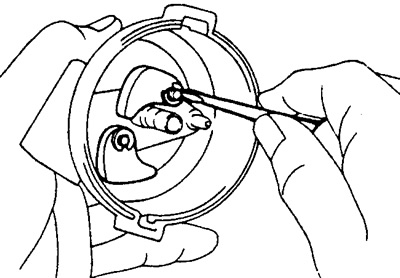
10. Remove the centrifugal governor weights, having first removed the locking split washers using a small screwdriver.
Examination
(See the section "Checking distributors after disassembly").
Assembly
1. Install the centrifugal governor weights and secure them with split washers using pliers.
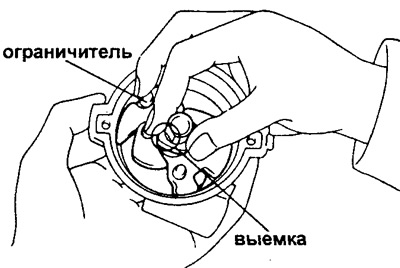
2. Install the distributor cam.
a) Apply a thin coat of grease to the drive shaft projection.
b) Install the cam on the protrusion of the drive shaft as shown in the figure.
c) Install a new screw into the end of the cam drive shaft.
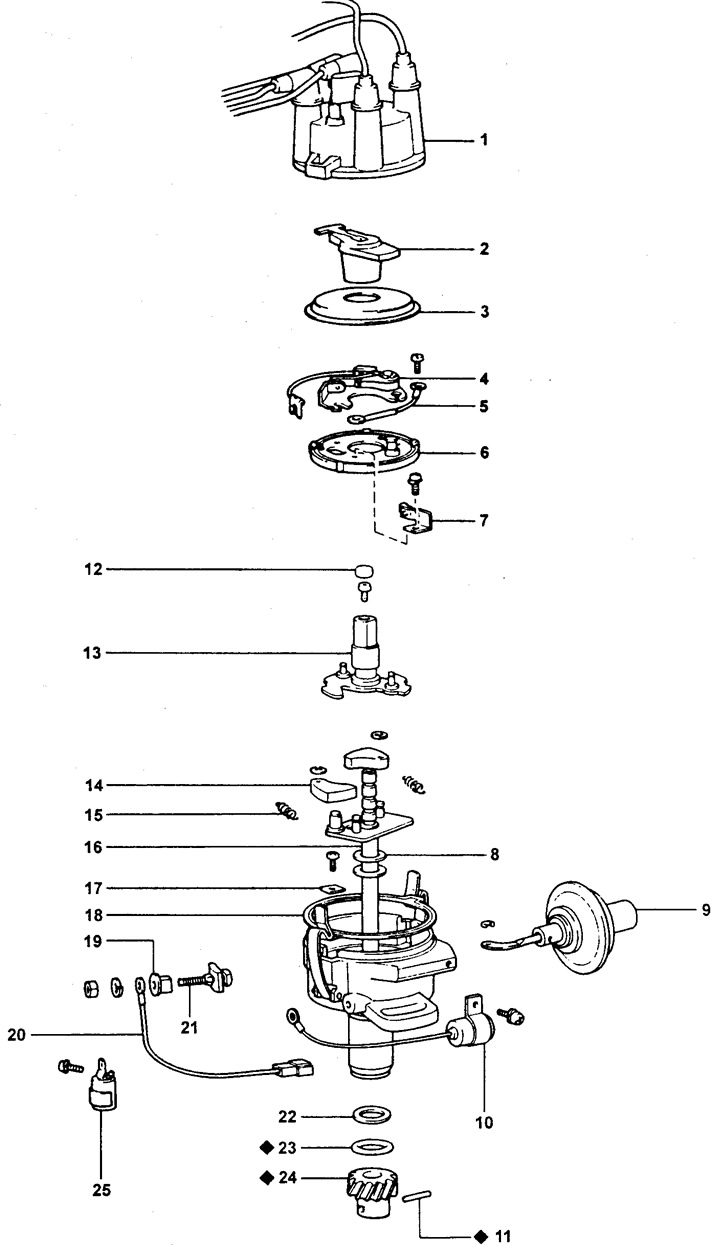
Breaker-distributor (contact ignition system). Components of a circuit breaker-distributor.
1 - breaker-distributor cover (with high voltage wires),
2 - distributor rotor,
3 - dust deflector,
4 - contact group,
5 - connecting wire,
6 - movable plate,
7 - damping spring,
8 - thrust washer,
9 - vacuum regulator of ignition timing angle,
10 - capacitor (type B),
11 - connecting pin,
12 - oil seal plug,
13 - breaker cam,
14 - centrifugal ignition timing regulator weight,
15 - spring of the centrifugal ignition timing regulator,
16 - centrifugal ignition timing regulator shaft,
17 - pressure washer,
18 - gasket,
19 - insulator,
20 - distributor wire,
21 - output (terminal) of the distributor,
22 - flat washer,
23 - sealing ring,
24 - gear of the breaker-distributor drive,
25 - capacitor (type A),
♦ - parts that cannot be reused.
d) Apply a layer of grease inside the cam.
(The original article is on the portal: www.ToyotaMan.ru)
d) Install the seal plug on the upper end of the drive shaft.
3. Install the centrifugal ignition timing adjuster springs.
4. Install the contact plate (breaker plate).
a) Align the four clamps on the contact group plate with the protrusions in the breaker-distributor housing and install the plate.
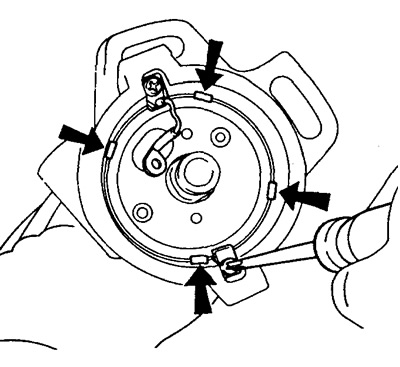
b) Secure one end of the connecting wire and two pressure washers with a screw.
5. Install the vacuum regulator of the ignition timing angle.
a) Install the regulator on the distributor housing and insert the pin installed on the breaker plate into the hole in its rod. Secure the pin with a split locking ring.
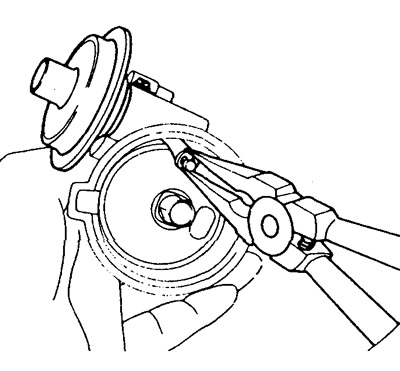
b) Secure the capacitor (except for European and Saudi Arabian models) on the distributor body.
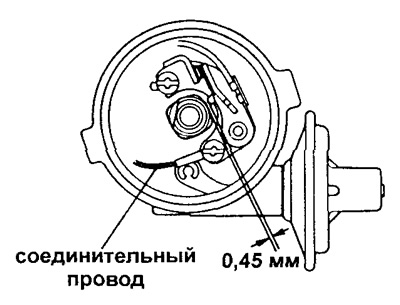
6. Install the breaker contact group and adjust the gap between the breaker contacts.
a) Clean the contact surfaces with solvent.
b) Apply a thin layer of grease to the plastic stop.
c) Loosely secure the contact group and the end of the connecting wire with two screws.
d) Check with a feeler gauge and adjust the clearance between the cam and the stop. Clearance: 0.45 mm.
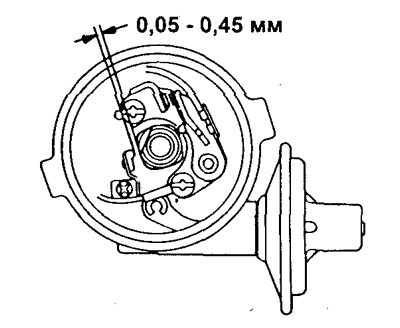
7. Install and adjust the damper spring.
a) Apply grease to the damper spring bearing pad.
b) Loosely tighten the damper spring with the screw.
c) Check with a feeler gauge and adjust the clearance between the back of the cam and the spring.
- Gap: 0.05 - 0.45 mm.
8. Secure the connecting wire and terminal (connector).
a) Install the terminal and insulator.
b) (Type A) Install the capacitor and distributor wire.
c) (Type B) Connect the distributor wire.
d) Secure with spring washer and nut.
9. Install the dust deflector.
10. Install the distributor rotor.
11. Install the distributor cap together with the high-voltage wires.
12. Install the new ring onto the bottom of the distributor housing.
Caution: Apply a thin layer of engine oil to the ring.