Company Honda Company Ford Company Skoda Company Kia Company Mazda Company Mercedes Company Renault
English Русский
Български
Беларускі
Український
Српски
Hrvatski
Română
Polski
Slovenský
Magyar
Bookmark Articles Sitemap Contacts
ToyotaMan.ru


Camry Corolla Corona Carina Land Cruiser Highlander 4Runner RAV4 Others
Carina T190 (1992-1996) Carina T170 (1988-1992)

Replacing brake pads [Toyota Carina T190]

  • Main
  • Carina
  • T190 (1992-1996)
  • Chassis, running gear
  • Brake system
  • Replacing brake pads
0
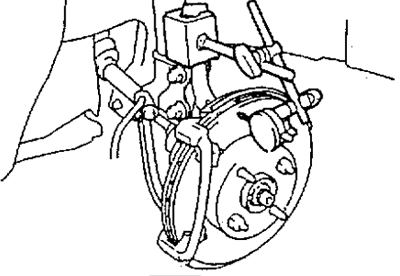
1. Remove the front wheel and temporarily secure the brake disc with wheel nuts.

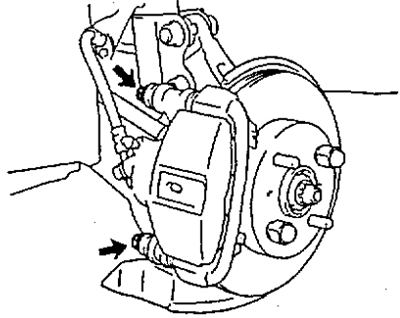
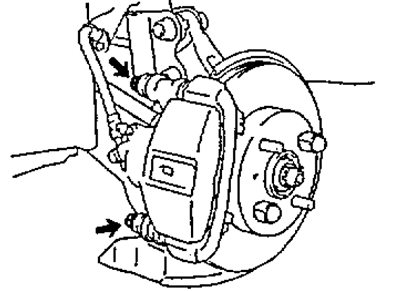
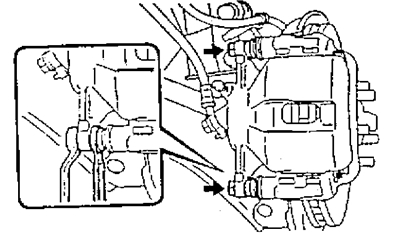
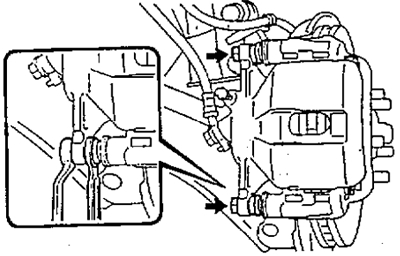
2. While holding the guide pins, loosen the bolts and remove the caliper.

Note: Do not disconnect the brake hose from the caliper. Secure the caliper to the stand with wire, do not leave it hanging by the brake hose.


13 inch wheels


14 inch wheels


3. Remove the parts shown in the figure.
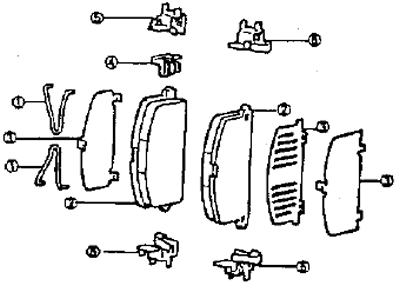


13 inch wheels
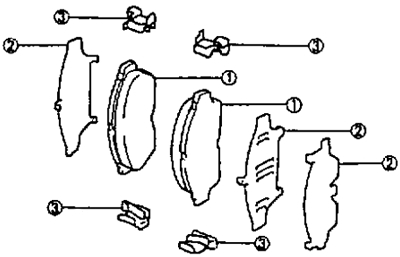


14 inch wheels


4. Measure the runout of the brake disc at a distance of 10 mm from the outer edge.


  • Runout - less than 0.07 mm


13 inch wheels
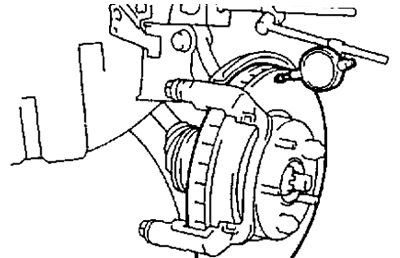


14 inch wheels


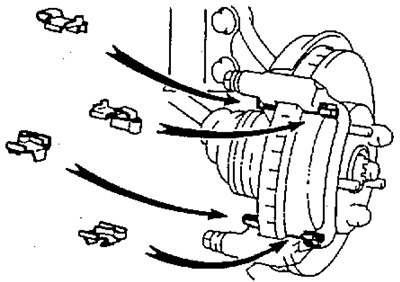
5. Install the four retaining plate inserts.
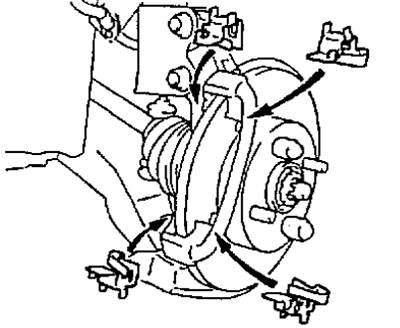


13 inch wheels


14 inch wheels


6. Install new pads.


Note: If it is necessary to replace at least one brake pad, replace all of them to ensure uniform braking. When replacing the pads, the anti-squeak pads are also changed.


a) Apply special lubricant for disc brakes to both sides of the inner anti-squeak lining.

b) Install anti-squeak pads on each pad as shown in the figure.
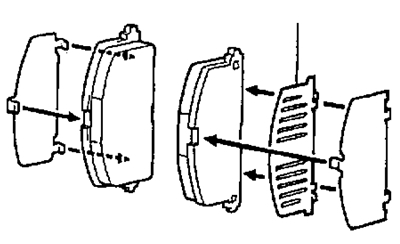


13 inch wheels
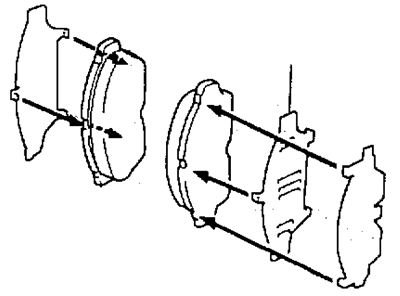


14 inch wheels


c) install the lining wear indicator on the new pad.
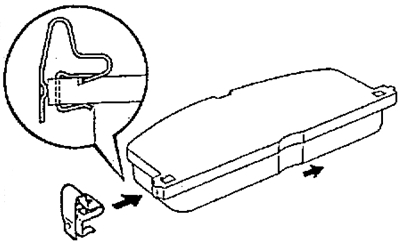


d) Install the brake pads.


Caution: Do not allow oil or grease to come into contact with the working surfaces of the pads and disc.
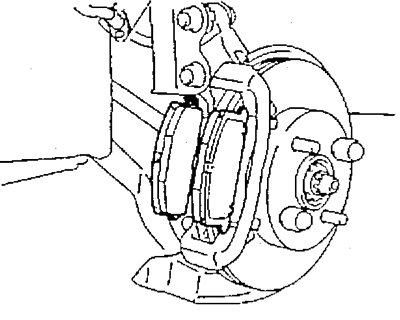


13 inch wheels
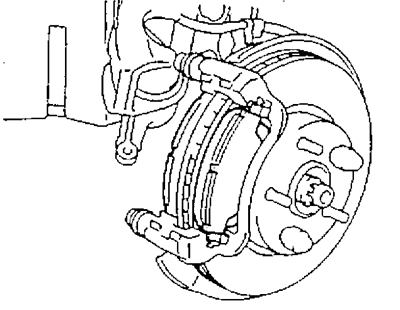


14 inch wheels


d) (13 inch wheels)

Install two anti-squeak springs.
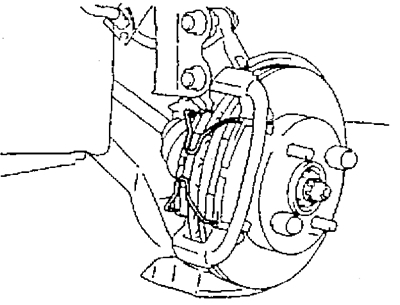


7. Install the caliper.

a) Remove a small amount of brake fluid from the reservoir.

b) Push the piston into the cylinder using the hammer handle.


Note: If the piston does not move well, loosen the bleed screw and push the piston in if there is a small leak of brake fluid.
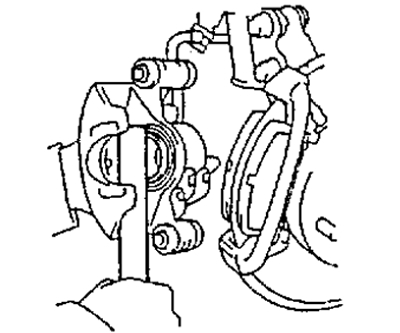


c) Install the caliper.

d) While holding the guide pins, tighten the bolts.

Tightening torque:
  • 13 inch wheels - 25 Nm
  • 14 inch wheels - 35 Nm


13 inch wheels


14 inch wheels


8. Install the front wheel.
  • Tightening torque - 105 Nm

9. Check the brake fluid level in the reservoir and top up if necessary.
This article is available at: russian, bulgarian, belarusian, ukrainian, serbian, croatian, romanian, polish, slovak, hungarian
The article material has been checked: Kondratyeva Ulyana
Share information:
◀ Previous
Carina T190: Brake system
Next ▶

Front brakes — device
Vacuum pump — removal, inspection, installation
Vacuum pump — device
Receiver device (2C)
Vacuum brake booster — removal and installation
Removal the front brake caliper
Disassembling the front brake caliper
Checking and repairing front brakes
Front Brake Caliper Assembly
Installing the front brake caliper
Similar articles on other Toyota models

➥ Replacing the front brake pads, removing, disassembling and… Toyota Camry XV30 (2001-2006)
➥ Replacing the front brake pads Toyota Corolla Verso 3 (2004-2009)
➥ Replacing the front brake pads Toyota Corona T190 (1992-1997)
➥ Replacing disc brake pads (front or rear) Toyota Cruiser 60/80 (1980-1997, petrol)
➥ Replacing the front brake pads Toyota RAV 4 XA10 (1994-2000)
➥ Brake pads — replacement Toyota Highlander 1 (2000-2007, petrol)
Link in different formats to this article
Comments and feedback from visitors
No comments yet


Add two numbers 25 + 21


Carina T190 (1992-1996) 
  • General information
  • User manual
  • Maintenance
  • Power unit
  • Engines 4A-FE, 5A-FE, 7A-FE
  • Engines 3S-FE, 4S-FE
  • Diesel engines 2C
  • Engine repair
  • Cooling system
  • Lubrication system
  • Fuel system
  • Control system (diesel)
  • Fuel injection system
  • Engine electrical equipment
  • Transmission
  • Clutch
  • Mechanical gearbox
  • Automatic gearbox
  • Drive shafts
  • Chassis, running gear
  • Car suspension
  • Steering
  • Brake system
  • Body and interior
  • Exterior (external elements)
  • Interior (internal elements)
  • Air conditioning and heater
  • Electrical equipment
  • Equipment and devices
  • Headlights and lighting
  • Breakers and switches
  • Electrical circuits
Carina T170 (1988-1992) 
  • General information
  • Introduction to the manual
  • Power unit
  • Gasoline engines
  • Diesel engines
  • Lubrication system
  • Cooling system
  • Fuel system (carburetor)
  • Fuel system (injector)
  • Ignition system
  • Transmission
  • Clutch
  • Car gearbox
  • Drive shafts
  • Chassis, running gear
  • Front suspension
  • Rear suspension
  • Steering
  • Brake system
  • Electrical equipment
  • Power devices
  • Electrical circuits
ToyotaMan.ru © 2018–2026 • Mobile version • Interesting about Toyota • Administration • Sitemap: EN BG BY UA RS HR RO PL SK HU • Search system • Bookmark
Camry Vista-V40 • Camry XV10 • Camry XV20 • Camry XV30 • Corolla Verso-AR10 • Corolla E80 • Corona T190 • Carina T170 • Carina T190 • Land Cruiser J70 (diesel) • Land Cruiser J60 (petrol) • Land Cruiser J100 • Highlander XU20 (petrol) • 4Runner N120 • RAV4 XA10 • RAV4 XA20 • Duet M100 • Dyna Y50 •
We require cookies to enable some interactive features. Is that ok with you?