
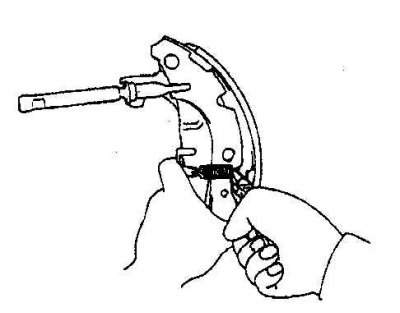
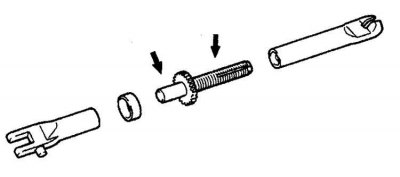
Shoe side A installation

1. Left wheel; 2. Right wheel; 3. To the front of the car
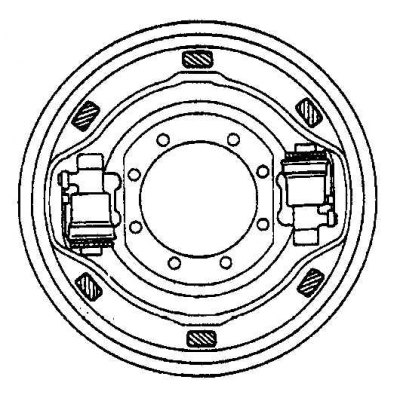
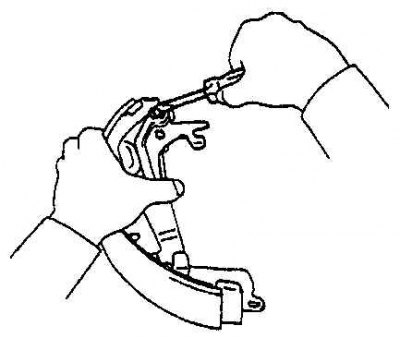
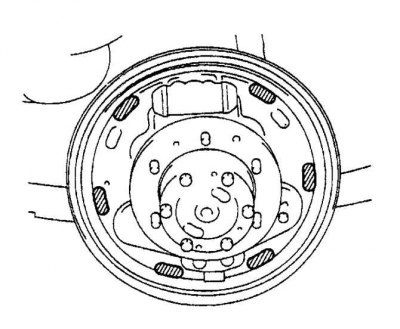
The position of the pads after assembly
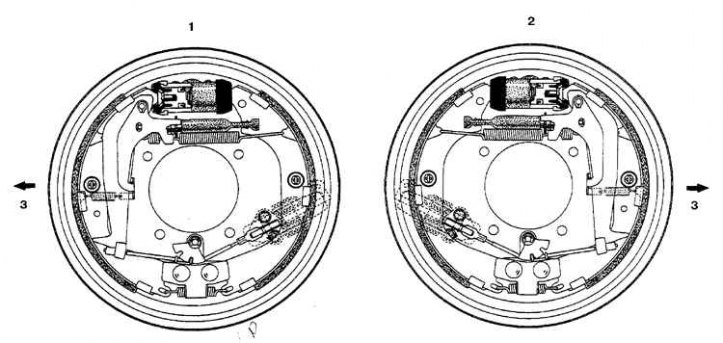
1. Left wheel; 2. Right wheel; 3. To the front of the car
Attention! Pads are changed only as a set for one axle.
Together with the pads, the coupling springs also change, which, being subjected to periodic thermal loads, gradually lose their elasticity and do not provide sufficient removal of the pad from the drum. As a result, the drum touches the pads, causing premature wear.
Replacement
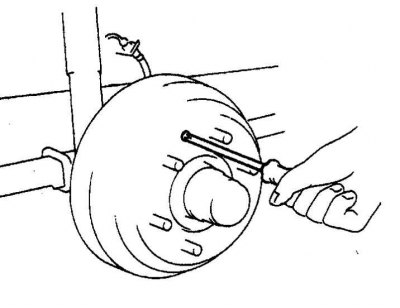
1. Loosen the wheel nuts, raise the rear (or front) part of the car.
2. Remove wheels.
3. Release the handbrake.
4. Mark the position of the drum, unscrew the screws (if provided) and remove the drum.
5. If the drum cannot be removed, then pour penetrating liquid between the axle shaft flange studs and the drum holes and tap the drum from the inside along the contour.
6. If this measure does not work, then bring the pads together.
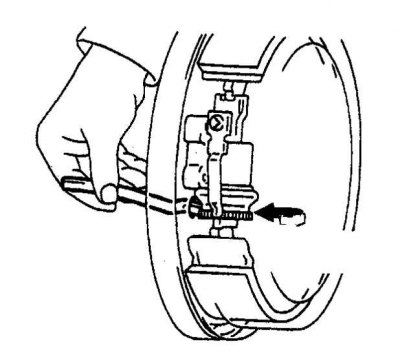
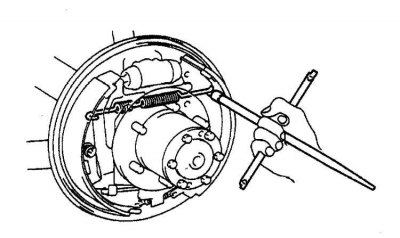
7. To do this, on brakes with horizontal pads, remove the plug from the brake shield and rotate the gear wheel of the regulator with a screwdriver.
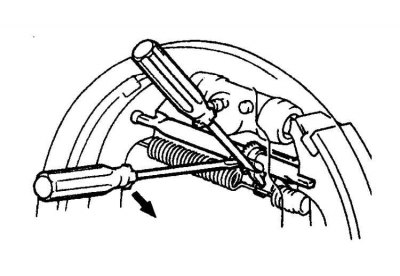
8. On vertical pad brakes, pry the adjuster lever away from the gear wheel with a narrow blade screwdriver and turn the adjuster gear wheel with another screwdriver.
Brake with horizontal pads
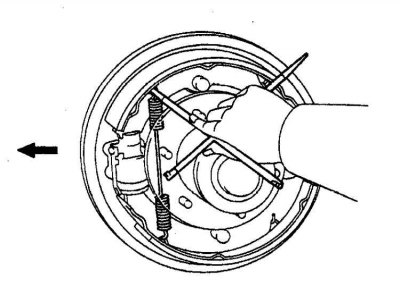
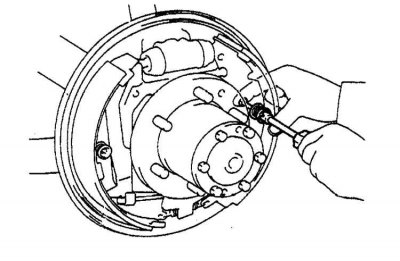
9. Remove the tension spring.
10. Remove the shoe pressure springs by pushing the cup and turning it 90°.
11. Remove the pads along with the lower spring.
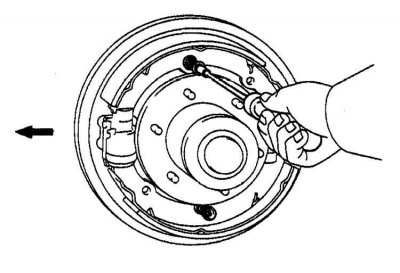
12. Lubricate the friction surfaces of the pads on the side of the shield with refractory grease and install the pads in the reverse order.
13. Set the block side A in accordance with fig. Shoe side A installation.
Brake with vertical pads
14. Remove the top spring.
15. Remove the retainer spring by pushing the cup and turning 90°and remove the rear shoe.

16. Disconnect the pressure spring and remove the front shoe assembly with the regulator. Remove the handbrake cable from the lever with pliers.
17. Remove the governor lever spring from the front shoe.

18. Remove the regulator.
19. Remove the lock washer and remove the regulator lever.
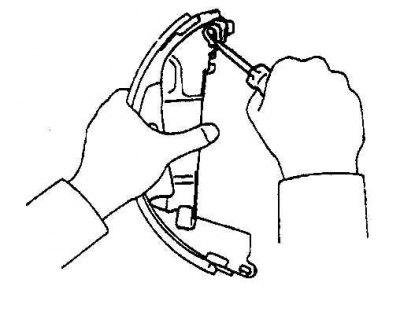
20. Remove the bracket and remove the handbrake lever.
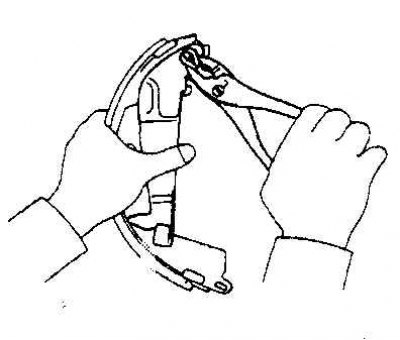
21. Install the handbrake lever on the new front shoe and crimp the caliper. Install the adjuster lever and split lock washer (replace washer and bracket).
22. Lubricate the friction surfaces of the block on the side of the shield with refractory grease.
23. Lubricate the regulator parts with refractory grease, screw the regulator stud into the spacer.
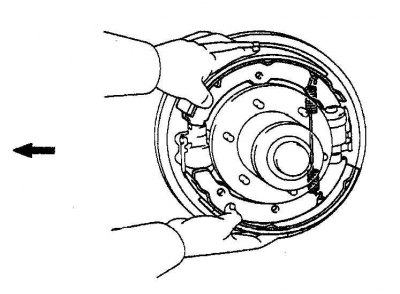
24. Install the pads in reverse order.
25. The position of the pads after assembly should look a certain way (see fig. The position of the pads after assembly).
26. Clean the drum and check the condition of the surface.
27. Check the ovality of the drum, in case of severe damage, machine the drum, fine roughness is polished with sandpaper.
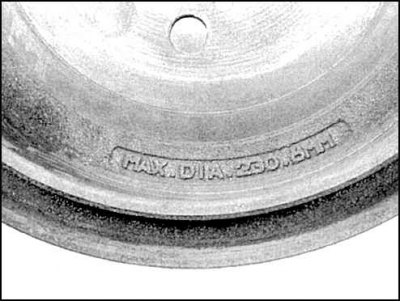
28. If, after turning, the inner diameter of the drum is greater than the limit (indicated on the drum), replace the drum.
29. Install drum and check brake adjustment.
30. If the gap between the pads and the drum is too large, then remove the drum and rotate the pin wheel to spread the pads until they touch the surface of the drum.
31. Slightly flatten the pads so that they do not touch the drum (checked by ear).
32. Install the wheel and lower the car.
33. Take a few stops while moving forward and in reverse.
34. Before leaving, check the operation of the brakes.